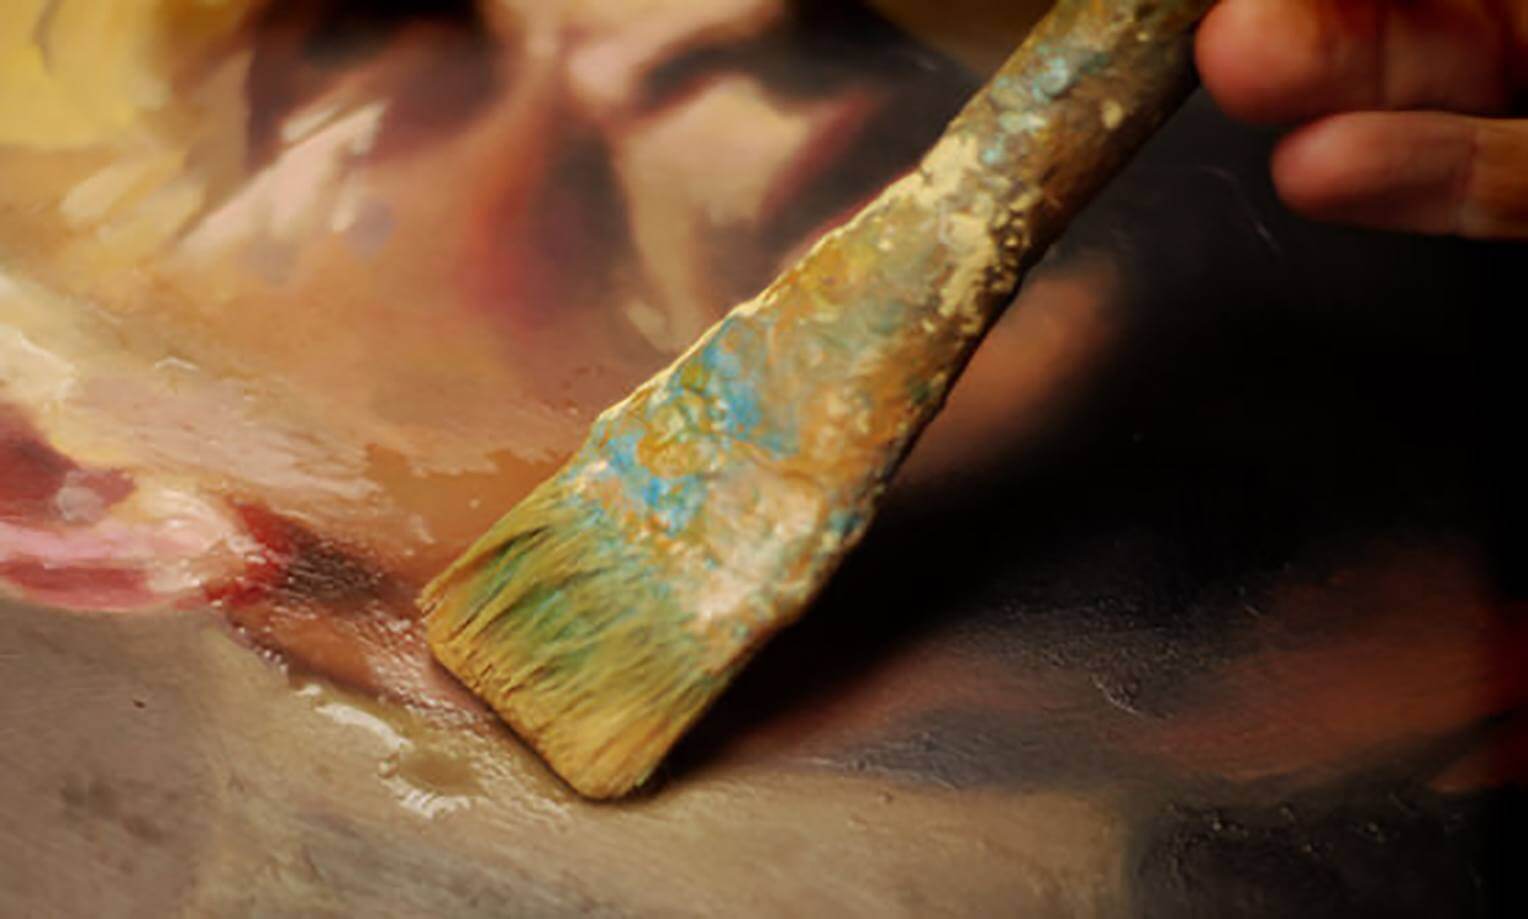
Learning how to varnish an oil painting is an essential part of the painting process. (Photo by Will Kemp)
Varnishing oil paintings is an important part of the painting process.
If you’ve completed an oil painting, you’ll notice that once completed and dry, the surface of the painting isn’t quite even. It has areas that shine and others that appear quite dull and matte.
This is where varnish comes into play to protect, even out and improve the aesthetic finish of an oil painting.
Learning how and why artists varnish their work is an important part of oil painting. But there is a lot of confusing steps and opinions online about how to varnish an oil painting.
At Evolve, we keep things simple for our students. The process can be done quite easily and can improve and protect the final oil painting. We're sharing our recommendations with you!
This quick guide will go through the basics of what varnish does, how it's been used throughout history, and a simple process for how to varnish an oil painting yourself.
Use the navigation below if you want to skip to our step-by-step guide on how to varnish an oil painting.
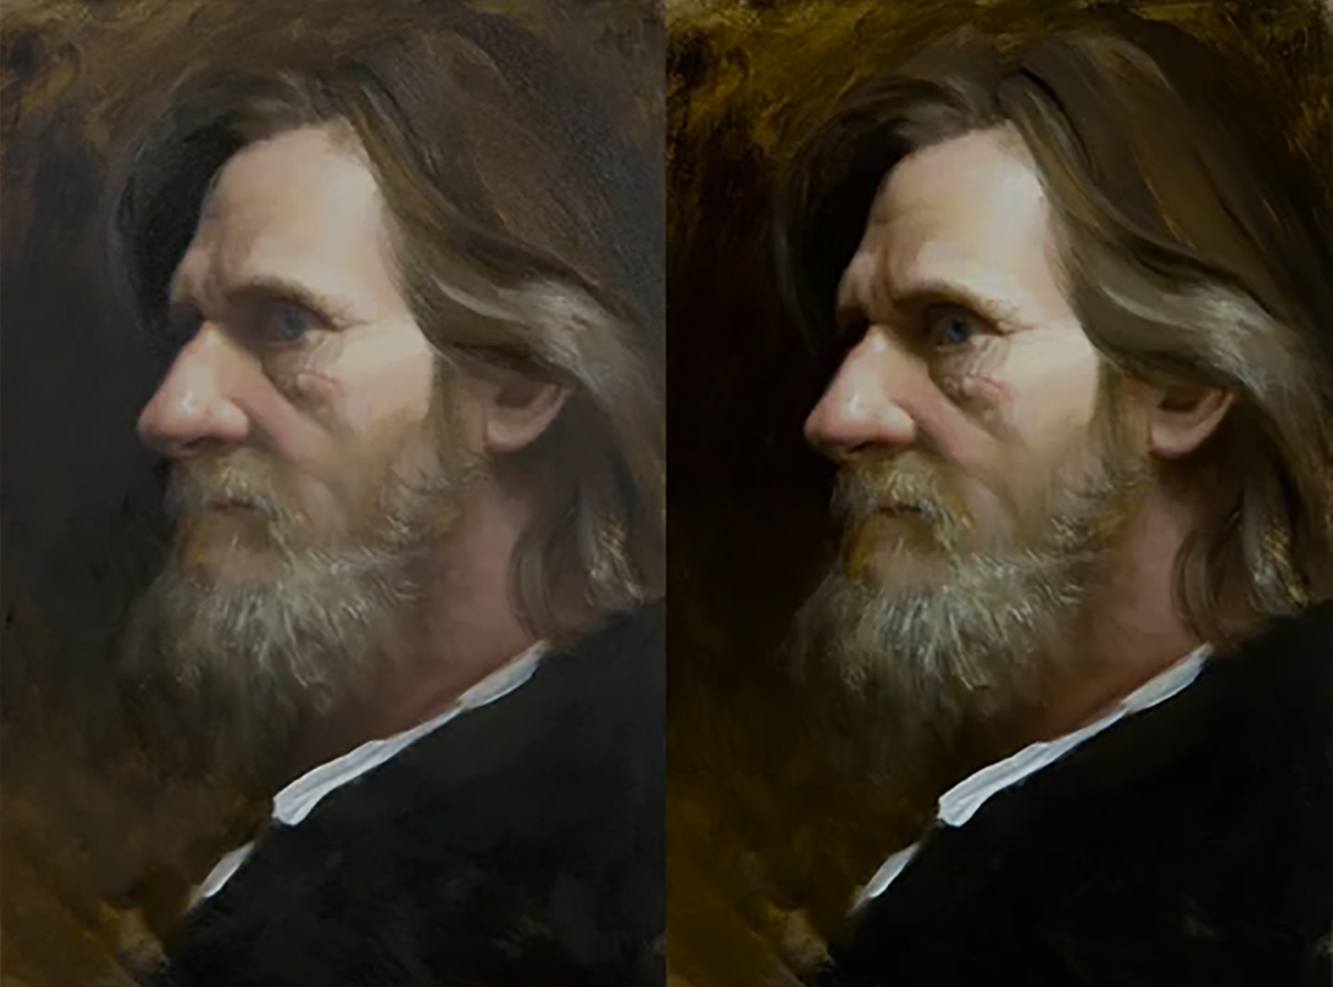
An example of before and after varnish, with the colors brought back to the luster of when they were wet. (Photo by Cowans)
What Does Varnish Do?
Applying varnish to an oil painting serves several purposes:
- It evens out and improves the aesthetic finish of an oil painting. Because some oil paint pigments contain more oil than others, they may dry more glossy or matte than others. Darker color especially tend to dry and lose their original luster. Varnish helps to even out the final painting at the very end to unify the layers and different colors of paint.
- It protects a painting from environmental damage, like dust, dirt, or smoke. Many varnishes have UV light resistors to protect the paintings from fading when exposed to light. Most are acrylic, some are removable and mineral spirit based rather than water-based. For this reason, varnish should always be used in a well ventilated or preferably outdoor area.
- When a painting is finished, varnish can be cleaned by removing that layer, and the dirt from decades or centuries that has affixed to the top layer can be eliminated without damaging the painting.
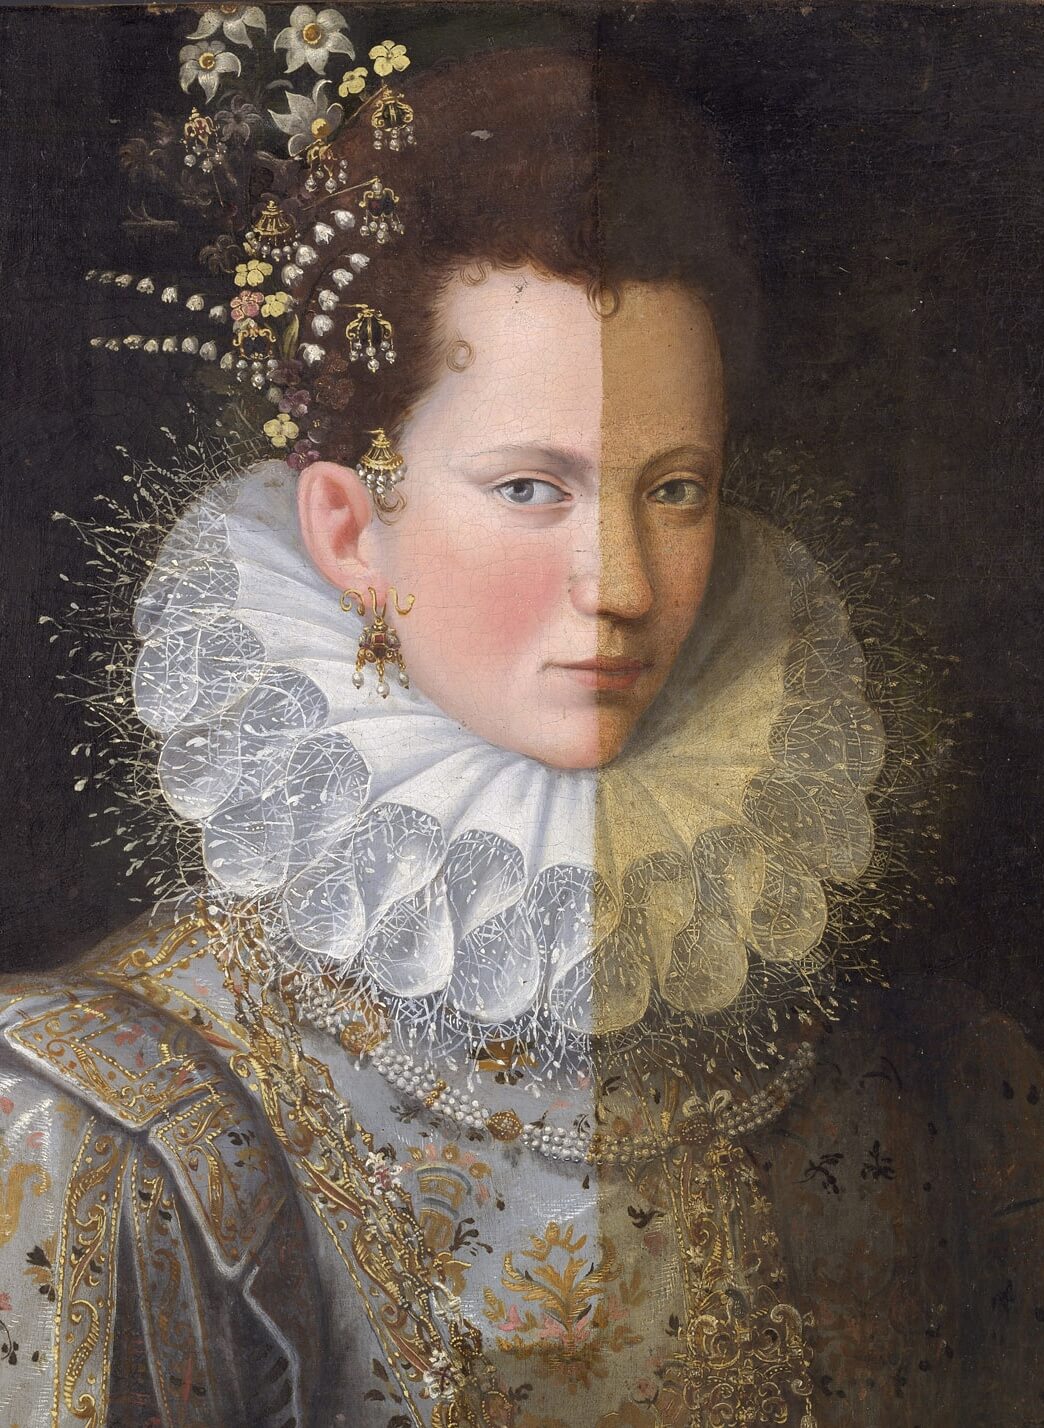
The in process restoration of "Portrait of a lady with a dog" 1590s, by Lavinia Fontana 1552-1614, restored by Rebecca Gregg Conservation. The left side has had the original varnish removed, while it remains on the right half.
Varnish in History and Restoration
Varnishing oil paintings was a method often used by the old masters in their painting process.
Many renaissance painters favored a glossy finish to complete their paintings, which not only increased the feeling of a glow and atmosphere but increased the feeling of dimension in the painting.
However, many historical varnishes became cracked, dirtied, and discolored over centuries. Due to the lack of knowledge behind the proper compounds to create a clear, colorfast protective coat, many famous paintings have had to undergo restoration to remove their varnish and restore the painting’s former luster.
Fortunately, because of the use of ancient varnishes, many masterpieces have been cleaned, restored, and preserved.
A restorationist will use a removing solution to carefully strip away the old varnish, without damaging the painting beneath. The painting can then be recovered with a modern solution to protect from dust, light, and other elements.
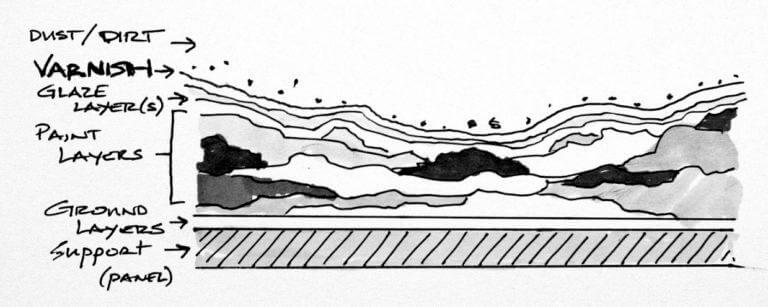
An unique view of the layers of a painting and the protective varnished layer. (Illustration courtesy of Gamblin)
Which Varnish Should I Use?
Should I use a brush or spray?
When learning how to varnish an oil painting, you'll notice that varnishes are typically acrylic and can be applied by either a spray or brush.
We recommend applying varnish via spray which evenly and lightly coats the surface of the painting. Using a brush can often produce unexpected results, ranging from uneven coverage to bubbles on the surface of the painting.
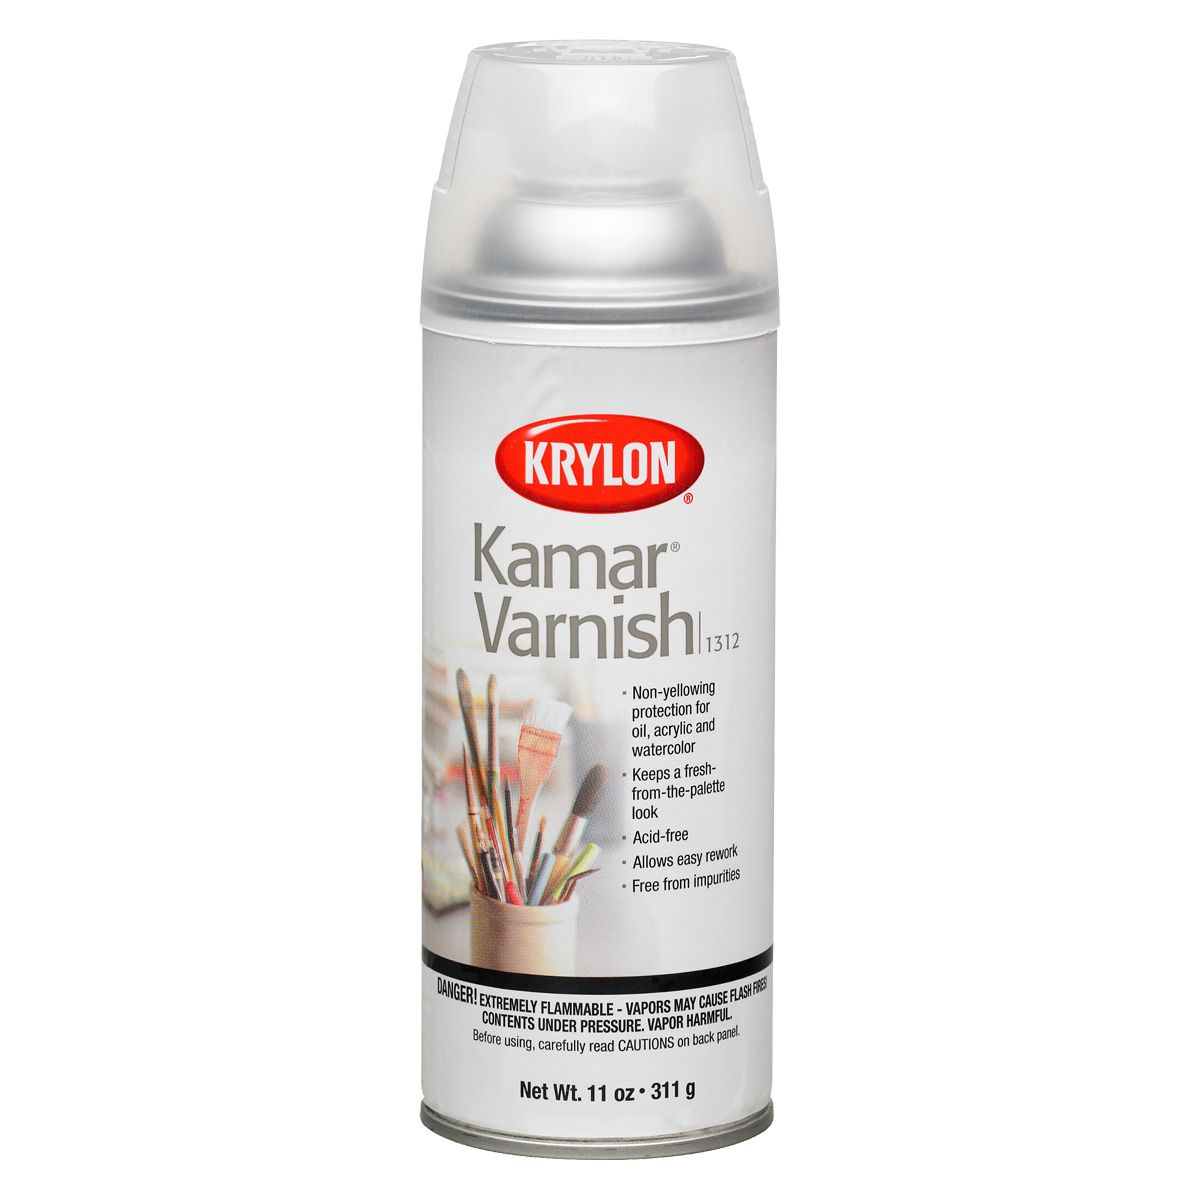
For an even coat of varnish, we recommend Kylon's Kamar Varnish spray when learning how to varnish an oil painting.
Should I use permanent varnish or temporary varnish?
Temporary varnish, also known as re-workable, temporarily restores colors and can be reworked upon. It is thin and can be applied to the painting as soon as it is dry to the touch. Because if it's thin nature, it allows the paint to continue to deeply dry without cracking.
Permanent varnish, also called picture varnish, is just as it sounds: permanent. It can only be applied after the painting thoroughly dries, anywhere from 2 months to two years. The permanent version usually protects paintings that will not be retouched or cleaned for many years.
At Evolve, we recommend Krylon Kamar Varnish Spray which is a permanent varnish.
Step by Step: How to Varnish an Oil Painting
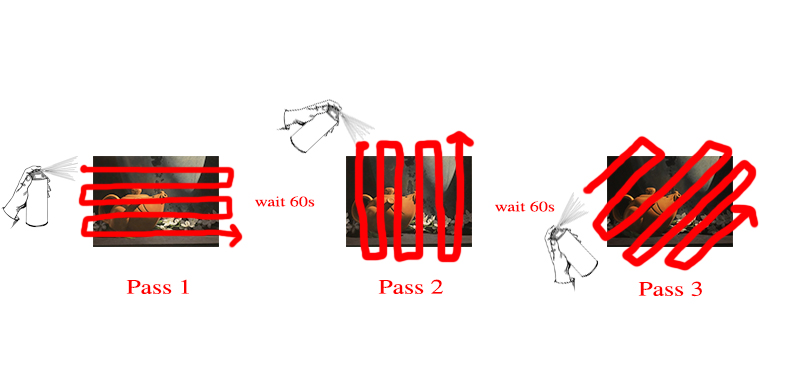
How to varnish an oil painting with spray varnish - a quick diagram of each spray pass. Notice how each spray is started and finished off the canvas.
- Make sure your painting is 100% dry and done. You cannot work on it anymore once it is varnished.
- Take your painting and varnish spray can outside. Set it somewhere safe where there is no wind. Never to varnish inside.
- Shake the can of varnish for 1-2 minutes.
- Do you first horizontal pass. Hold the can 16" away from your painting and start the spray off of the canvas then complete a horizontal pass, going back and forth across the canvas, finishing your pass once you are off the canvas.
- Wait 60 seconds and do a vertical pass, again starting and finishing off of the canvas so that the coverage is always even.
- Wait another 60 seconds and complete a diagonal pass.
- Carefully examine the painting to make sure that the coverage is even and equally shiny with no dull spots. Repeat as necessary and do not spot spray.
- Once you are done, wait 5 minutes and bring the painting inside. It will be dry within an hour.
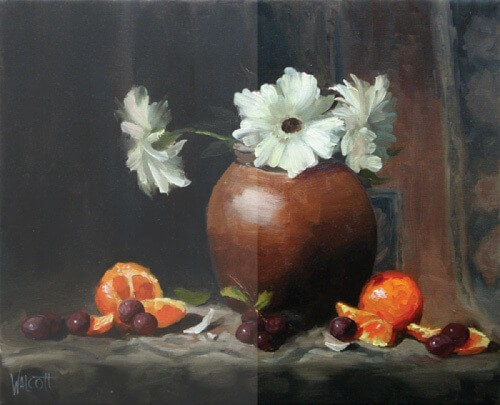
An painting in the process of varnishing by Jason Walcott.
Final Thoughts on How to Varnish an Oil Painting
Varnishing oil paintings is an important part of the oil painting process. Both for aesthetic and protective purposes, this important layer should be applied to every painting a student creates once they dry.
For more information on historical varnish and conservation, click here.
How to Varnish an Oil Painting: Frequently Asked Questions
- It evens out and improves the aesthetic finish of an oil painting. Because some oil paint pigments contain more oil than others, they may dry more glossy or matte than others. Darker color especially tend to dry and lose their original luster. Varnish helps to even out the final painting at the very end to unify the layers and different colors of paint.
- It protects a painting from environmental damage, like dust, dirt, or smoke. Many varnishes have UV light resistors to protect the paintings from fading when exposed to light. Most are acrylic, some are removable and mineral spirit based rather than water-based. For this reason, varnish should always be used in a well ventilated or preferably outdoor area.
- When a painting is finished, varnish can be cleaned by removing that layer, and the dirt from decades or centuries that has affixed to the top layer can be eliminated without damaging the painting.
We recommend applying varnish via spray which evenly and lightly coats the surface of the painting. Using a brush can often produce unexpected results, ranging from uneven coverage to bubbles on the surface of the painting.
At Evolve, we recommend Krylon Kamar Varnish Spray which is a permanent varnish.
- Make sure your painting is 100% dry and done. You cannot work on it anymore once it is varnished.
- Take your painting and varnish spray can outside. Set it somewhere safe where there is no wind. Never to varnish inside.
- Shake the can of varnish for 1-2 minutes.
- Do you first horizontal pass. Hold the can 16" away from your painting and start the spray off of the canvas then complete a horizontal pass, going back and forth across the canvas, finishing your pass once you are off the canvas.
- Wait 60 seconds and do a vertical pass, again starting and finishing off of the canvas so that the coverage is always even.
- Wait another 60 seconds and complete a diagonal pass.
- Carefully examine the painting to make sure that the coverage is even and equally shiny with no dull spots. Repeat as necessary and do not spot spray.
- Once you are done, wait 5 minutes and bring the painting inside. It will be dry within an hour.
FREE MASTERCLASS:
The 4 Part Framework to Develop Artistic Excellence in 12 Months
