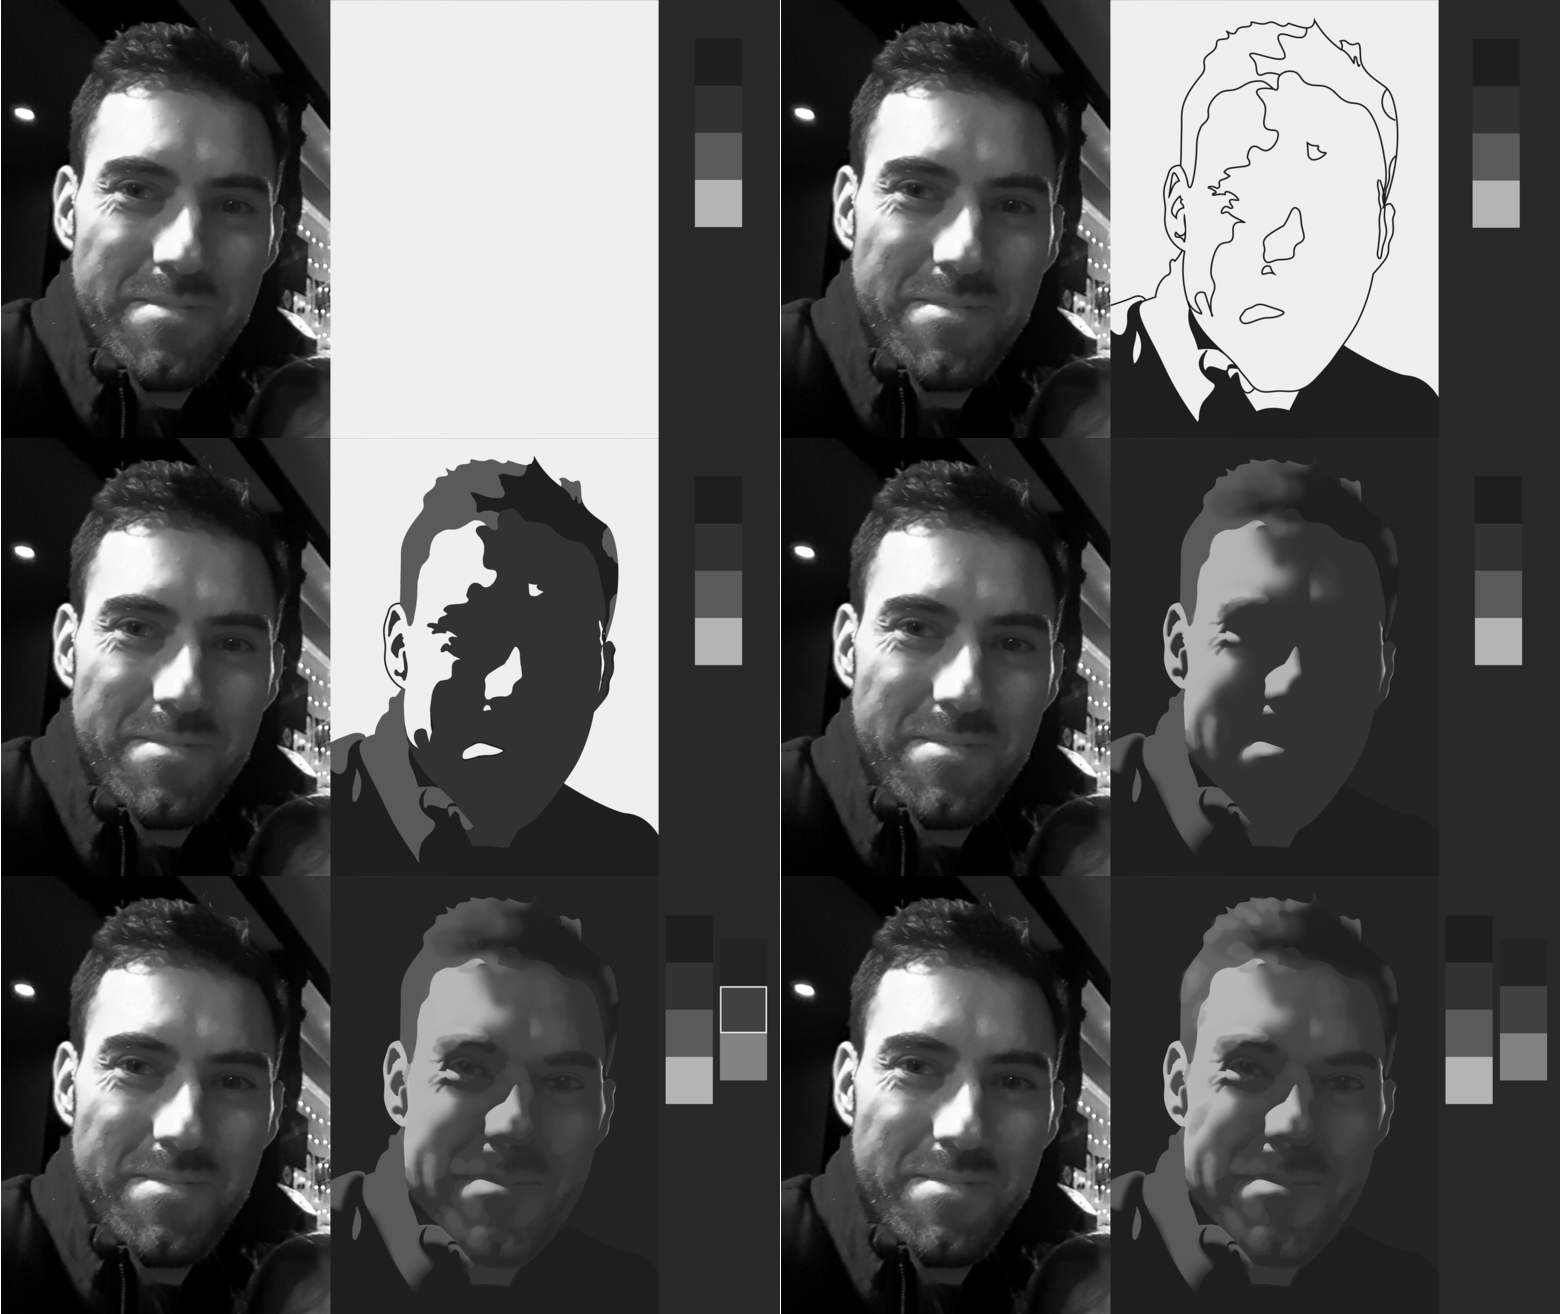
Daniel Folta of Evolve Artist takes us through Evolve’s simple process to make a grayscale portrait from start to finish.
Painting a grayscale portrait is surprisingly simple when you follow the right process. Follow along as Daniel Folta of Evolve Artist shows us how to make a grayscale portrait from start to finish using the Evolve Artist method.
Introduction
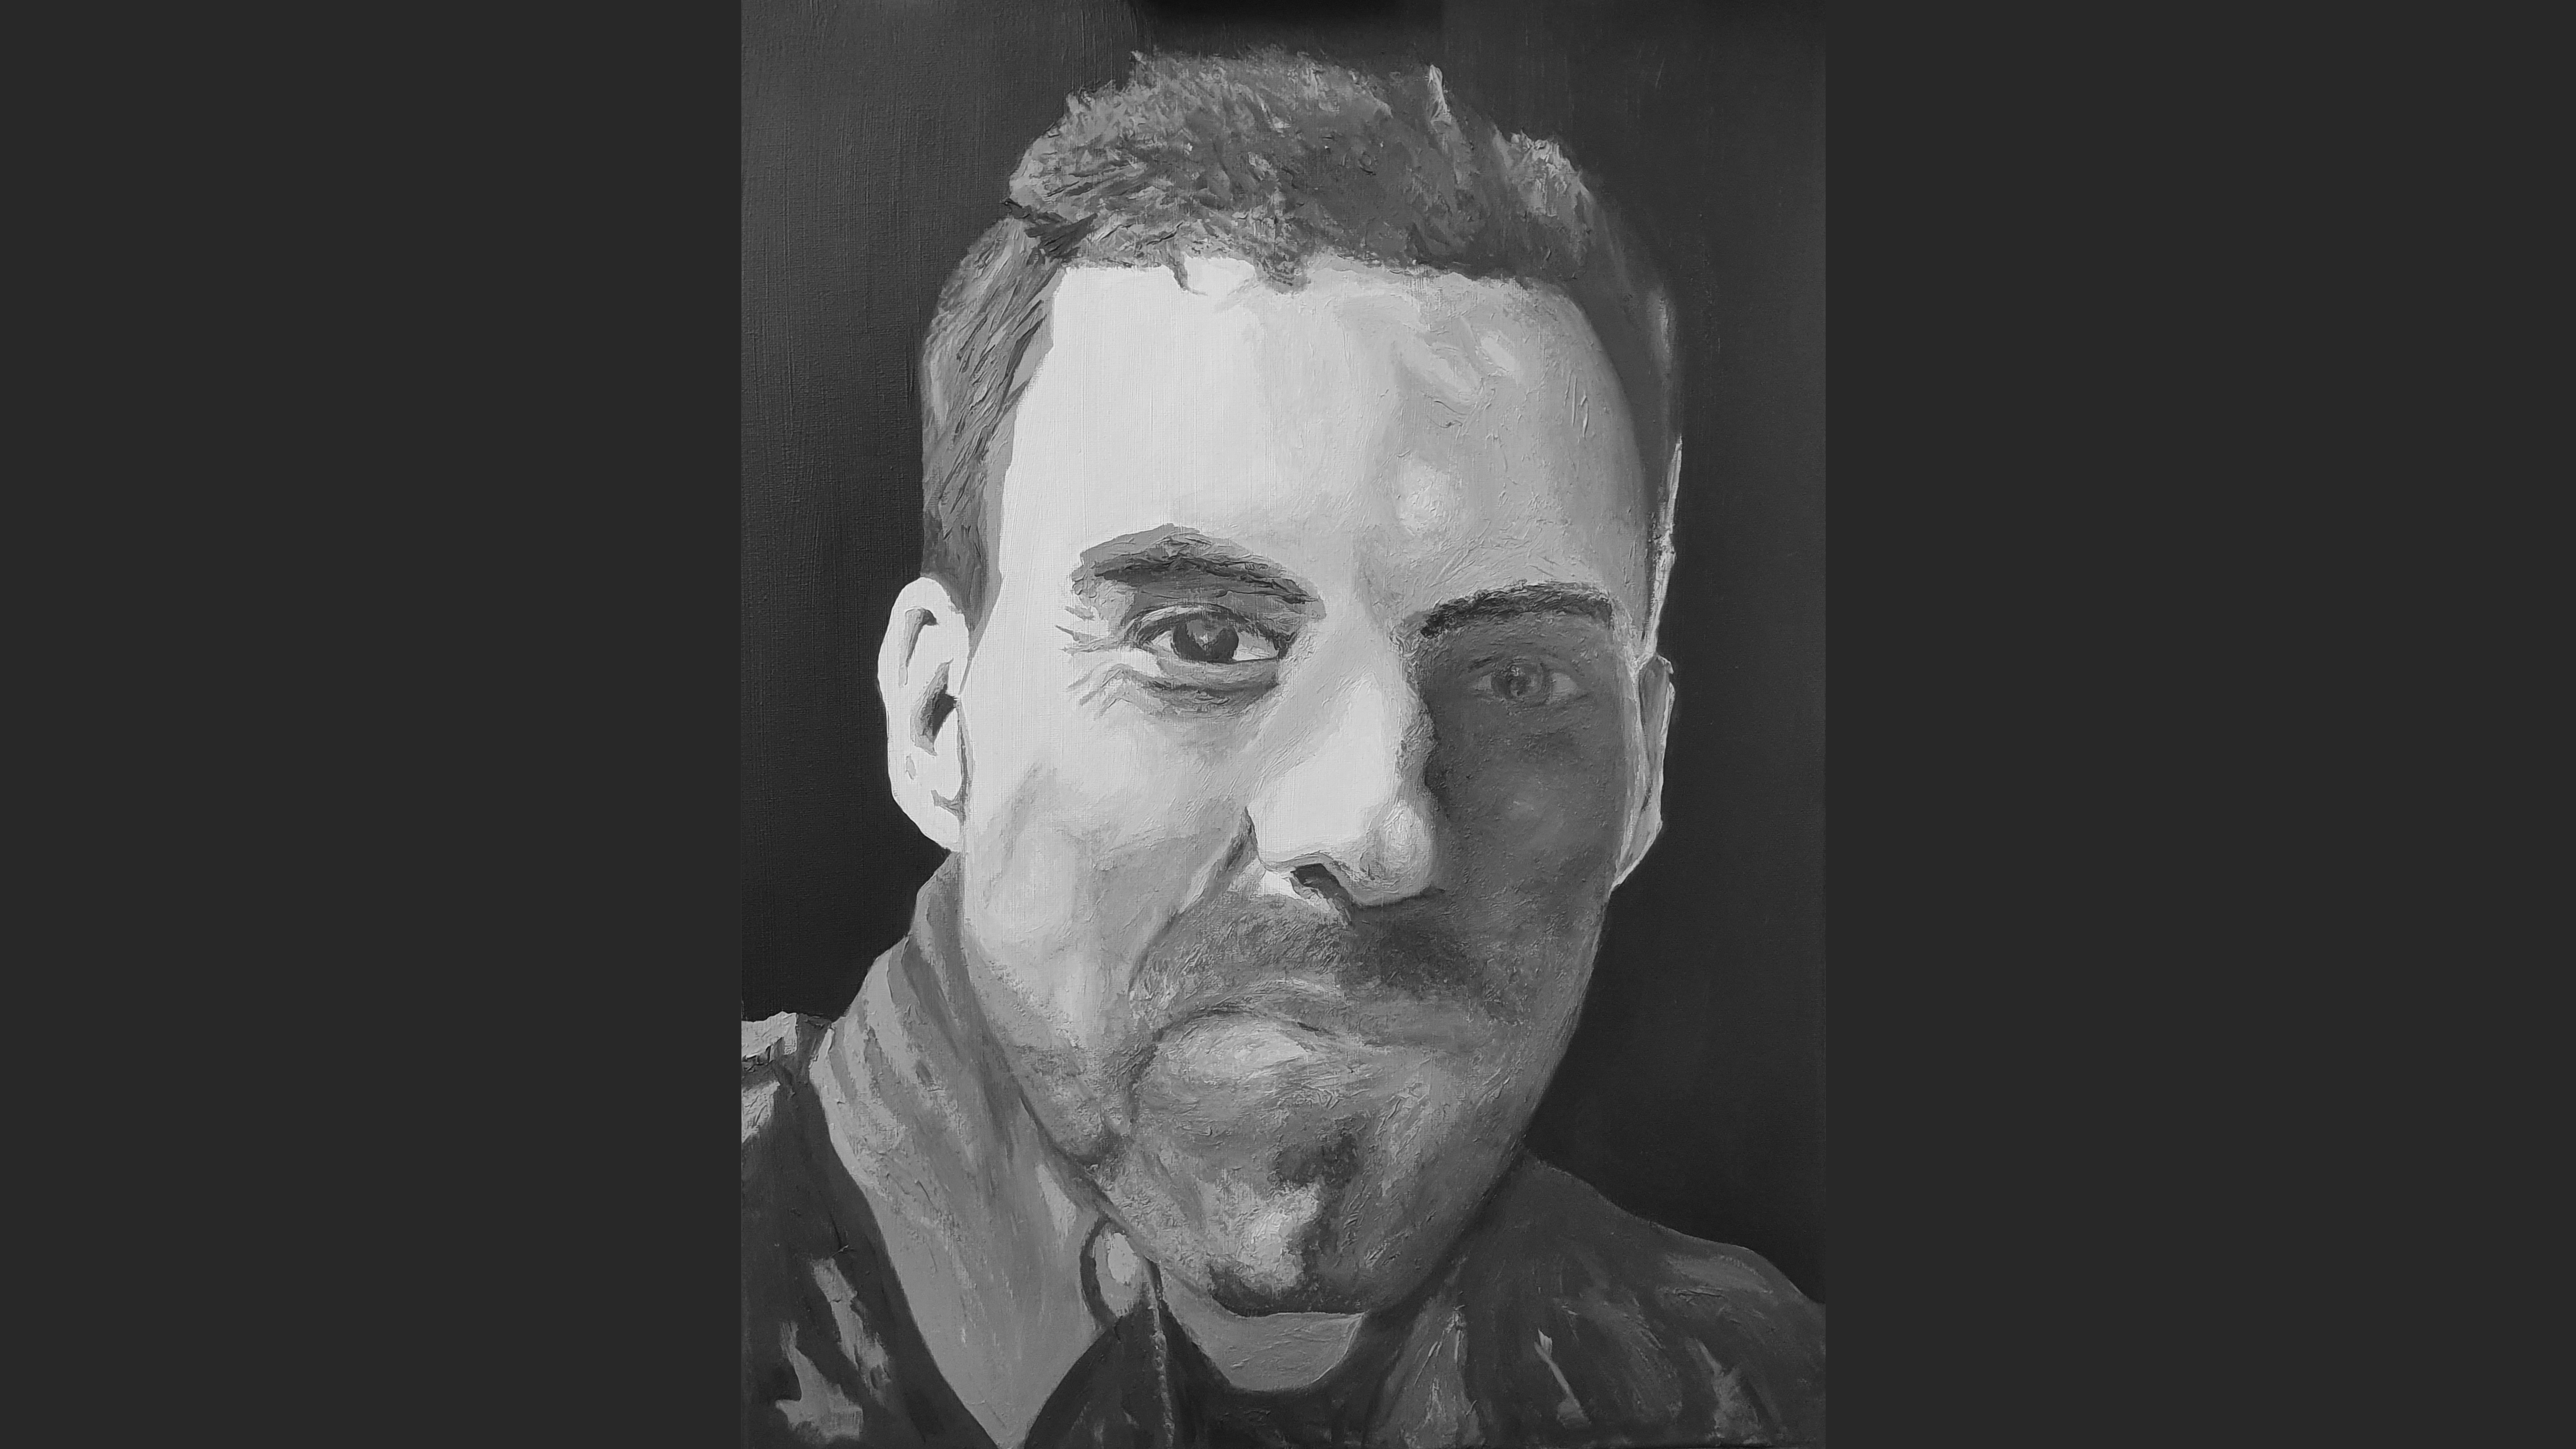
Grayscale Portrait submitted for critique by Andrew Donelan.
To show you the Evolve Artist method, we're going to critique Andrew Donelan's awesome attempt at making a grayscale portrait. What's great about Andrew's portrait is that he's very thoughtful about his values, and because of that, you can see an impression of light and shadow emerging on the face, which helps turn the form. Look at that nose. It's so three-dimensional. Where Andrew can improve, however, is in accurately assessing light and shadow in the first place.
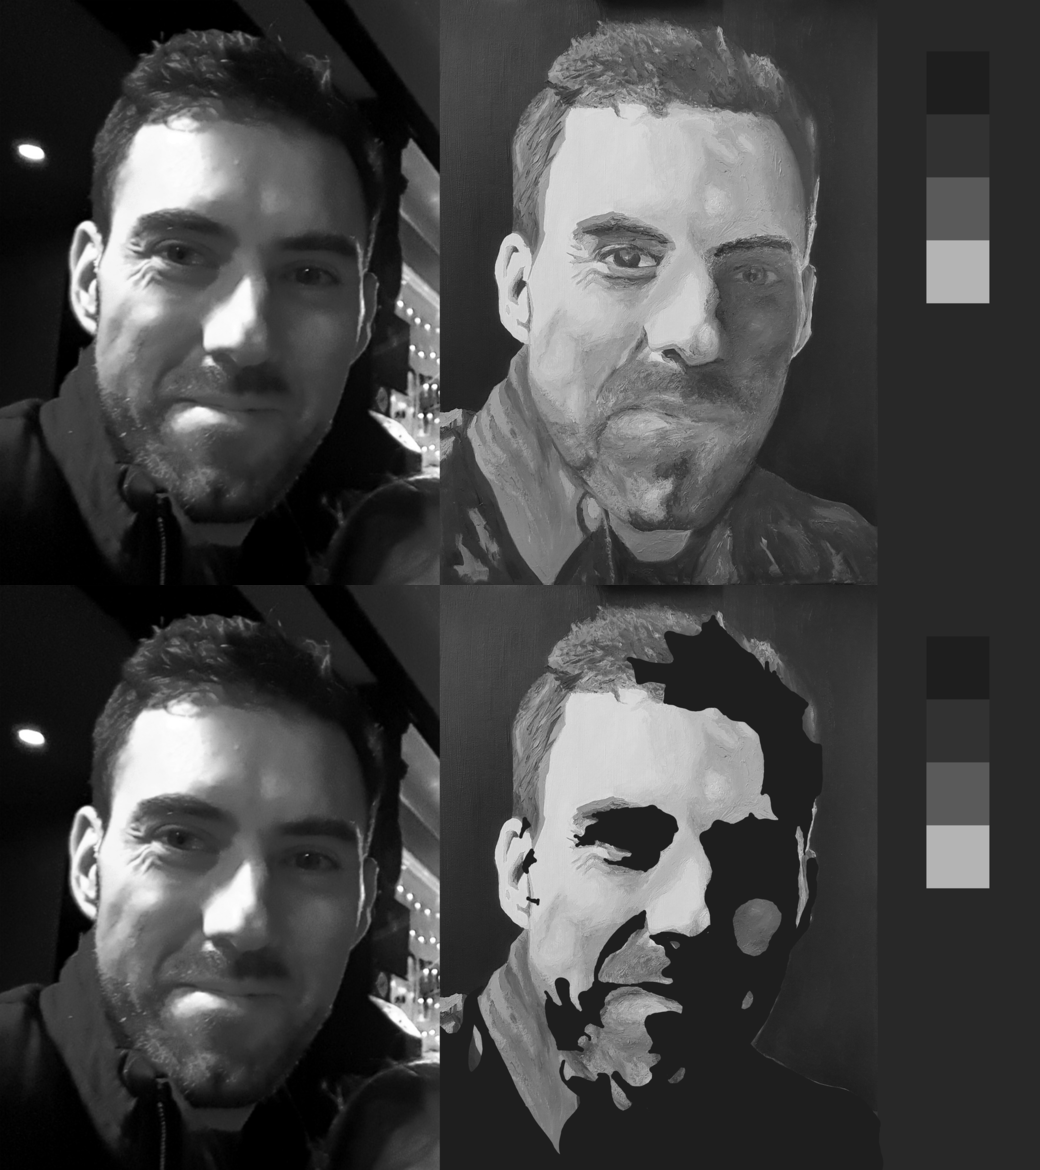
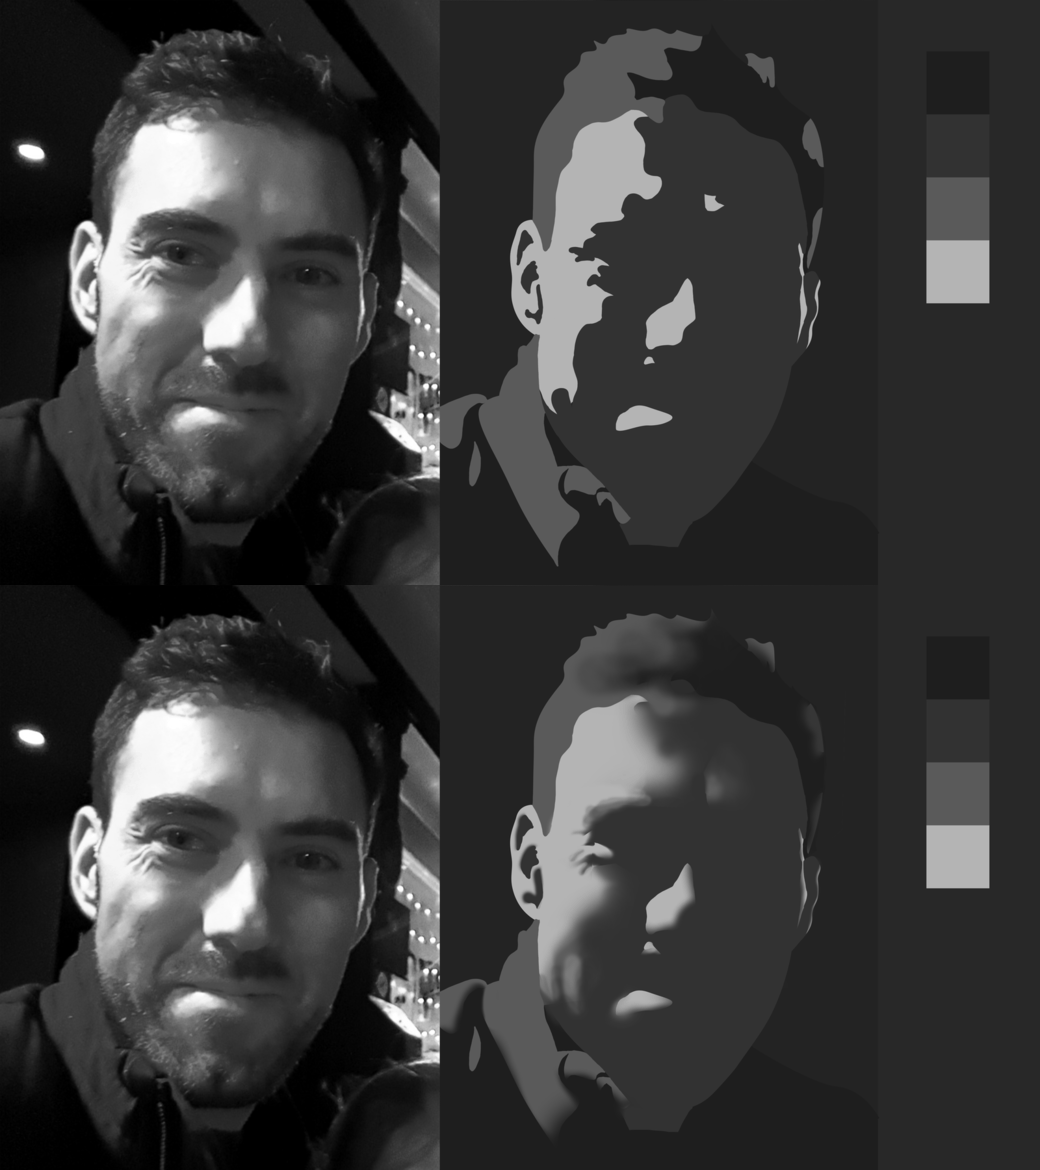
Where Andrew chose to place his lights and shadows, above, sent him on the wrong path in his grayscale portrait.
First, Andrew needed a better reference image that has a clearer distinction between light and shadow. Secondly, because the reference isn't clear about the light and shadow, Andrew incorrectly chose the above image as his light and shadow when it really should have been this:
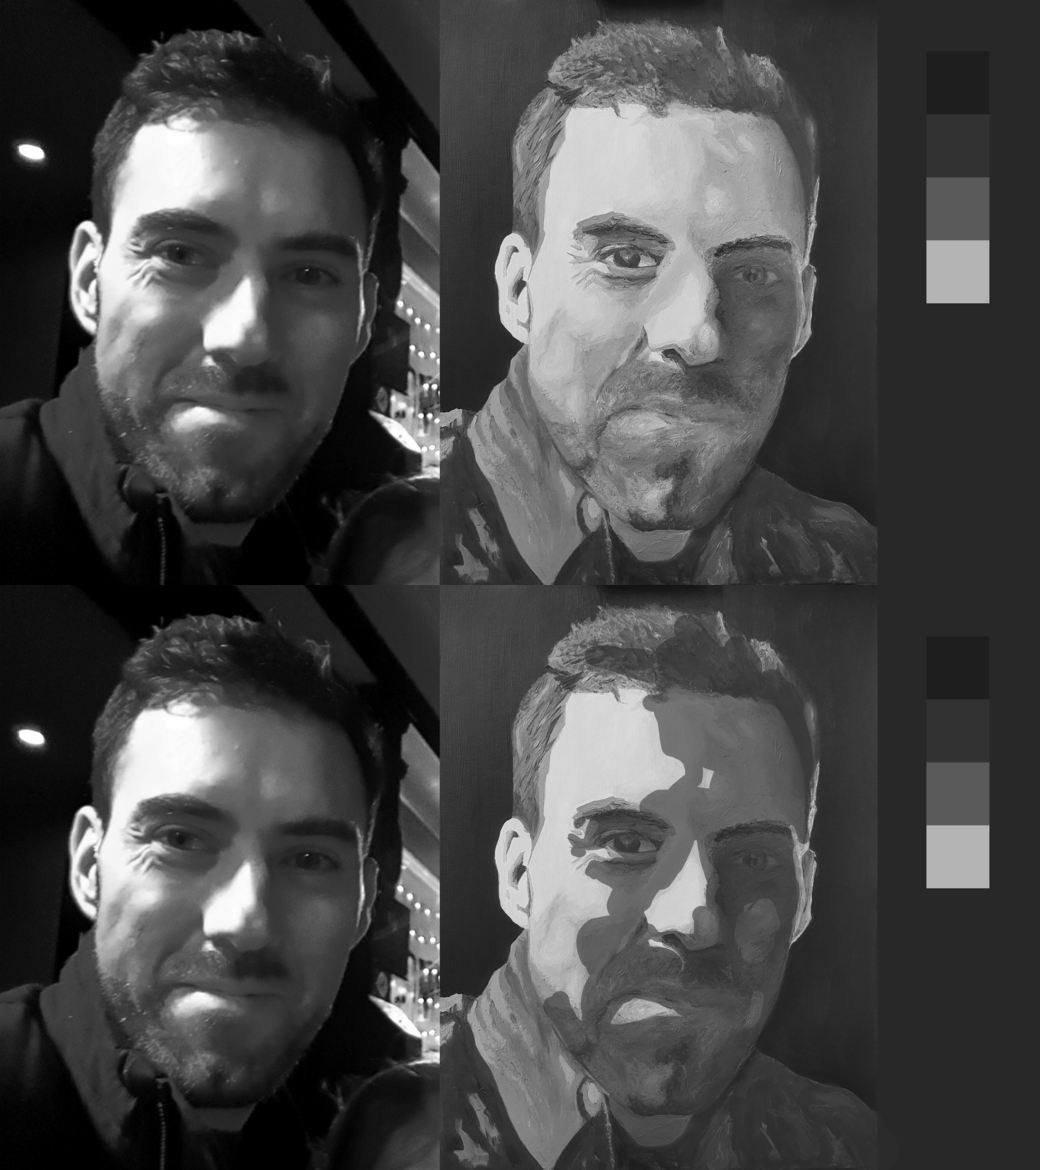
Identifying the correct placement of light and shadow is essential in starting your grayscale portrait on the right track.
Because of Andrew’s initial decision, it sent him on the wrong path, even though he continued to do a pretty great job with the rest of the process. To honor Andrew's attempt at making a grayscale portrait using the Evolve Artist method, I will now build this portrait from the ground up, showing you every step of the way, using the process that we teach our students in Block 1, the very first part of our program.
Grayscale Portrait Step 1: Find the Light and Shadow
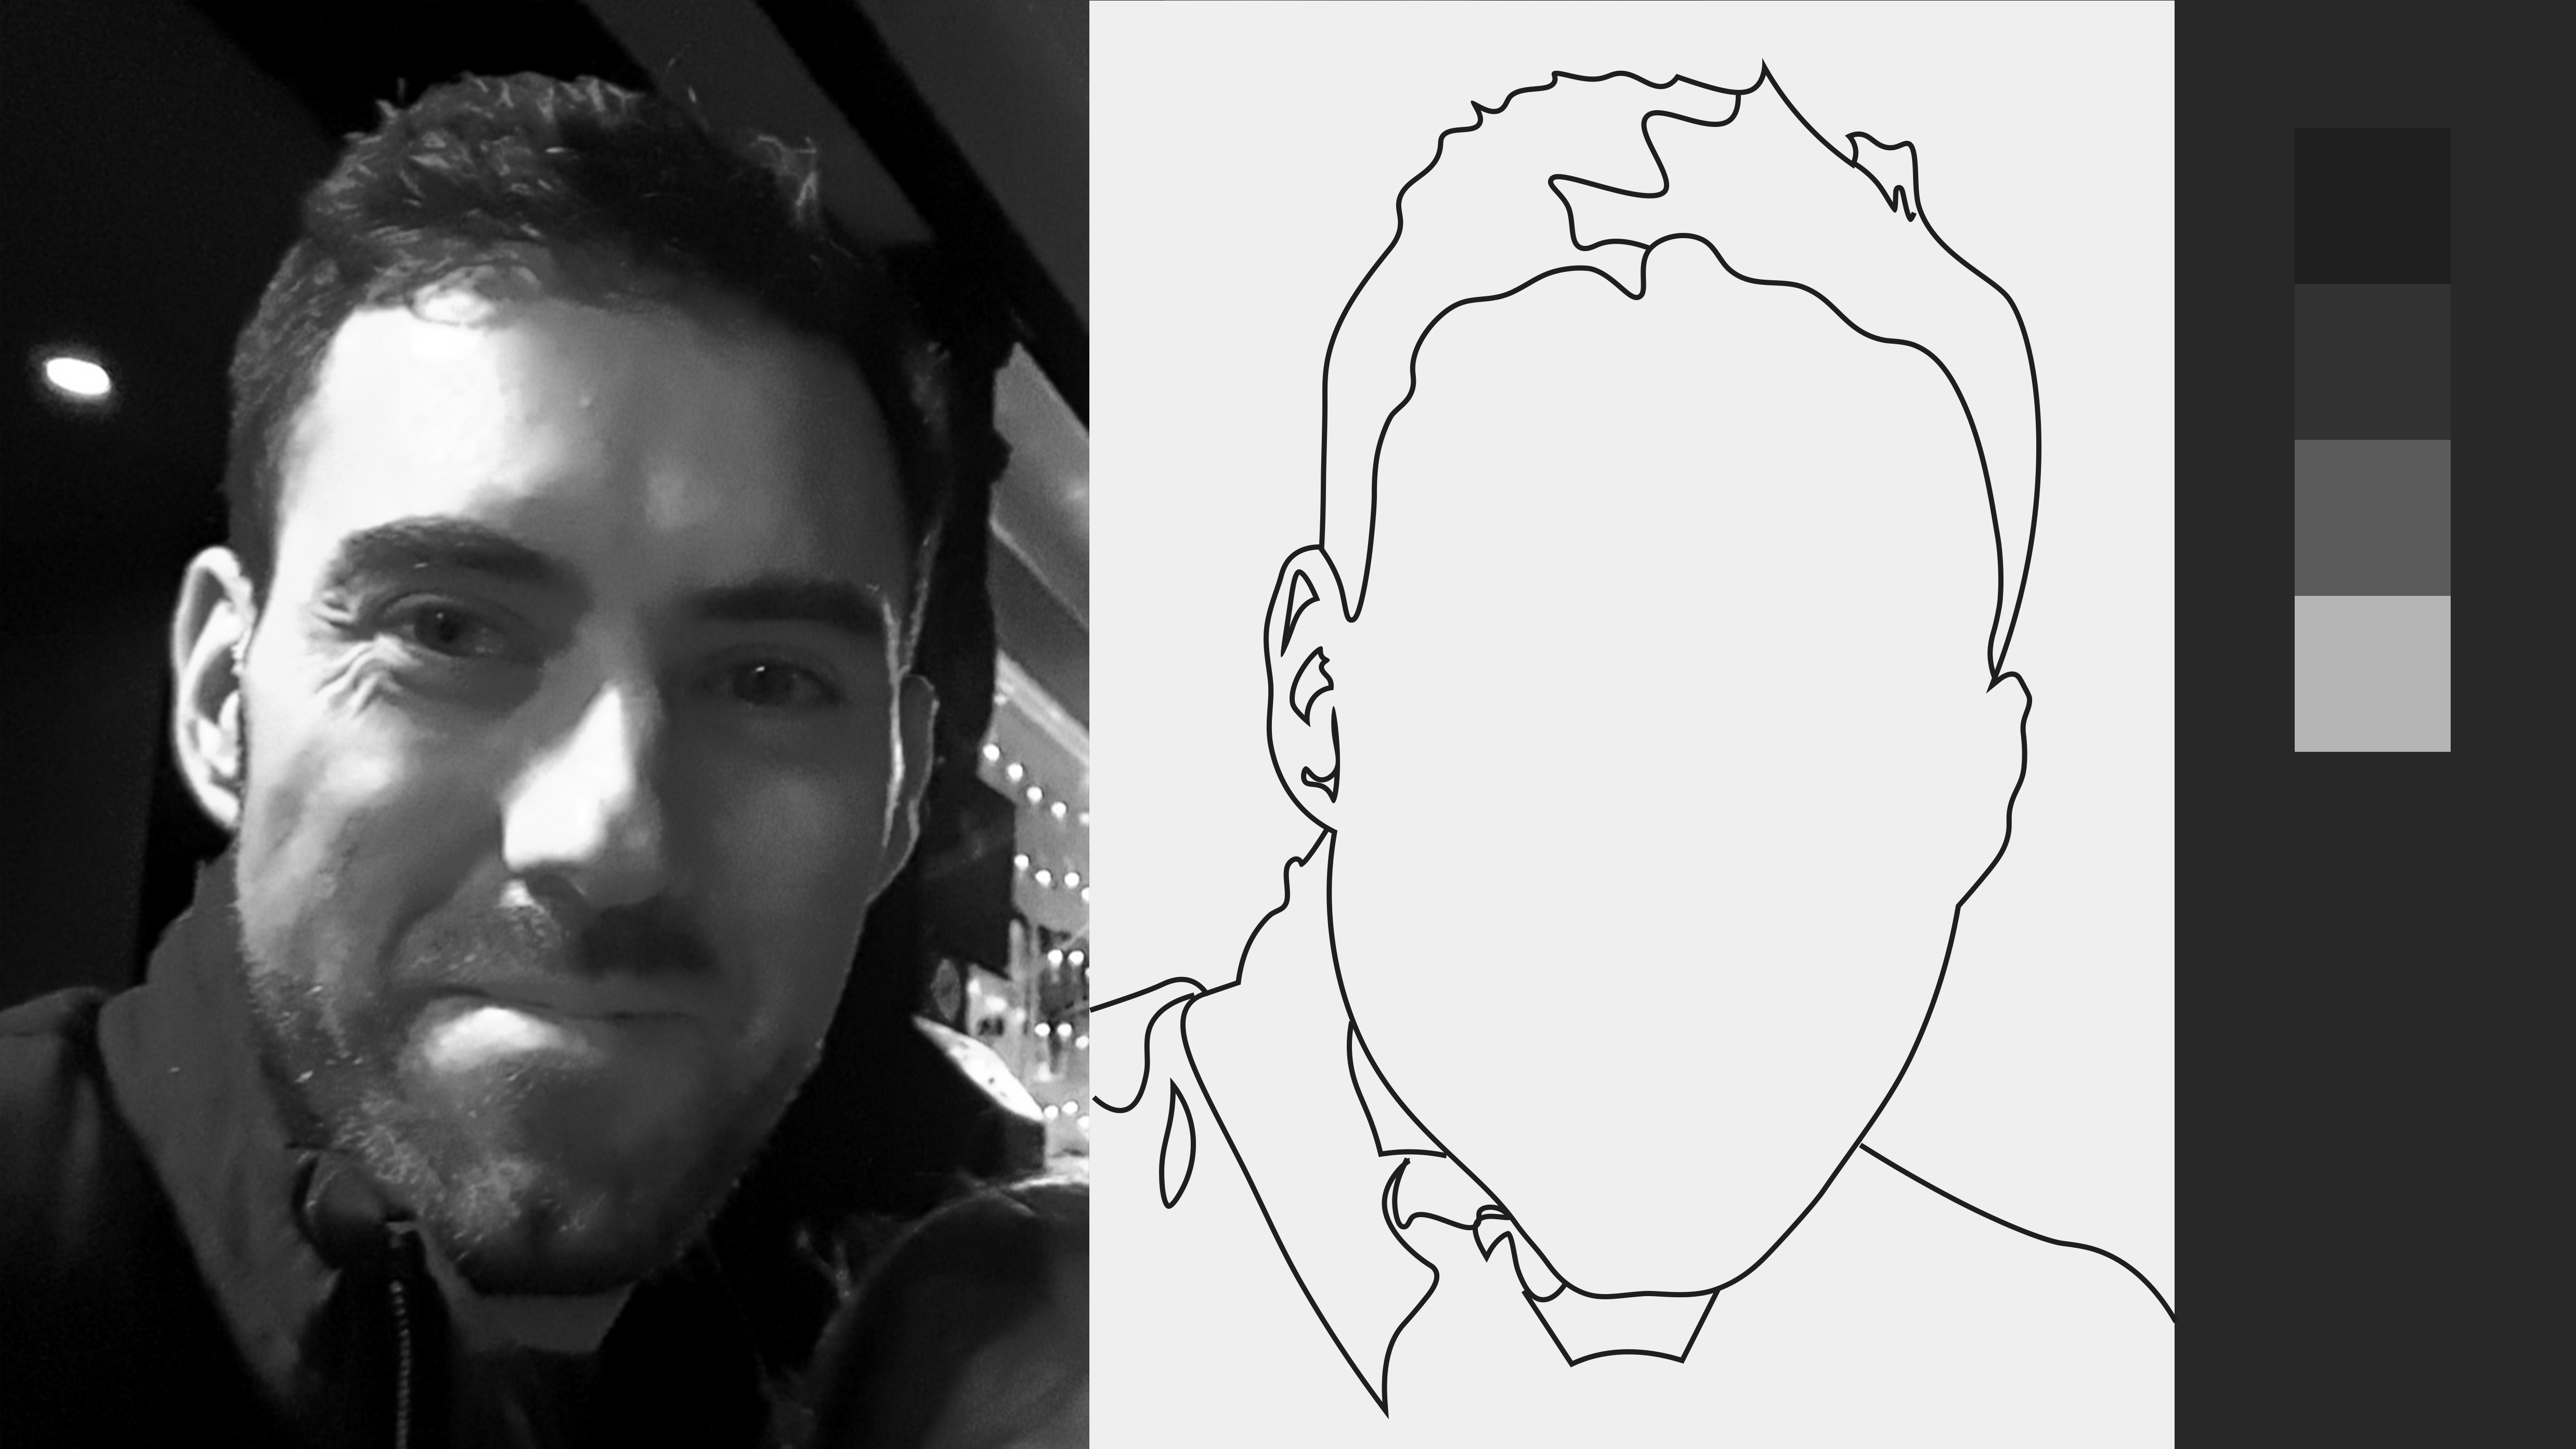
The first step for your grayscale portrait is to transfer the outline of the image on your canvas and marking the areas where there is a clear shift in value (where the light and shadow meet).
I'm going to start off with a blank canvas. Since we're in Block 1 of the Evolve Artist program, we're not worried about developing our drawing skills just yet. So we would use a transfer to get the proportions right by marking areas where there is a clear shift in value, particularly where the light and shadow would meet. This means that we first have to determine where we have light and where we have shadow.
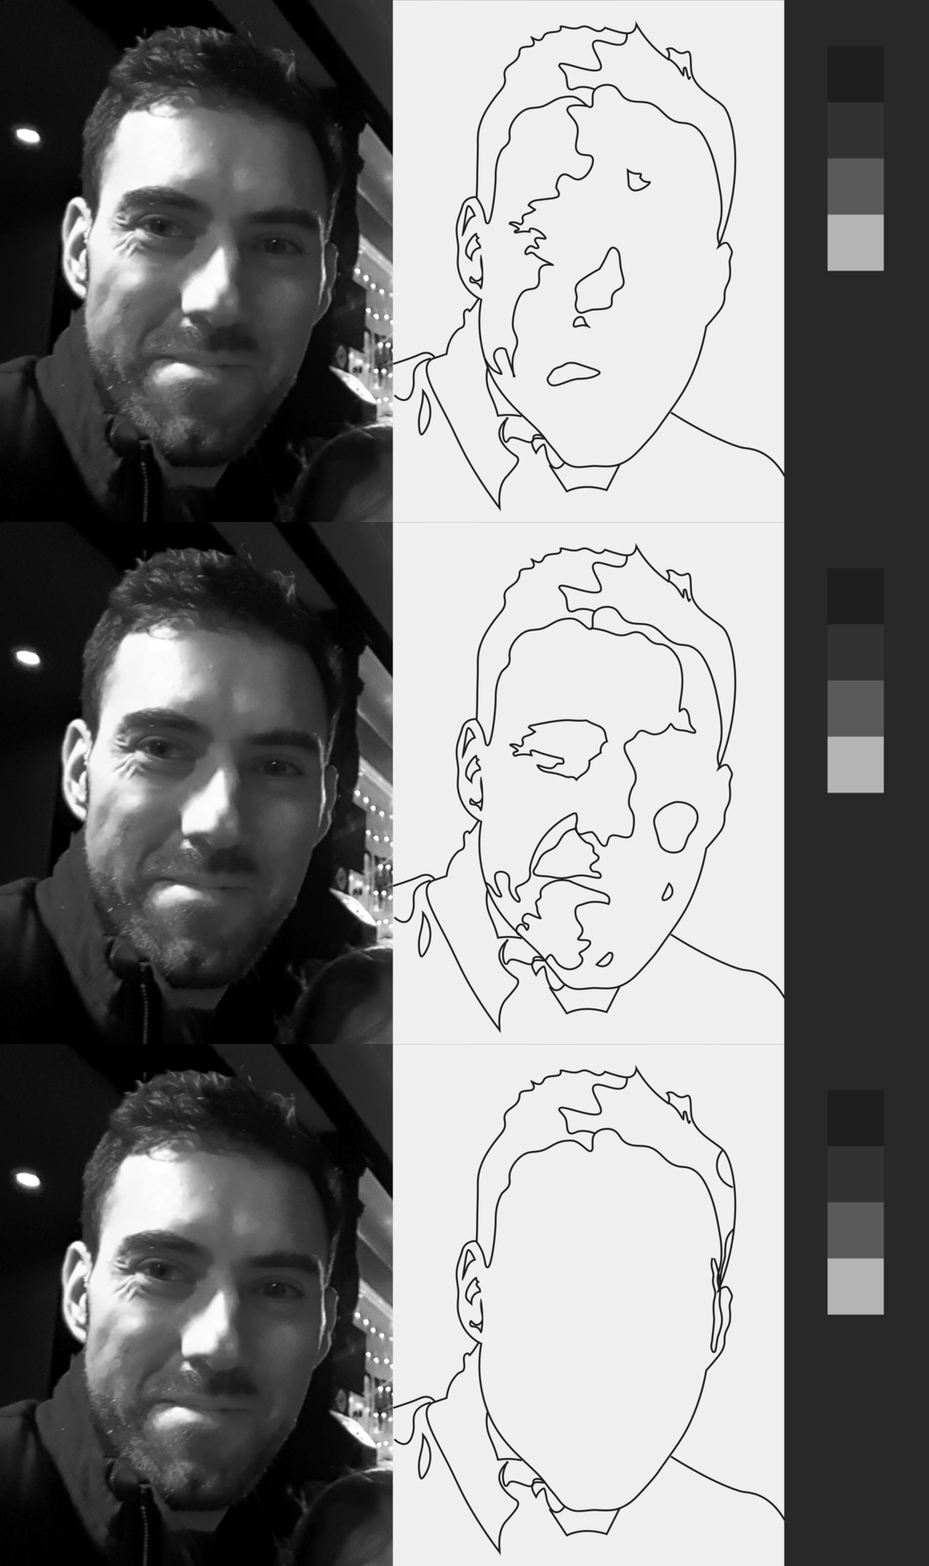
The reference image makes this grayscale portrait more complex because it includes three separate light sources.
Now, if you look at this reference closely, you'll discover that there are three separate light sources shining on his face, which is a big issue. There's a strong light that is overexposed in the photo, but there's also a much more subtle light, which you can see casting some shadows on the eye sockets. Then there's a third light source bouncing off the side of his brow.
Grayscale Portrait Step 0: Use Quality References
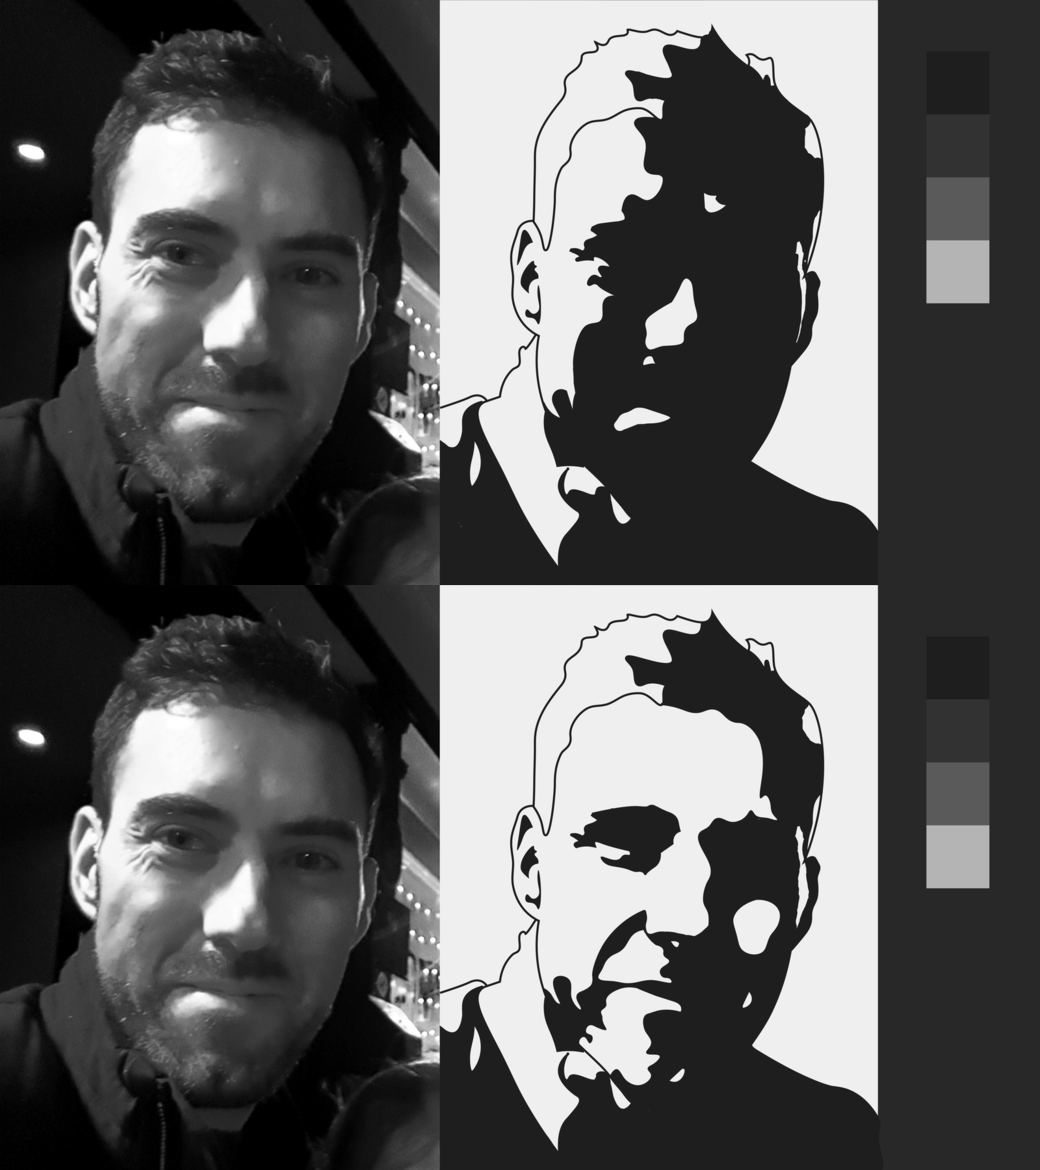
As a result of multiple light sources in this reference image, there are also multiple shadows to work with.
So having three separate light sources just made this portrait way too complex and fractured to be a worthy reference for an exercise in portraiture, unless you are already very experienced. So if you are trying to improve your skills, you need to be just as thoughtful about having good references as you would be thoughtful about making good paintings.
I can't tell you enough how many times I've seen bad references ruin paintings before the paint even touched the canvas. So keep it simple. Lighting is a big part of keeping it simple, so it's no surprise that this is where Andrew got tripped up.
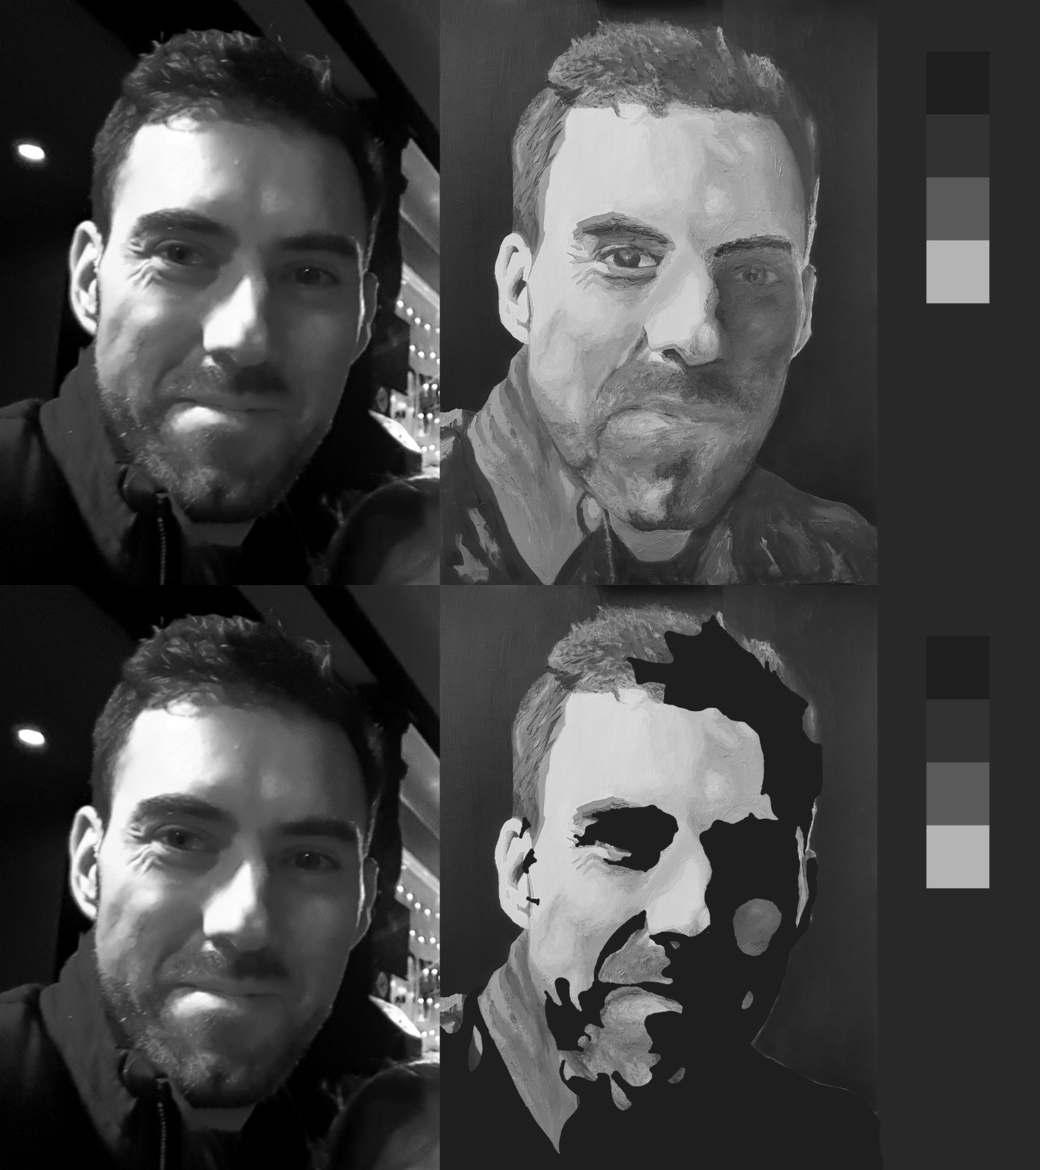
Andrew’s choice of light and shadow impacted his ability to capture the likeness of his subject in his grayscale portrait.
He chose his light and shadow based on this second scenario (see image above), but what he needed was these shadows here from the first lighting scenario:
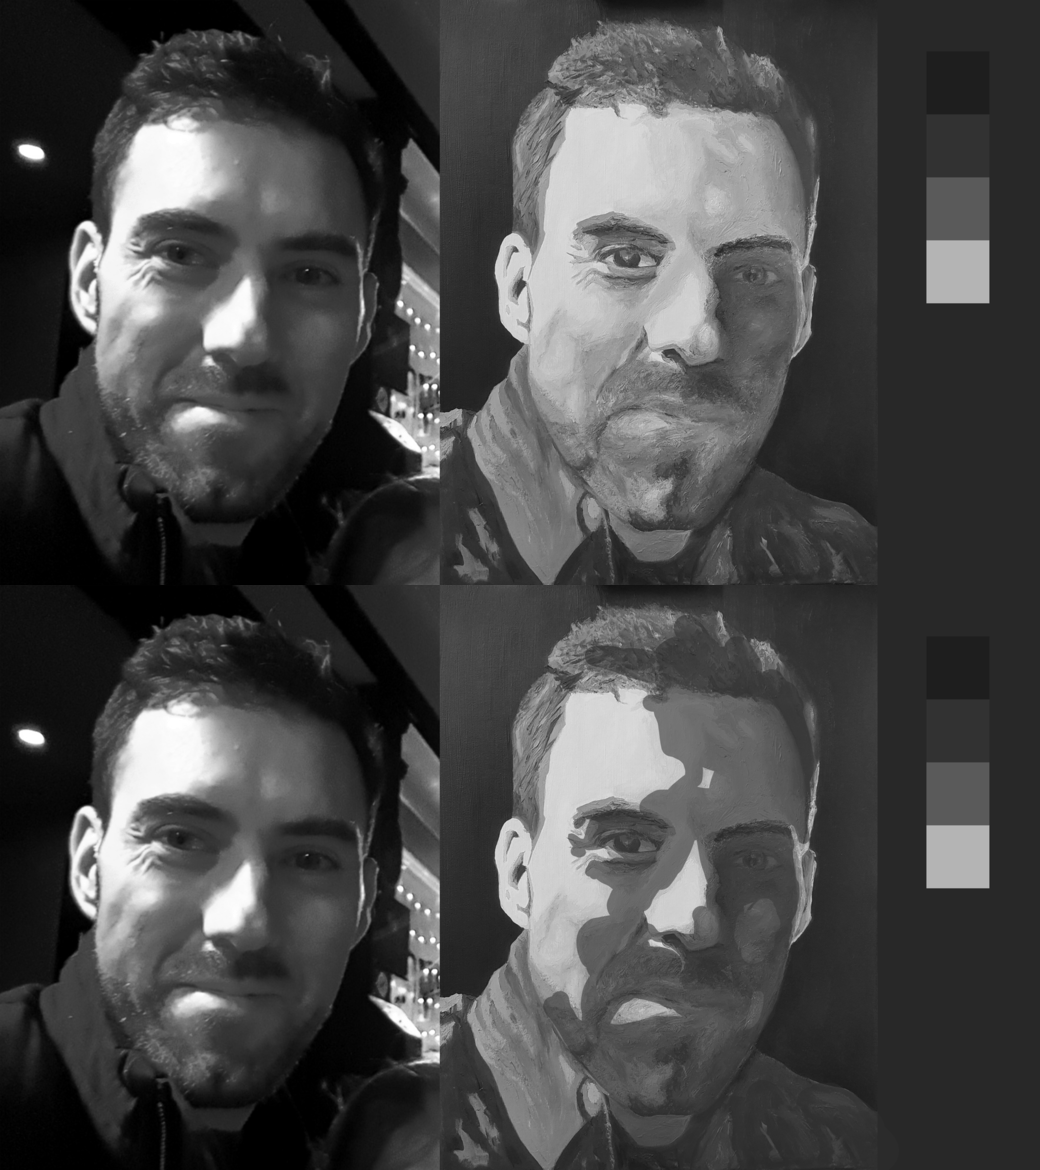
Choosing the correct light and shadow for your grayscale portrait makes a huge difference in capturing the likeness of your subject.
Look at that. If he had done that, he would have nailed the likeness for this portrait. Isn't it amazing how just the light and shadow alone can do that?
Take the time to acquire good reference material that has quality lighting with a clear distinction between light and shadow. Not only will this help you with the process, but it will also make better paintings, and more importantly, you will learn more efficiently.
Don’t Paint What You See
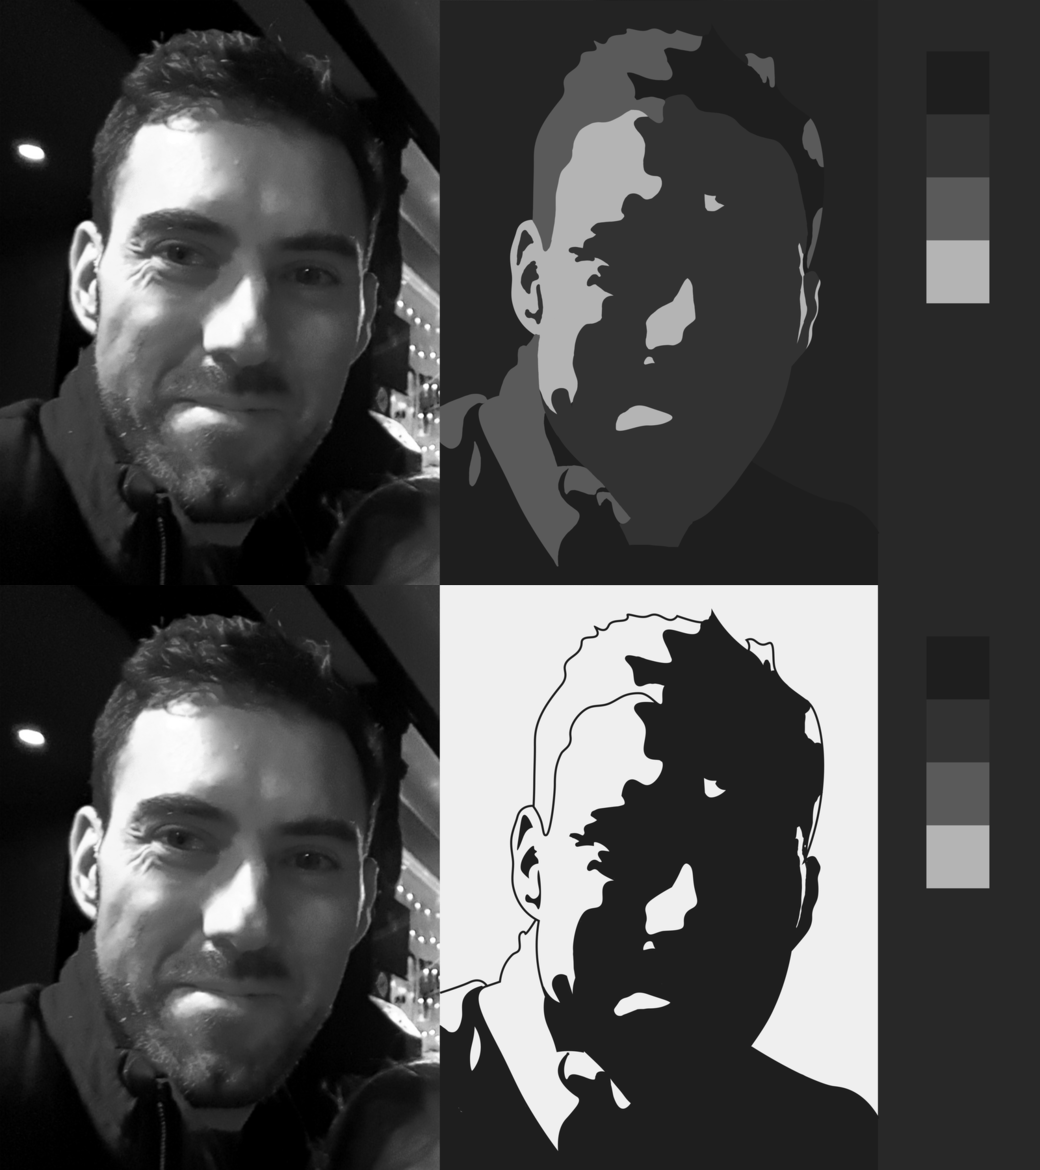
With our light and shadow, we will create four values to make our grayscale portrait.
Now, back to the process. First, we need to find our light and shadow and then break it down into four values. We're taking two things, light and shadow, and creating four values.
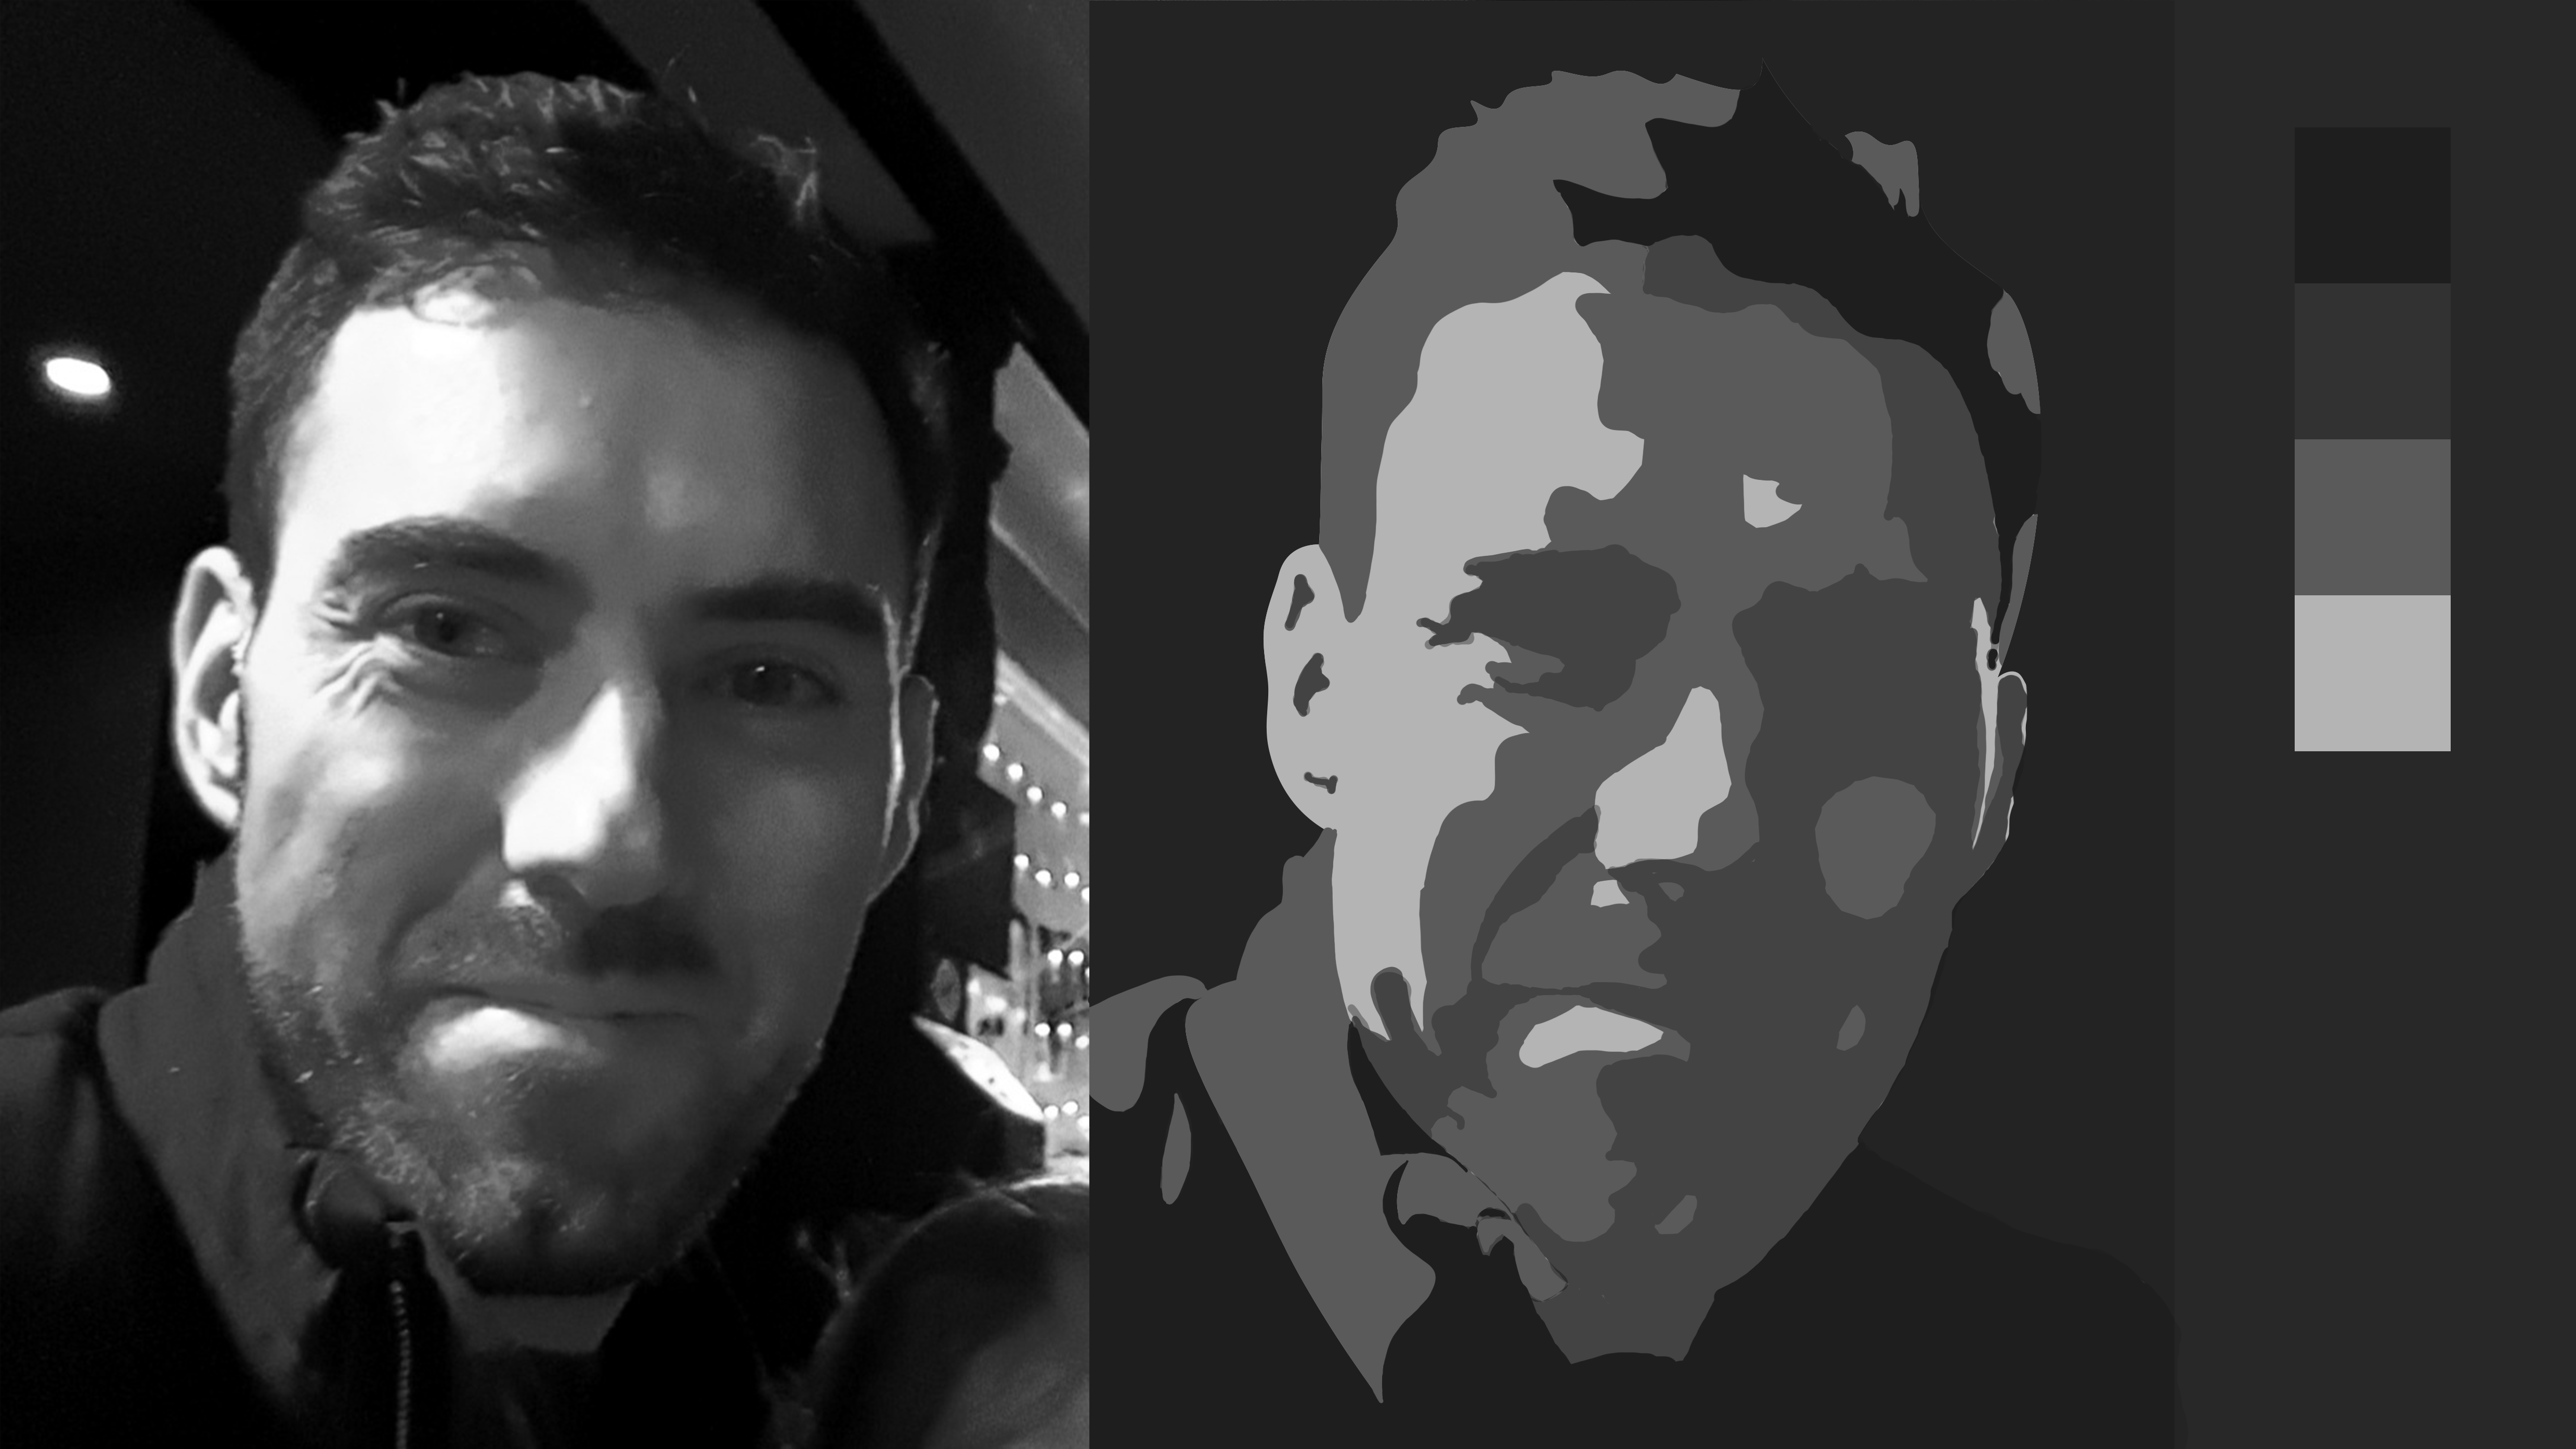
Although you could combine the two lighting scenarios together, this step would vary with each new painting you make and further complicate the process.
Now maybe you're wondering, why don't we just combine the two lighting scenarios together to match the four values? Although that's not a bad idea in theory, you'd be defeating the purpose of the exercise and the method.
Remember, the goal here is to learn a method that you can apply to any painting that you make. If you're simply copying the values that you see without understanding why you're seeing what you're seeing or knowing what to do when you understand what you're seeing, you're not going to learn anything. When we trust the process, we're going to get a much stronger result than from simply copying what we see.
Grayscale Portrait Step 2: Assign the 4 Values
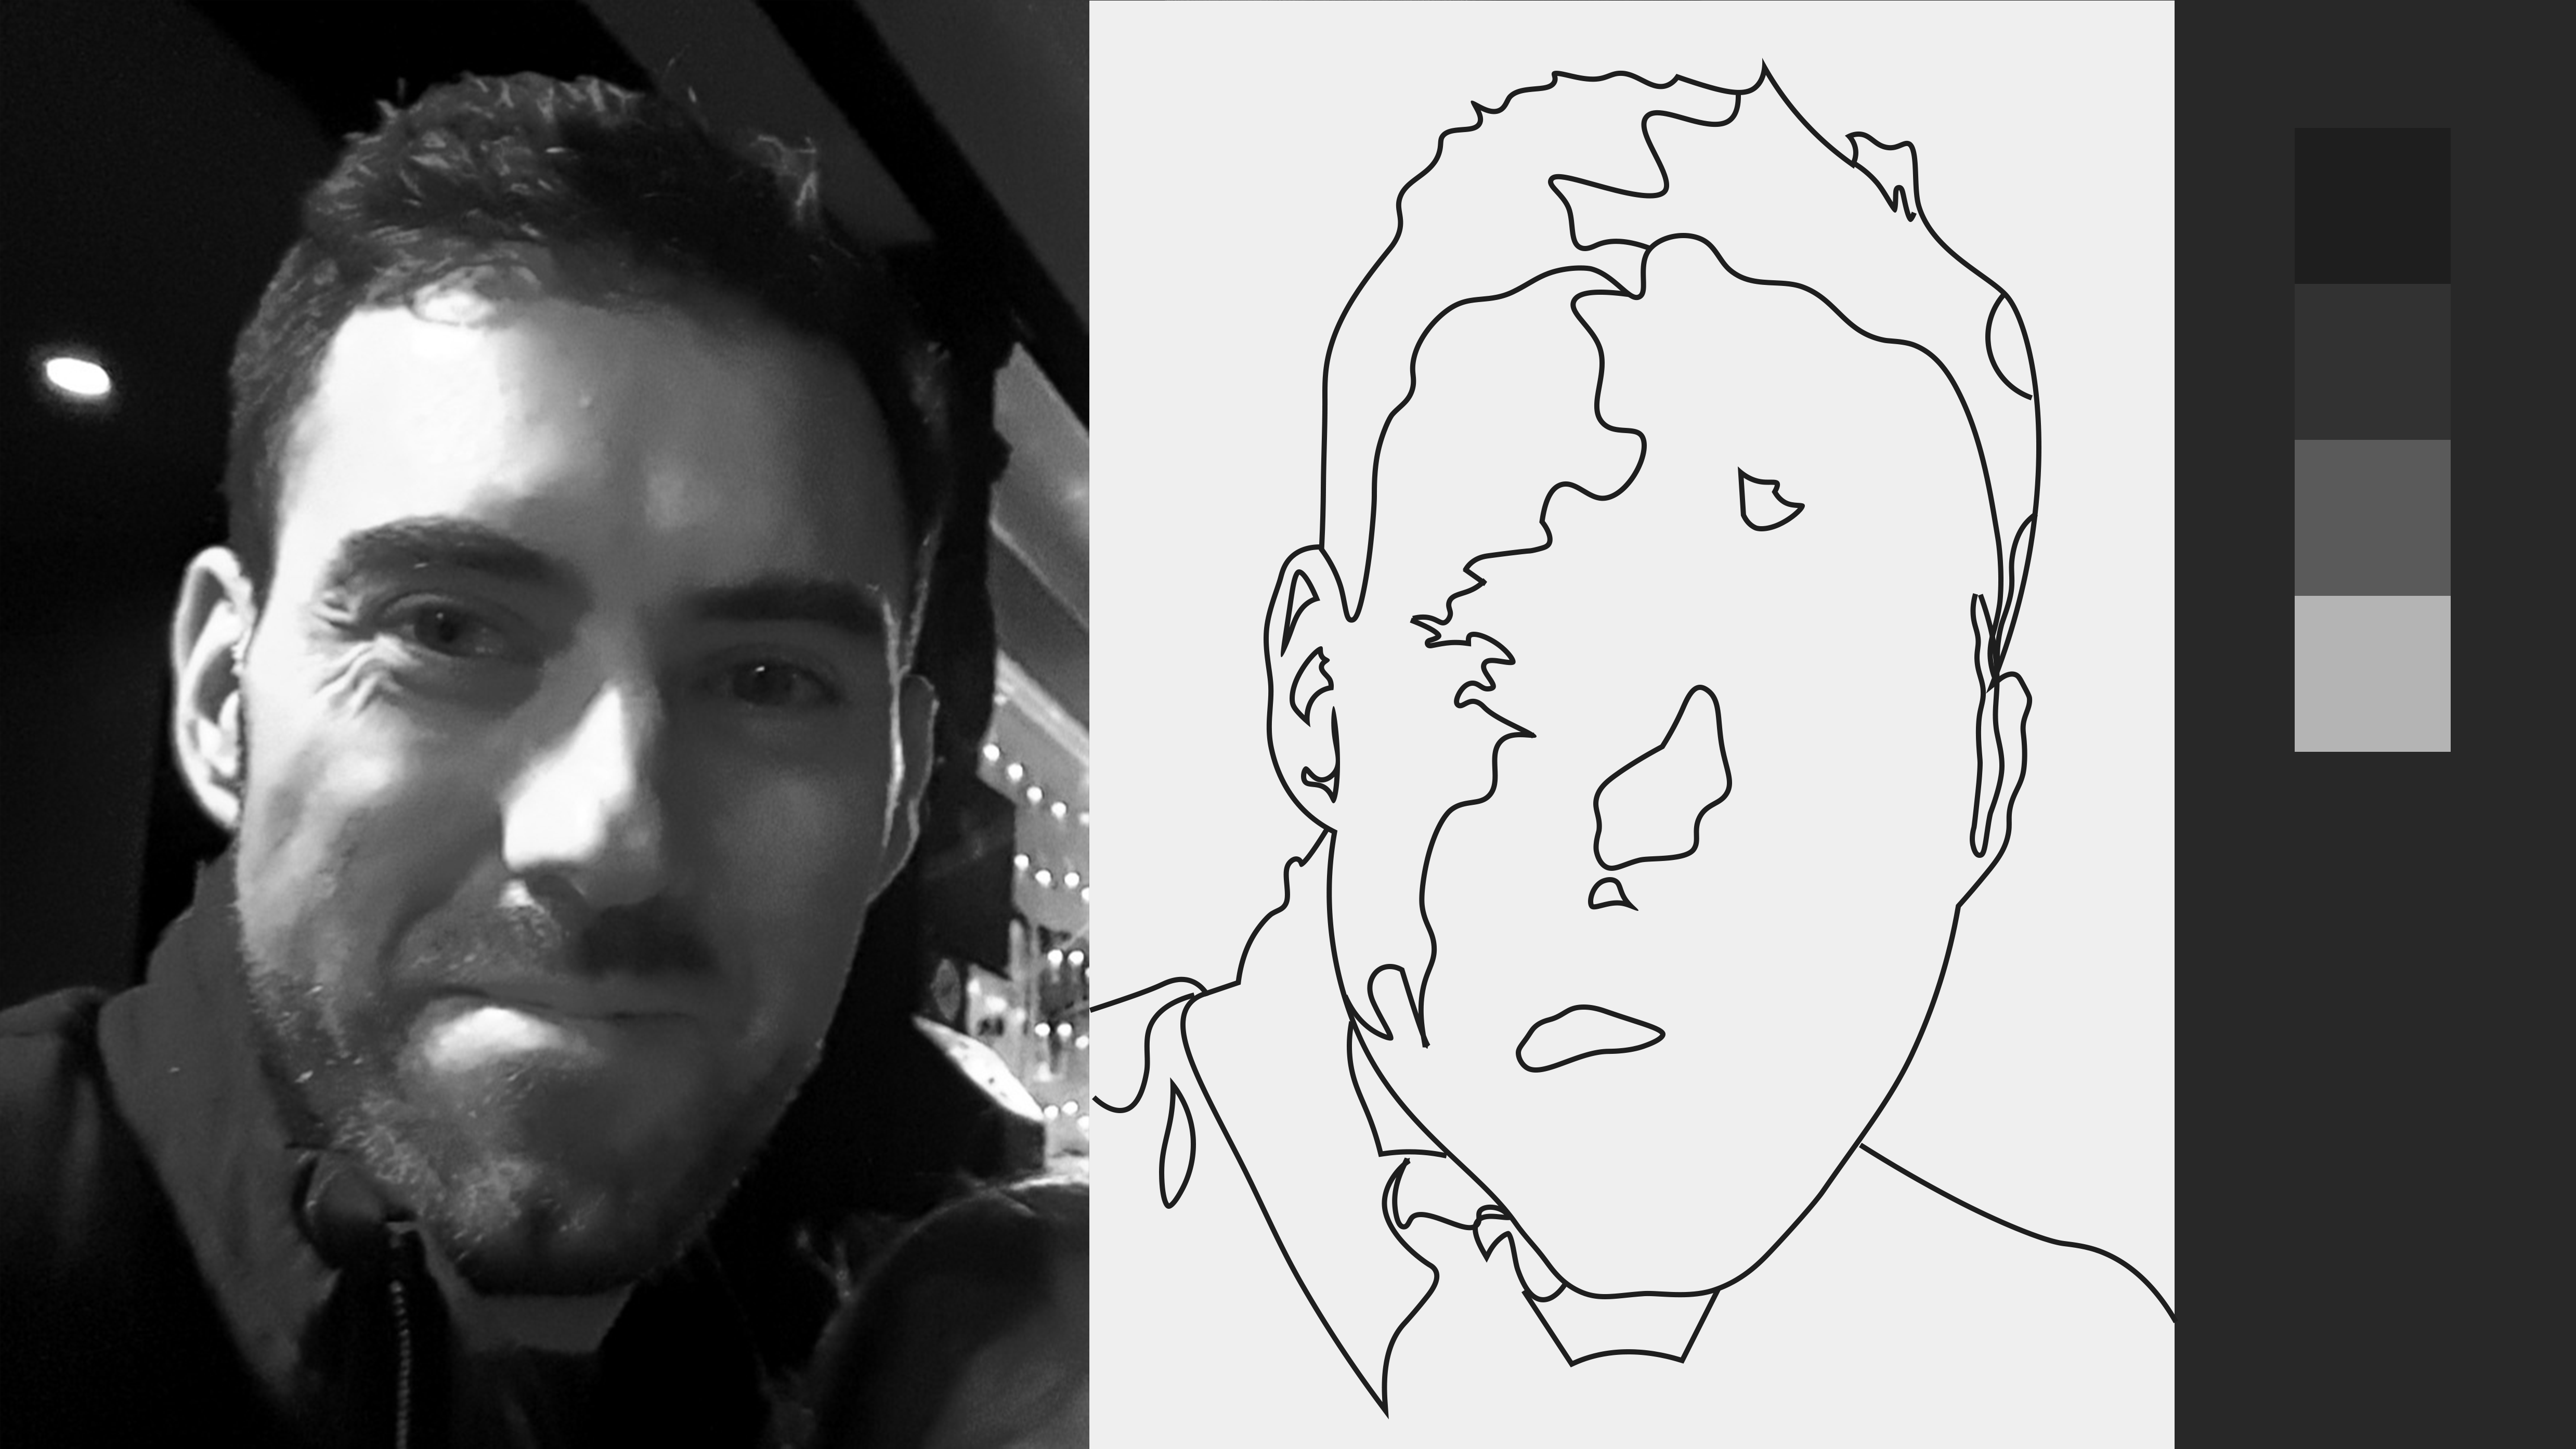
Once you’ve chosen the correct lighting scenario and marked the clear shifts in value, assigning values will be straightforward.
So I'm going to choose the first, much more simple lighting scenario. Then, I’ll assign values to my shadows. The first thing I want to do is find my darkest shadow in the reference.
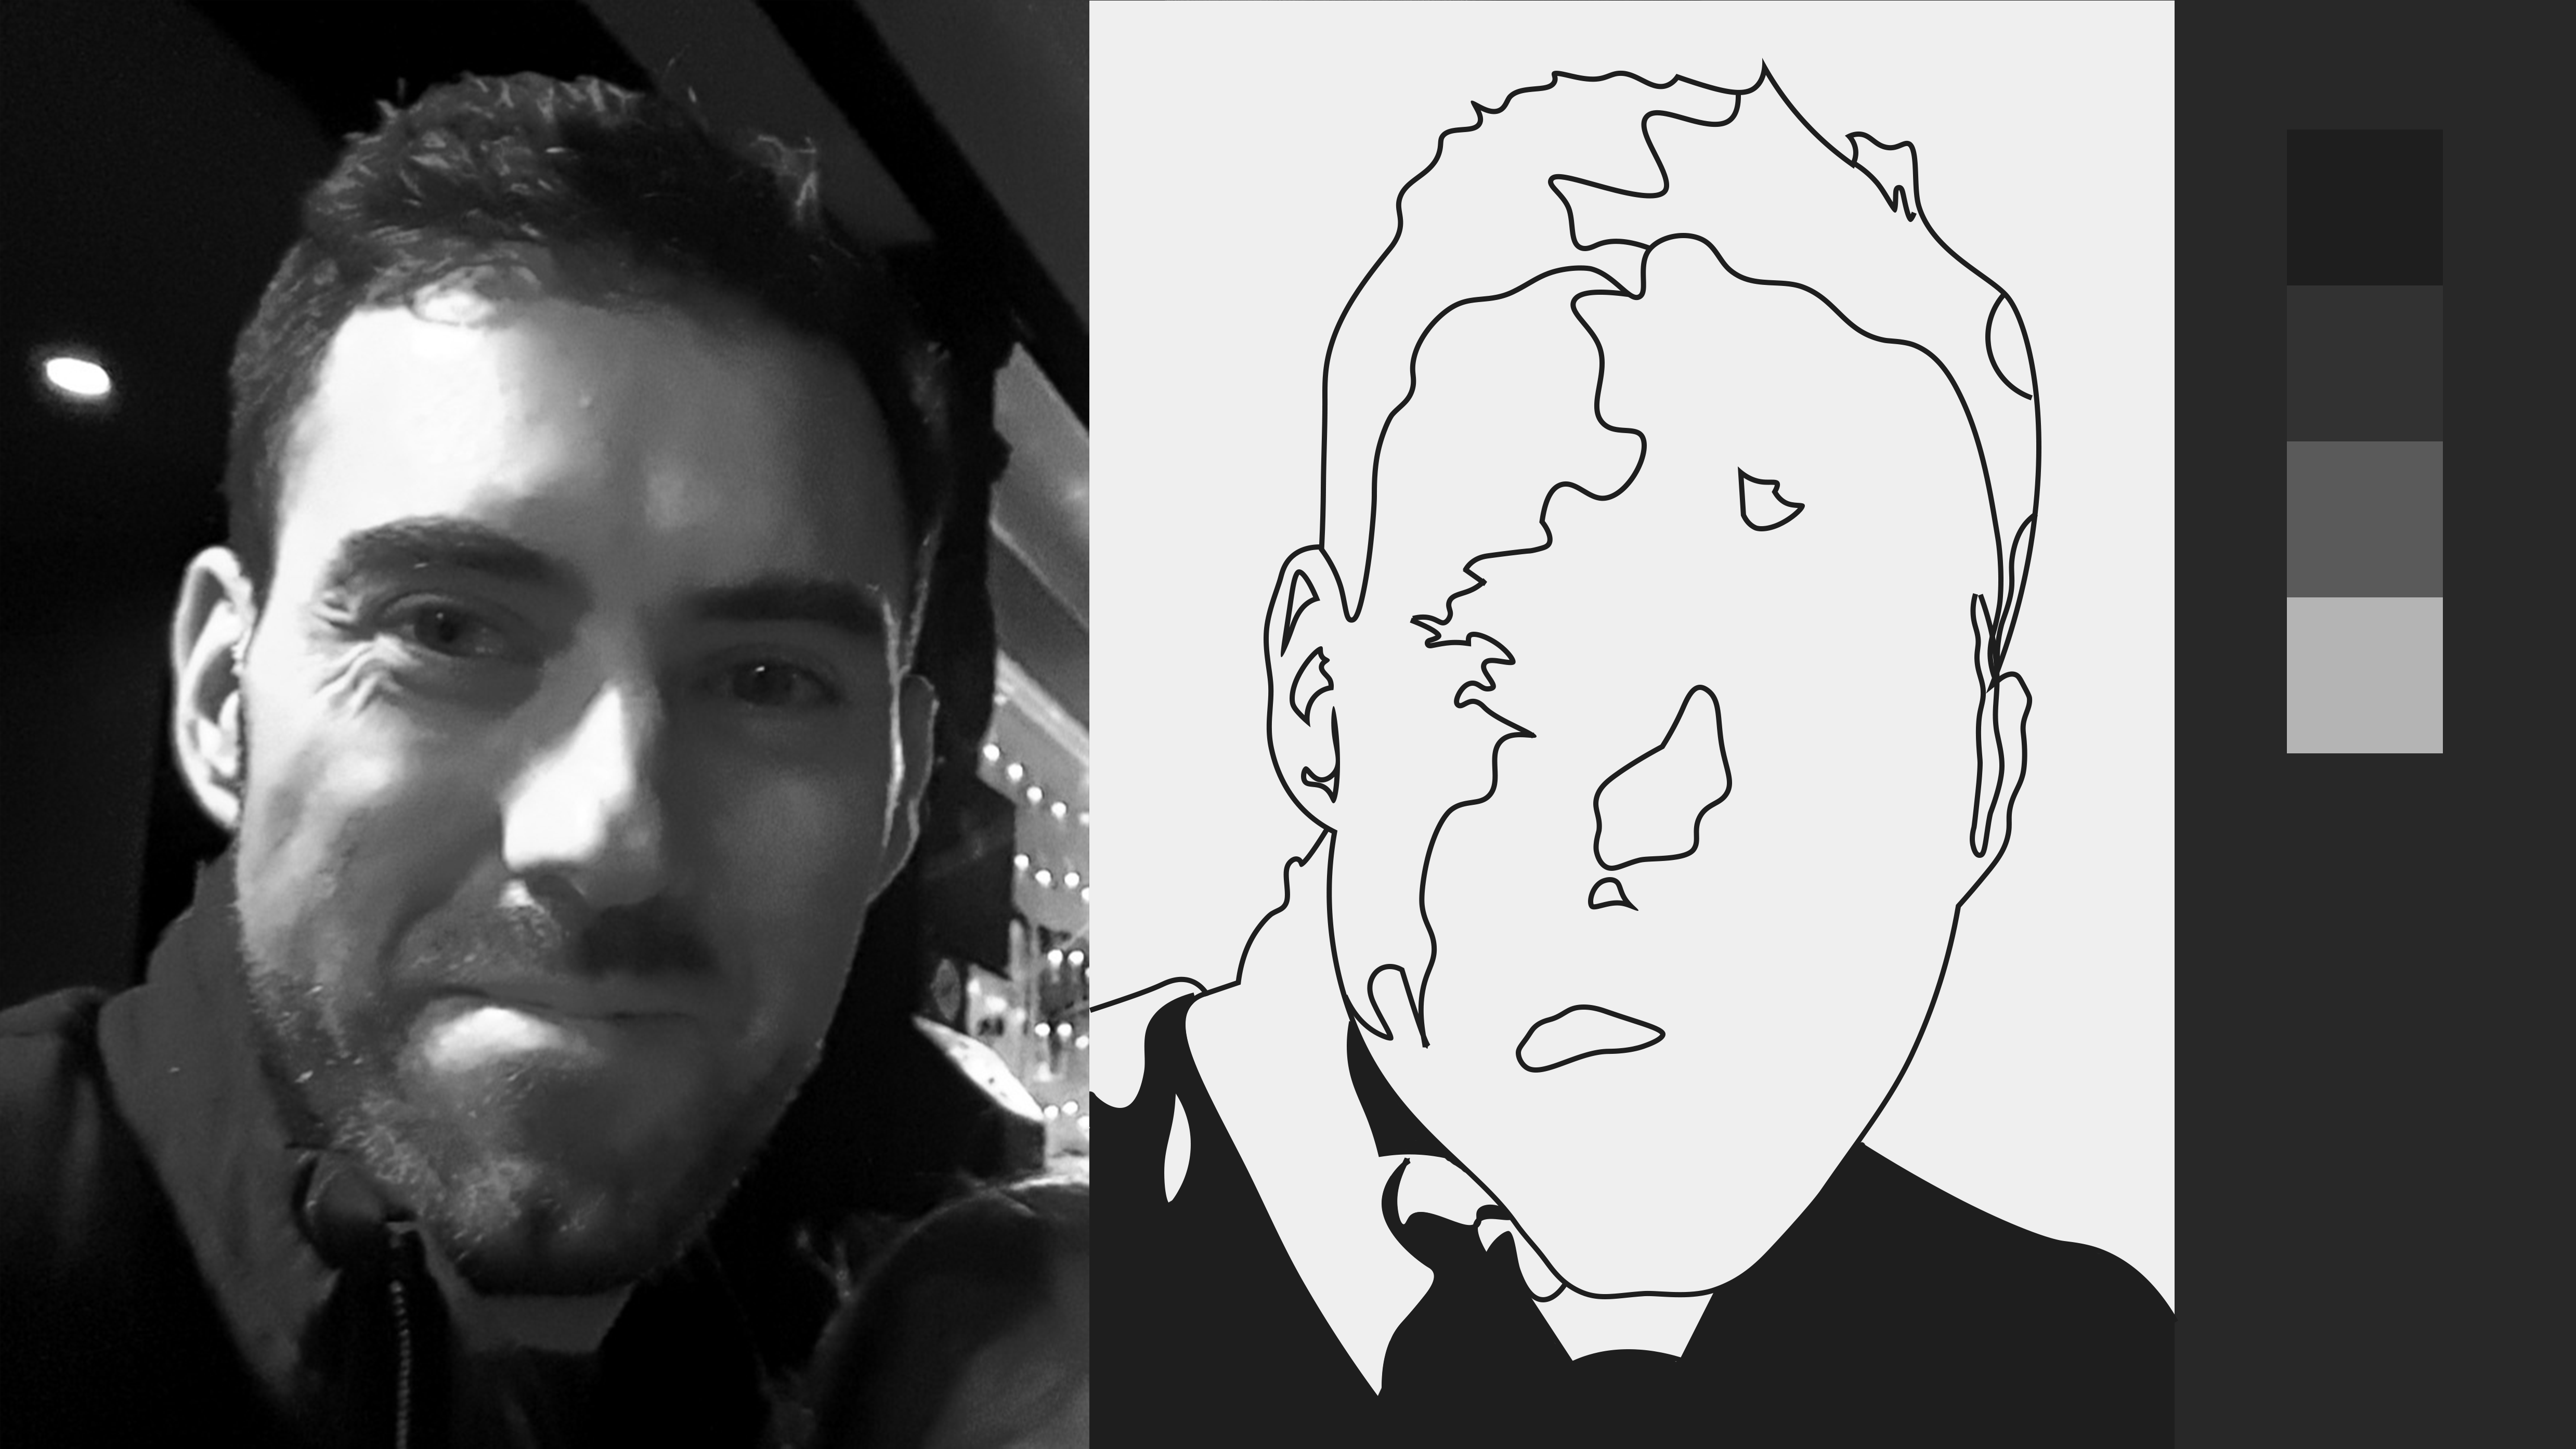
The first value to assign in your grayscale portrait is your darkest shadow, or extreme shadow.
The darkest shadow is going to be my extreme shadow value. Then, I'll look for my brightest shadow. It's the brightest value among the shadows, and that's going to be the shadow on the face.
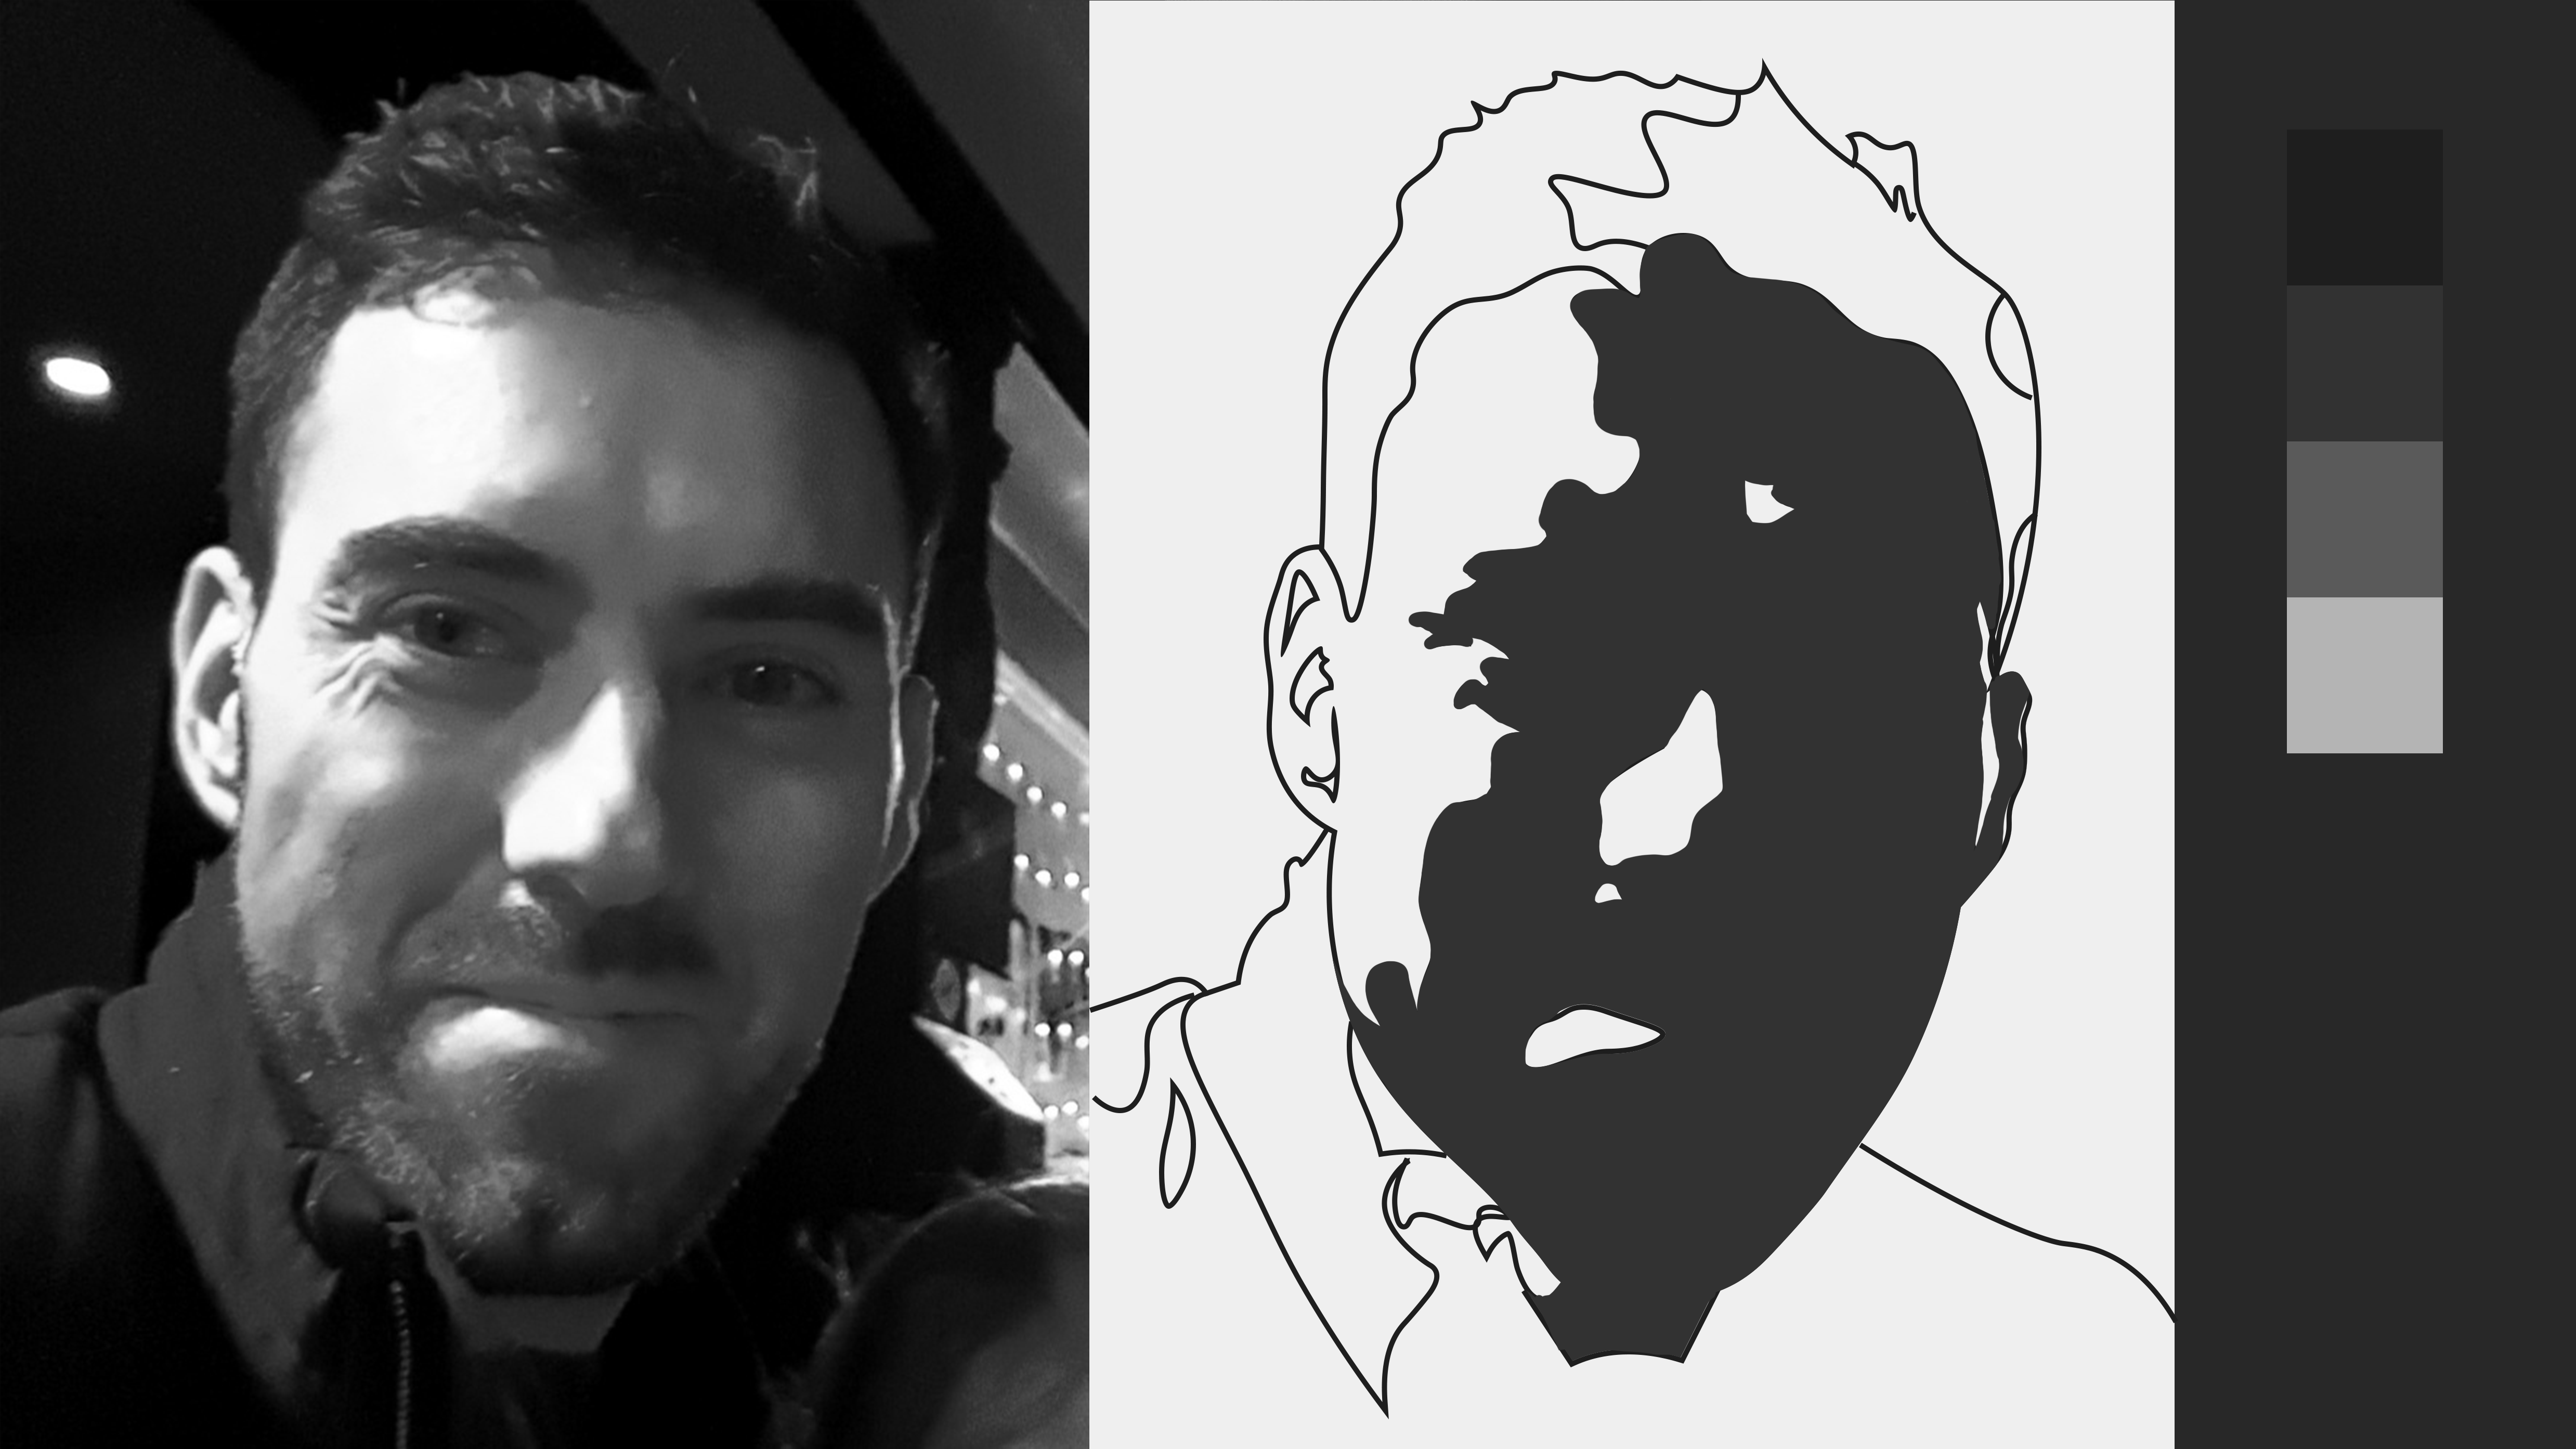
The brightest value of the shadows is your moderate shadow value.
So that will be my moderate shadow. As for the rest of the shadows, I will compare each one to the extreme and then to the moderate, and whichever one it's closest to, it will become that value. Now, I'm going to follow the same process for the lights.
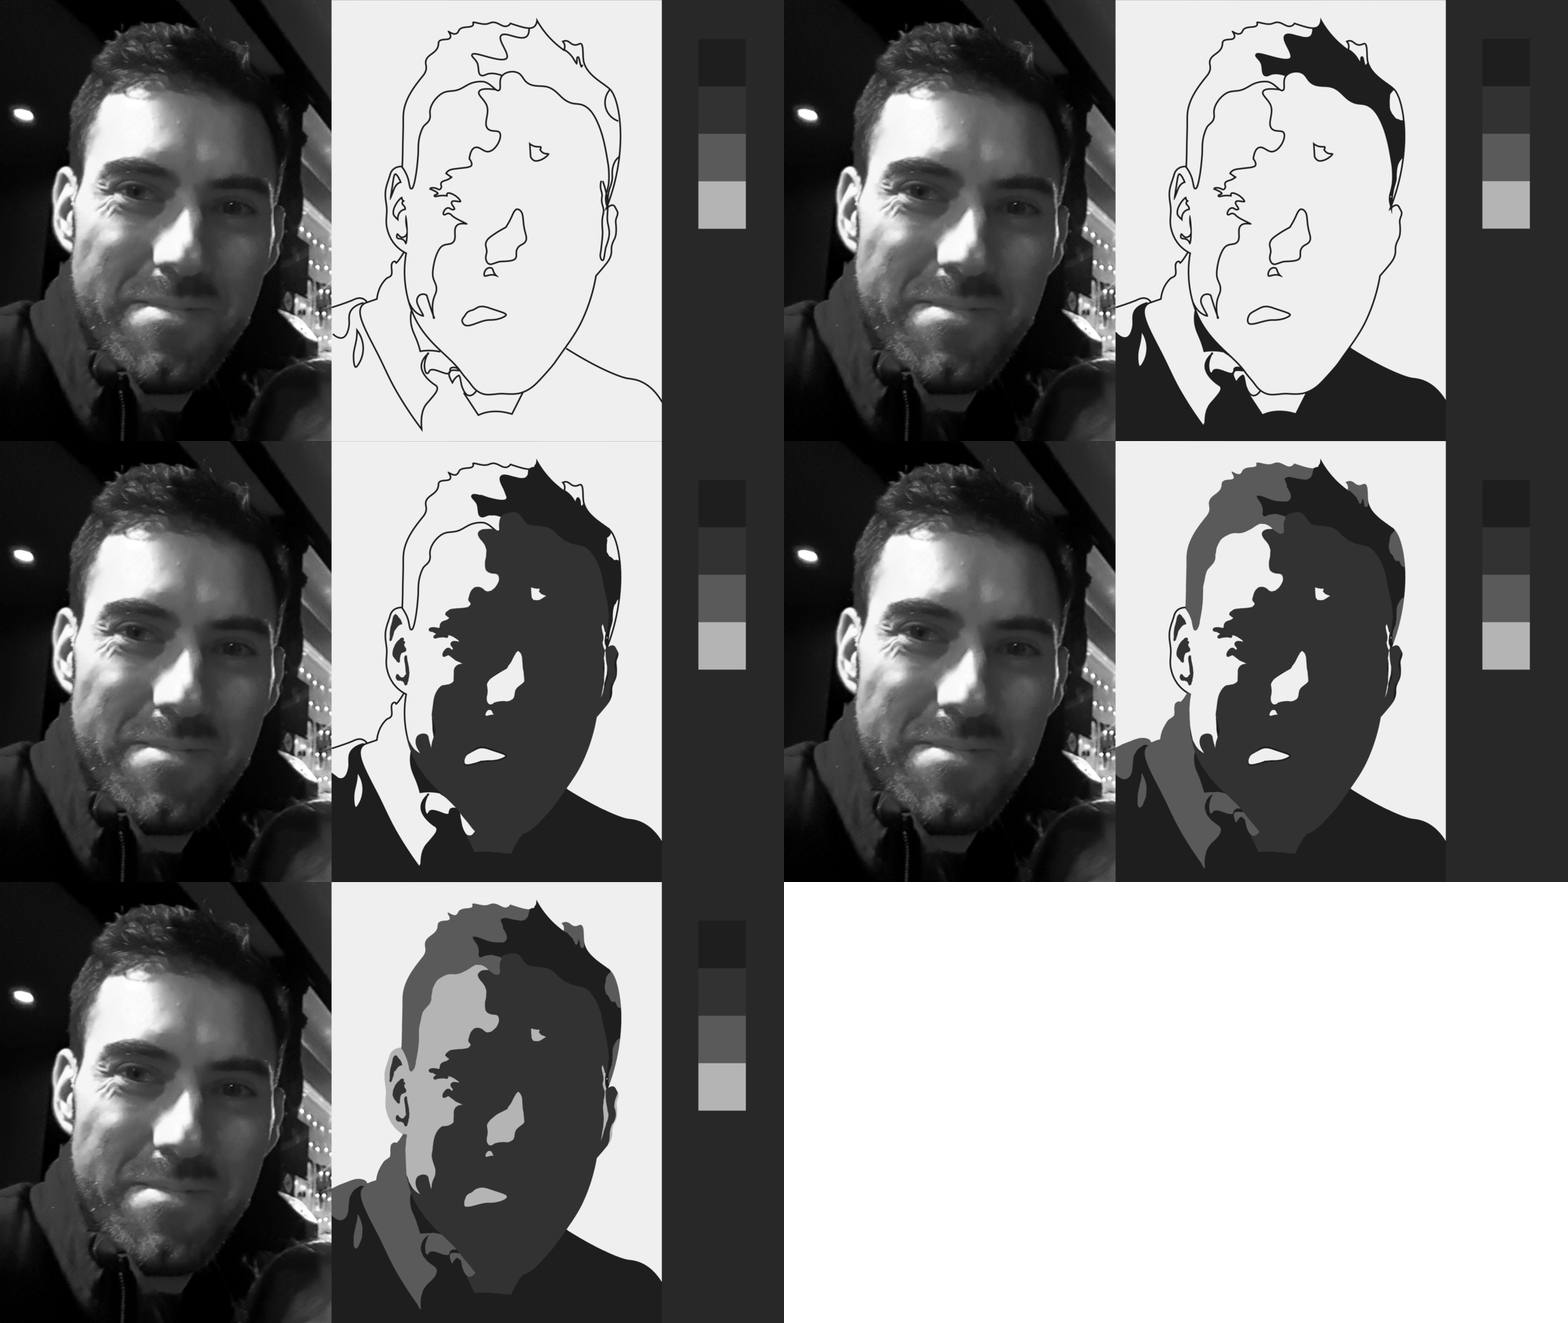
Assign the lights and shadows to the two lightest values and the two darkest values.
When you're done, check to make sure that all of your shadows are one of the two darkest values and all of your lights are one of the two lightest values.
Remember, we're not just copying what we're seeing. We are making value assessments based on whether something is a light or a shadow. Yes, there is a difference, and yes, it does result in different paintings. If one of your lights has a shadow value, then you did not follow the process correctly.
Grayscale Portrait Step 3: Fill in the Background
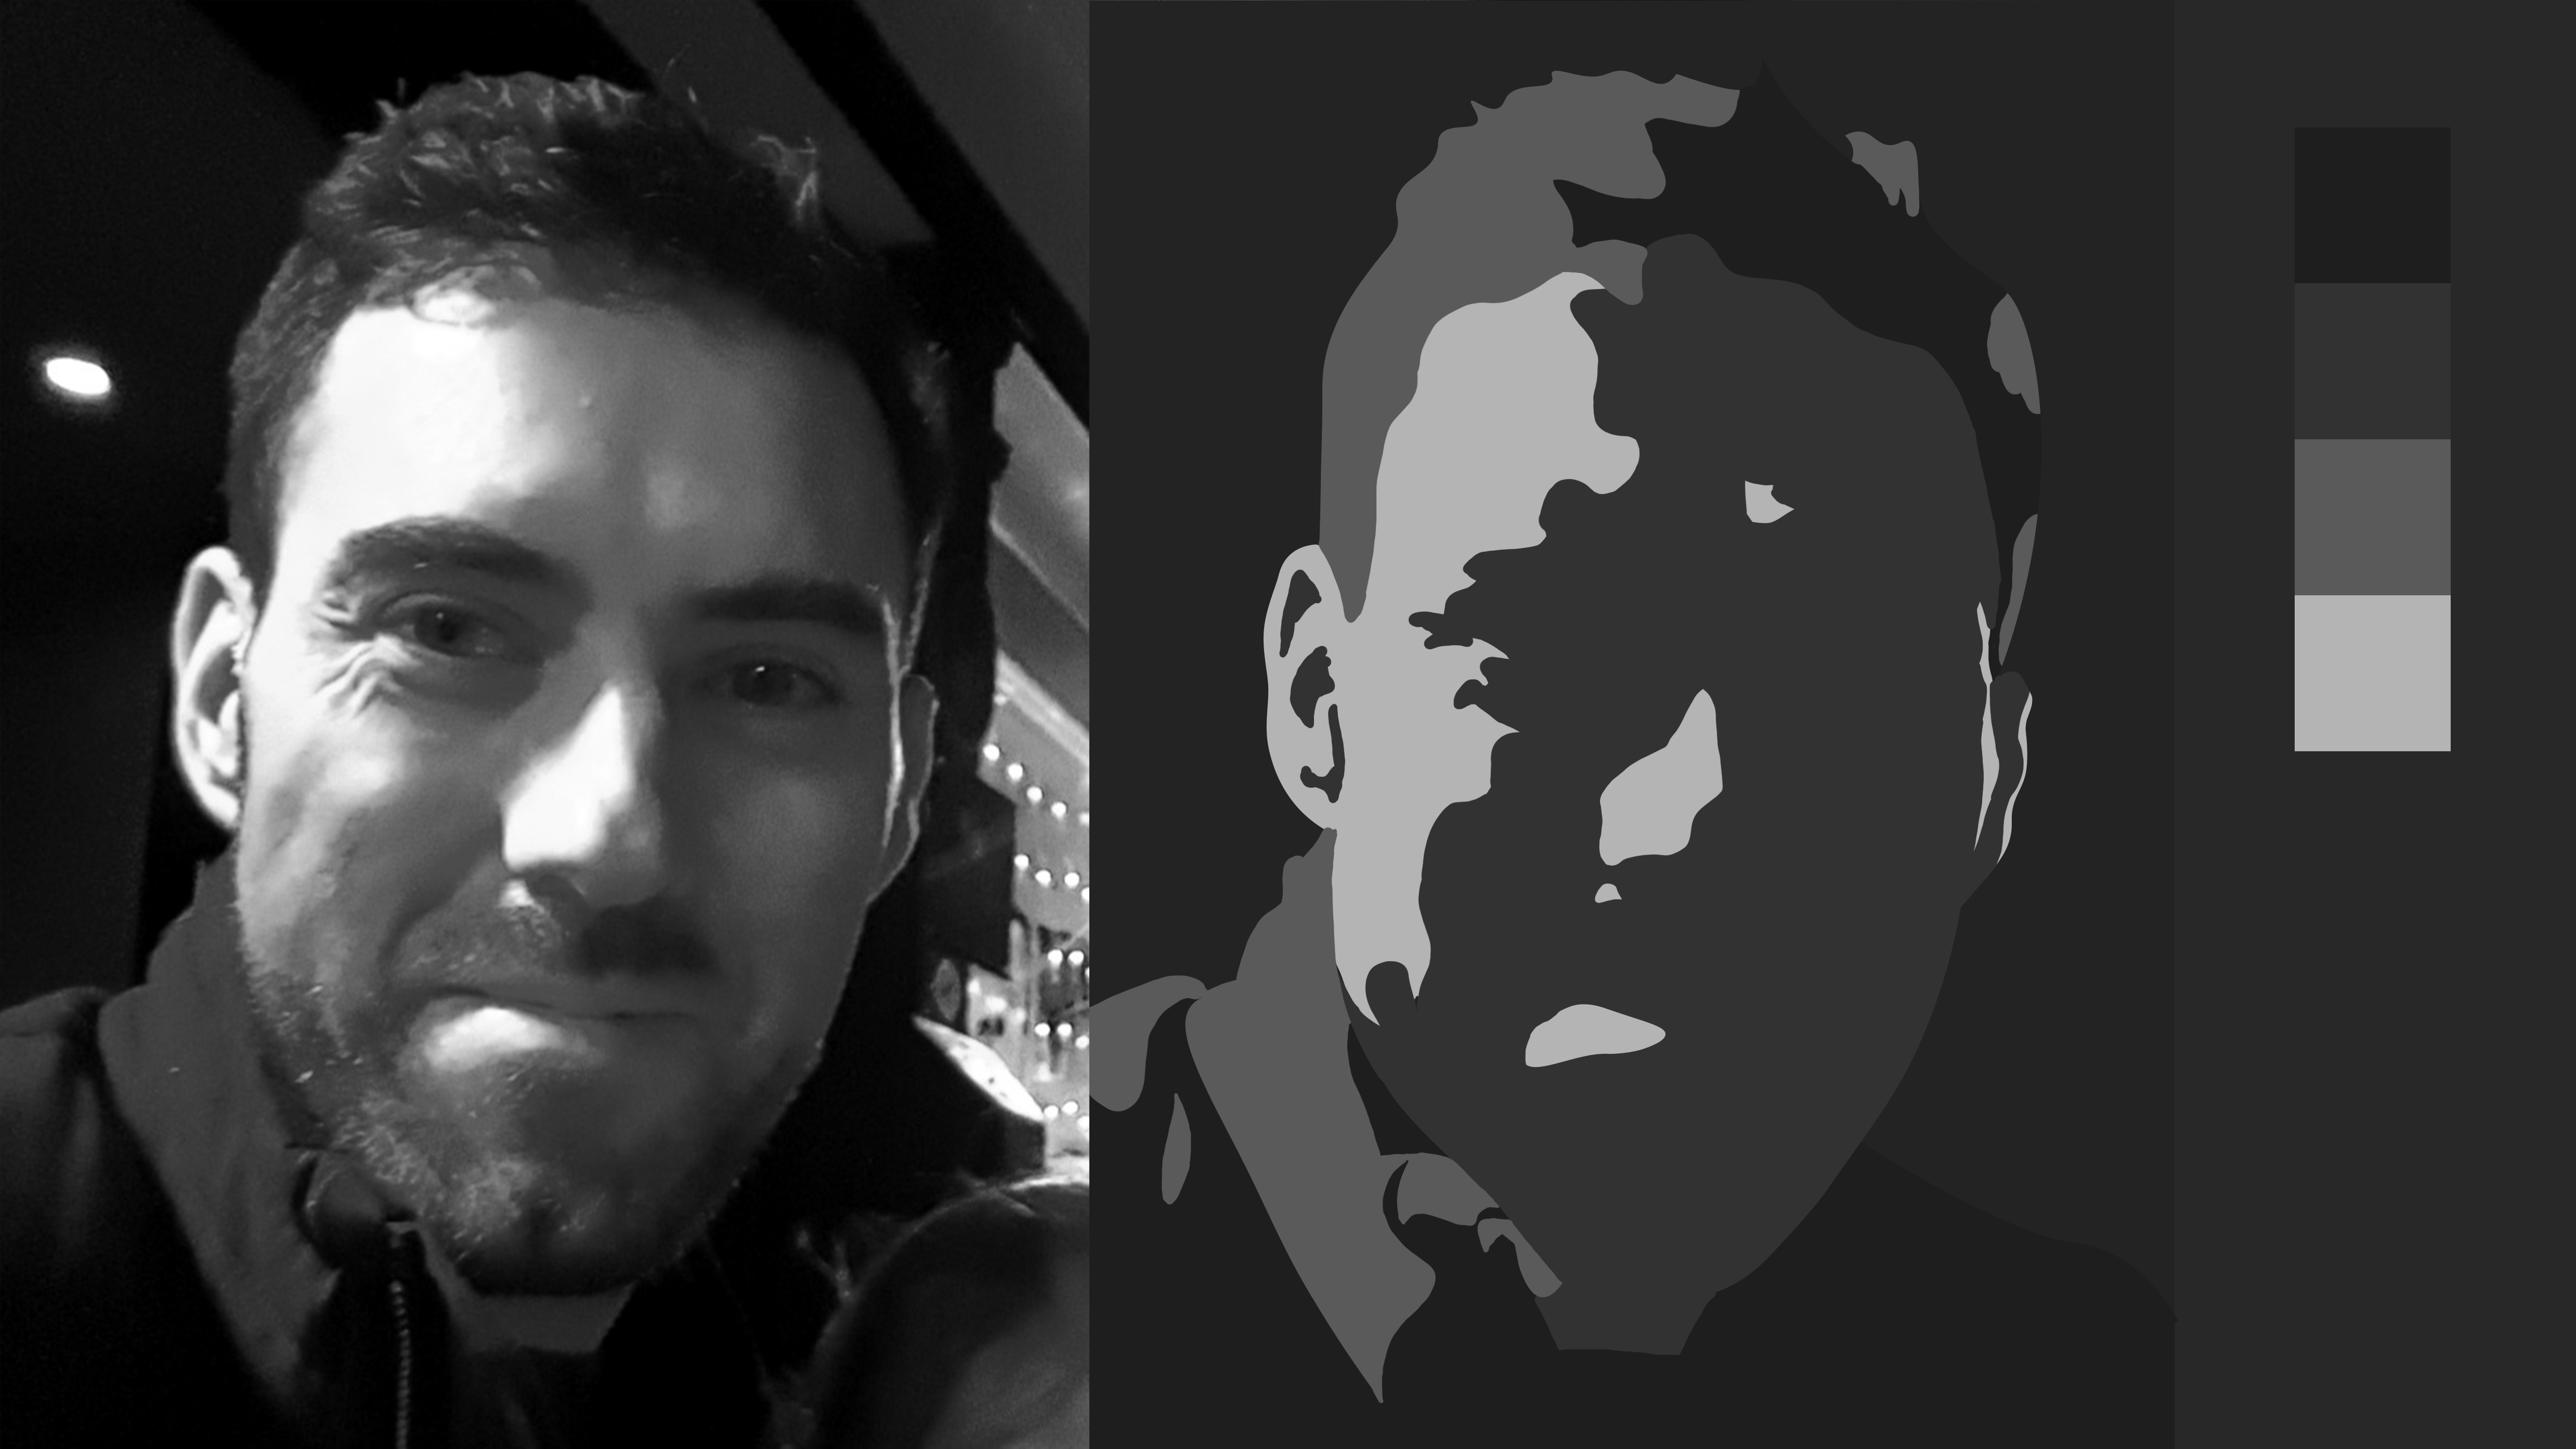
Fill in the background with a mixture between extreme and moderate shadow.
Next, I'll fill in the background with a value mixture between the extreme and moderate shadow. This way, we can see all four of our values for the objects that we're painting, while the background is a slightly different value than the rest of them. You can make this mixture by mixing in your darkest value with your second darkest value, the extreme shadow, and the moderate shadow.
Grayscale Portrait Step 4: Create Gradients for Form Shadows
Everything is now in its proper place to take this portrait to a whole other dimension. This is the fun part. Now that I have my values right, we can focus on our edges (Read more about values and edges).
Adding gradients where there are form shadows adds dimension to your grayscale portrait.
Look at how three-dimensional the portrait is. All I did was create gradients where there are form shadows. And where there are cast shadows, I left my edges sharp. Read more about edges to learn more about form and cast shadows, how to see them for yourself, and why we give form shadows gradients and cast shadows sharp edges.
Look at how strong this grayscale portrait is now. There are no eyes, no eyebrows, no details at all. But you could put this in a gallery and people would be staring at it from across the room because the impression of reality is so strong. You can learn more about how to create depth and volume in your art by watching the free mini course HERE.
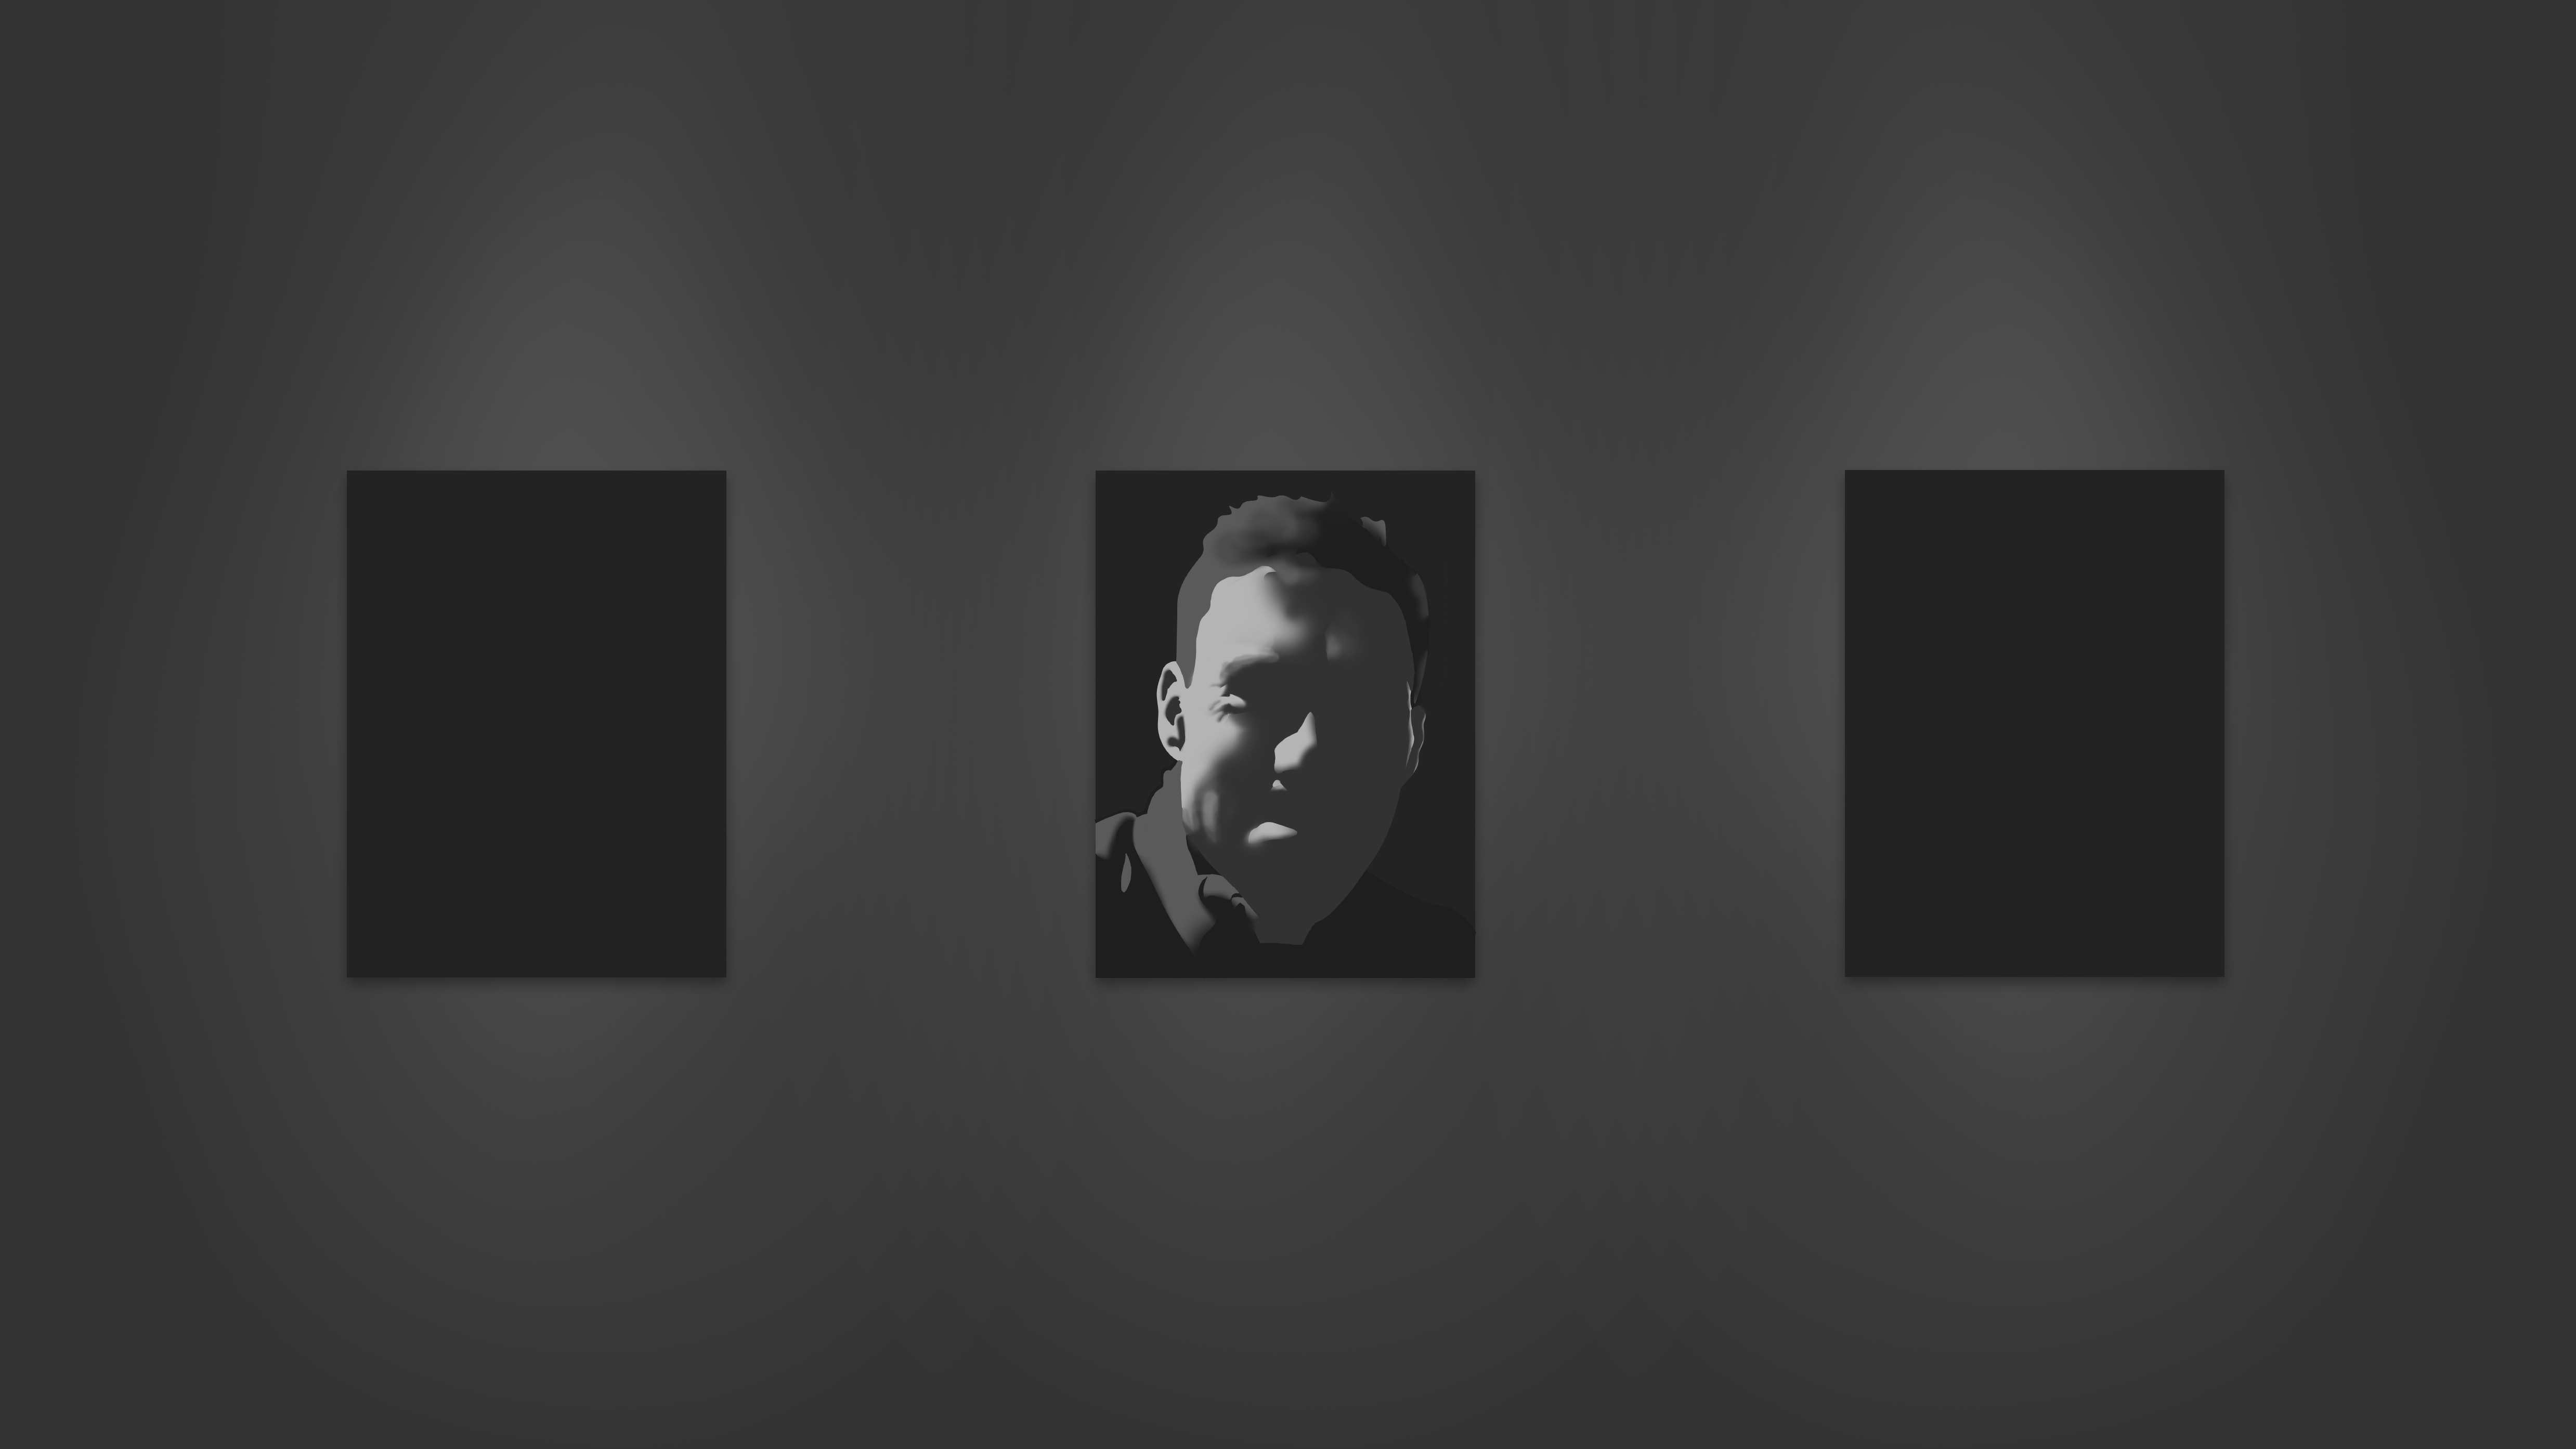
Just from adding the edges to your values, your grayscale portrait will have the impression of reality.
If you're trying this out for the first time, this is where I would recommend that you stop. If you got this far, take the victory and celebrate with your friends. You just took an entire portrait and simplified it down into just four values and then made some gradients in the areas where you knew there was a form shadow to create this incredible impression of three dimensions and a likeness. Well done!
Grayscale Portrait Step 5: Add Reflections and Highlights
However, we can take this further, and I'm going to show you how. In Block 1 of the Evolve Artist Program, we introduce highlights and reflections to our students. To create them, we mix what we call “admixtures.” These admixtures are three values that go right in between the four main values.
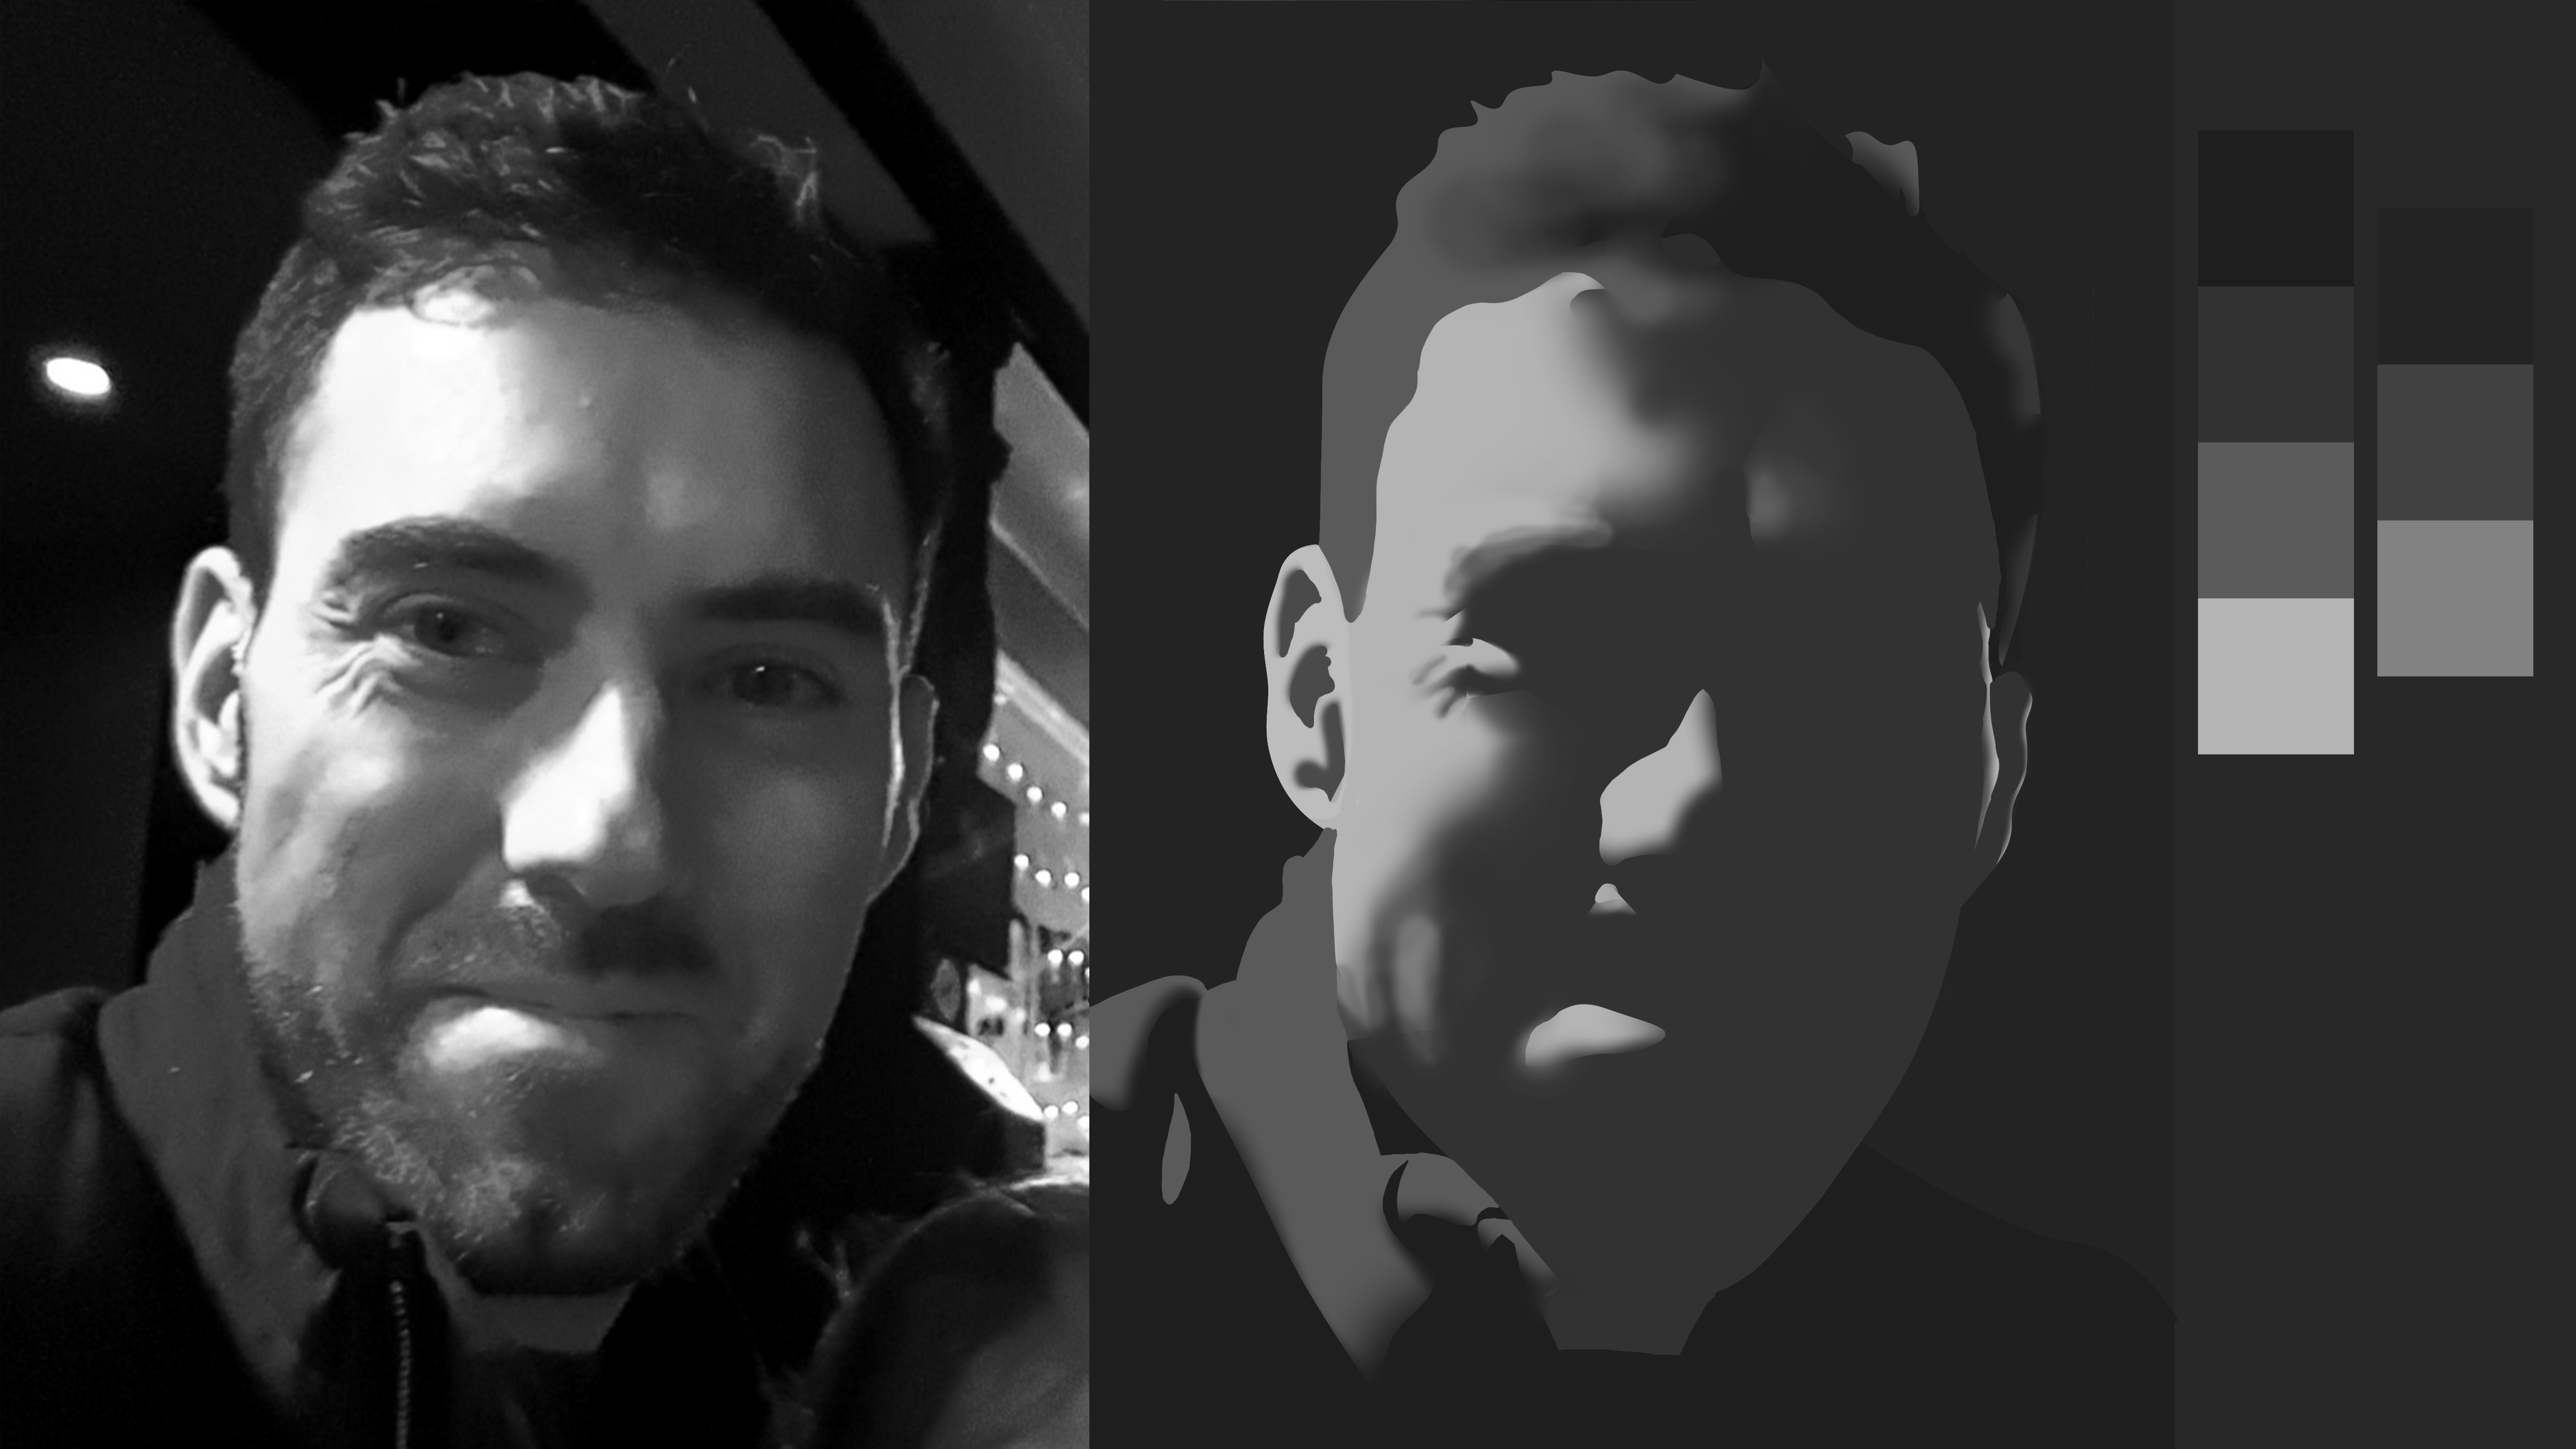
Admixtures, the values that go in between the main values, can be used to create highlights and reflections in your grayscale portrait.
The rule here is that you can go half a step up or down for each of the four values. So I'll do that with just the face here.
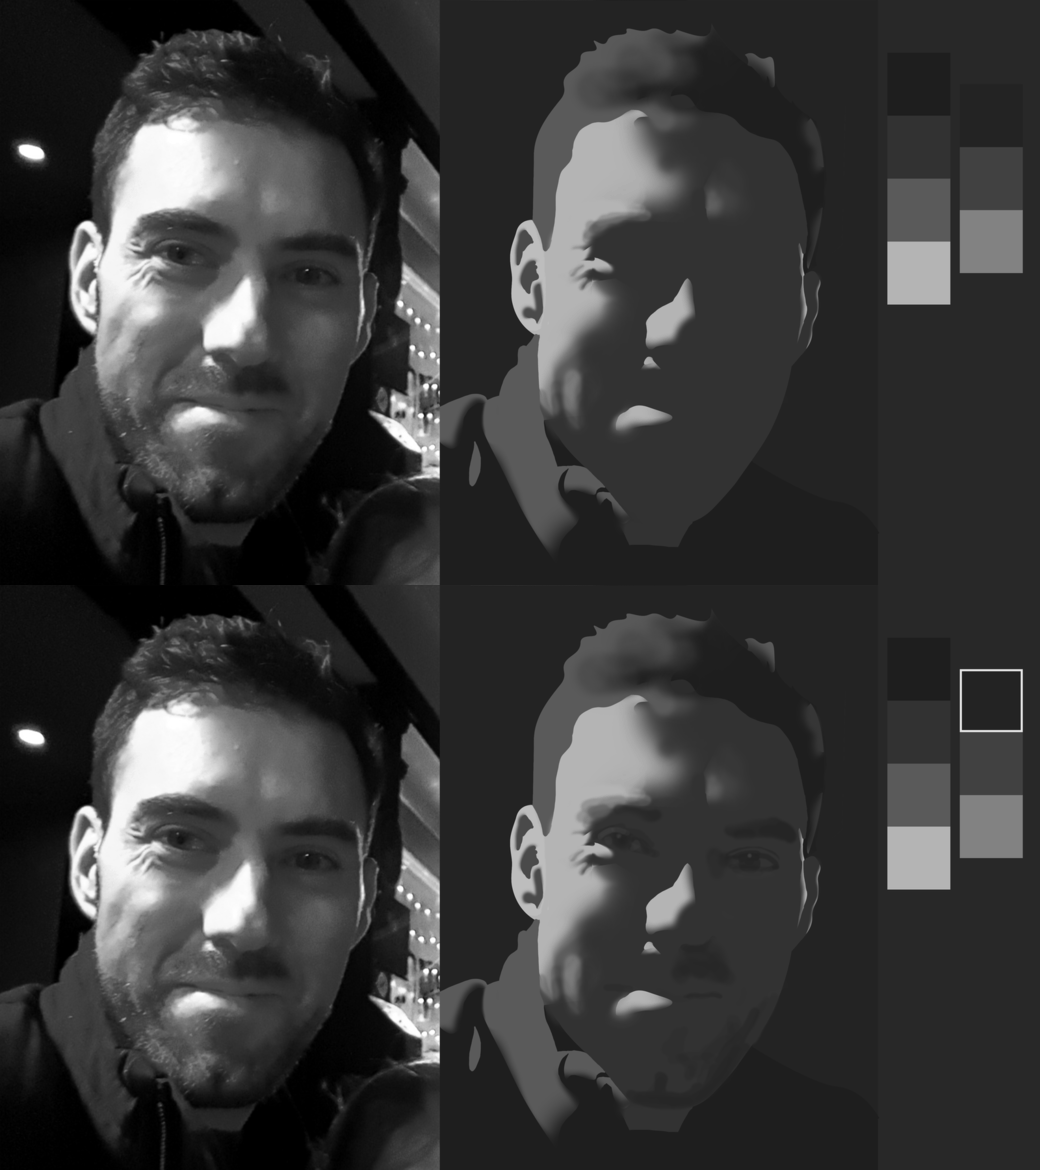
You can use the admixture that is a half step down from the moderate shadow to add darker details in the face of your grayscale portrait.
First, I'll go half a step down from my moderate shadow to get these darker areas in, and then I can go half a step up from my moderate shadow and get a whole lot more information in there.
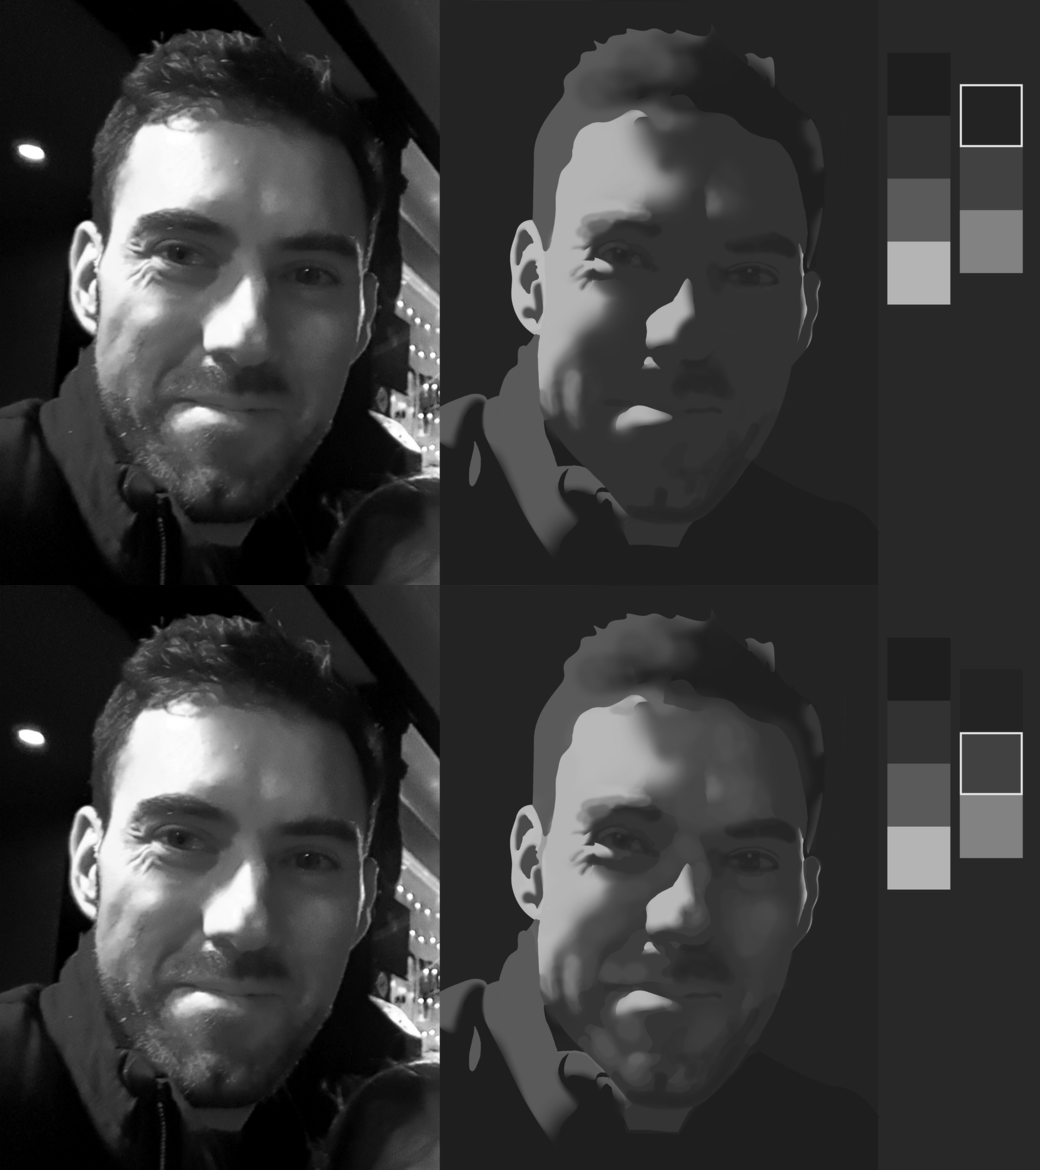
A value that is half step up from the moderate shadow can be used to add lighter details to the face.
Now, for my moderate light in the hair, I can do the same.
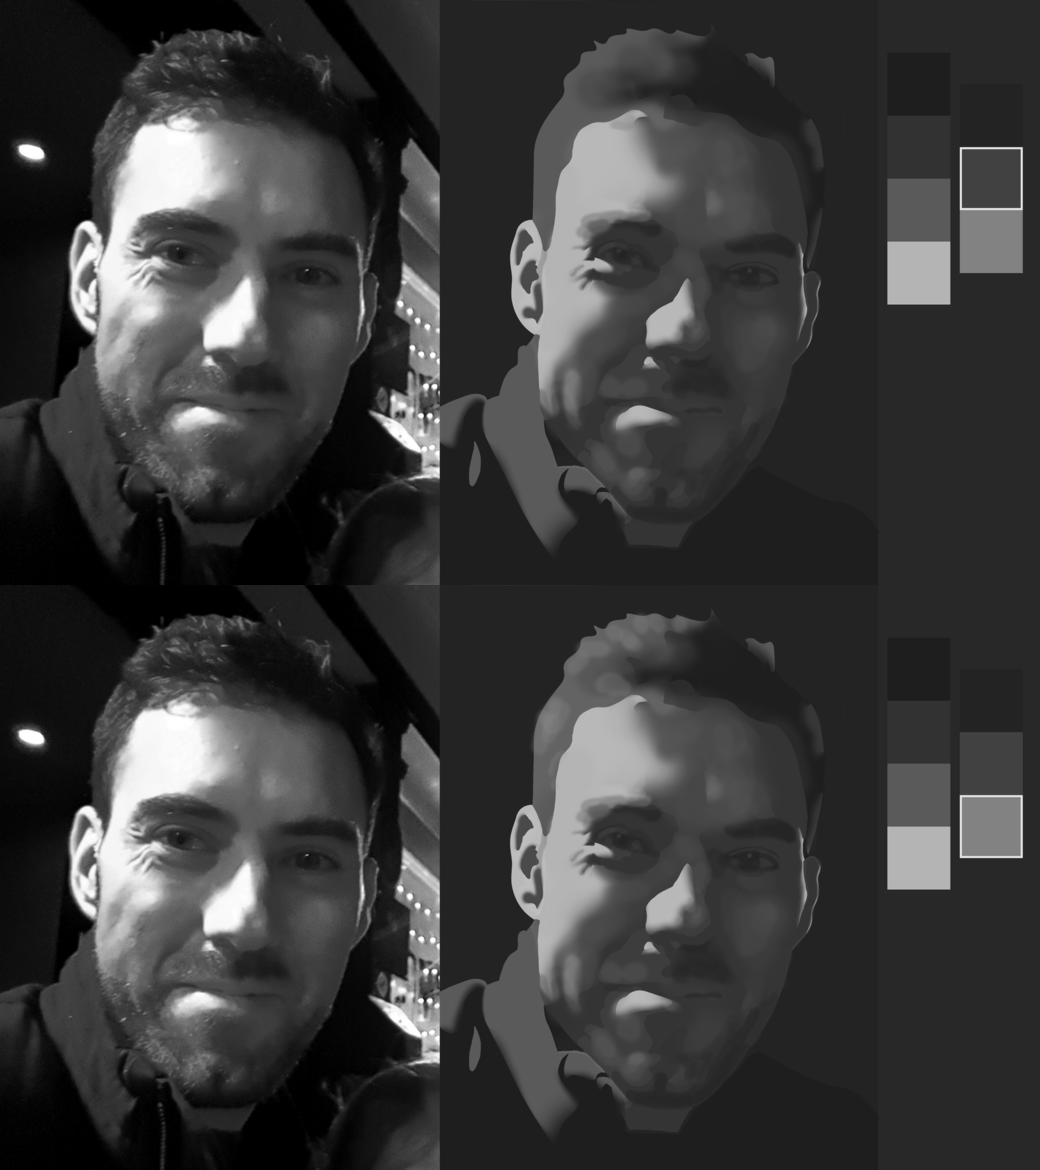
To add the highlights in the hair, use an admixture value that is a half step up from moderate light.
I went half a step up to get these highlights in the hair. Then with my extreme light in the face… I can't go a half step up because the extreme light is my lightest value…
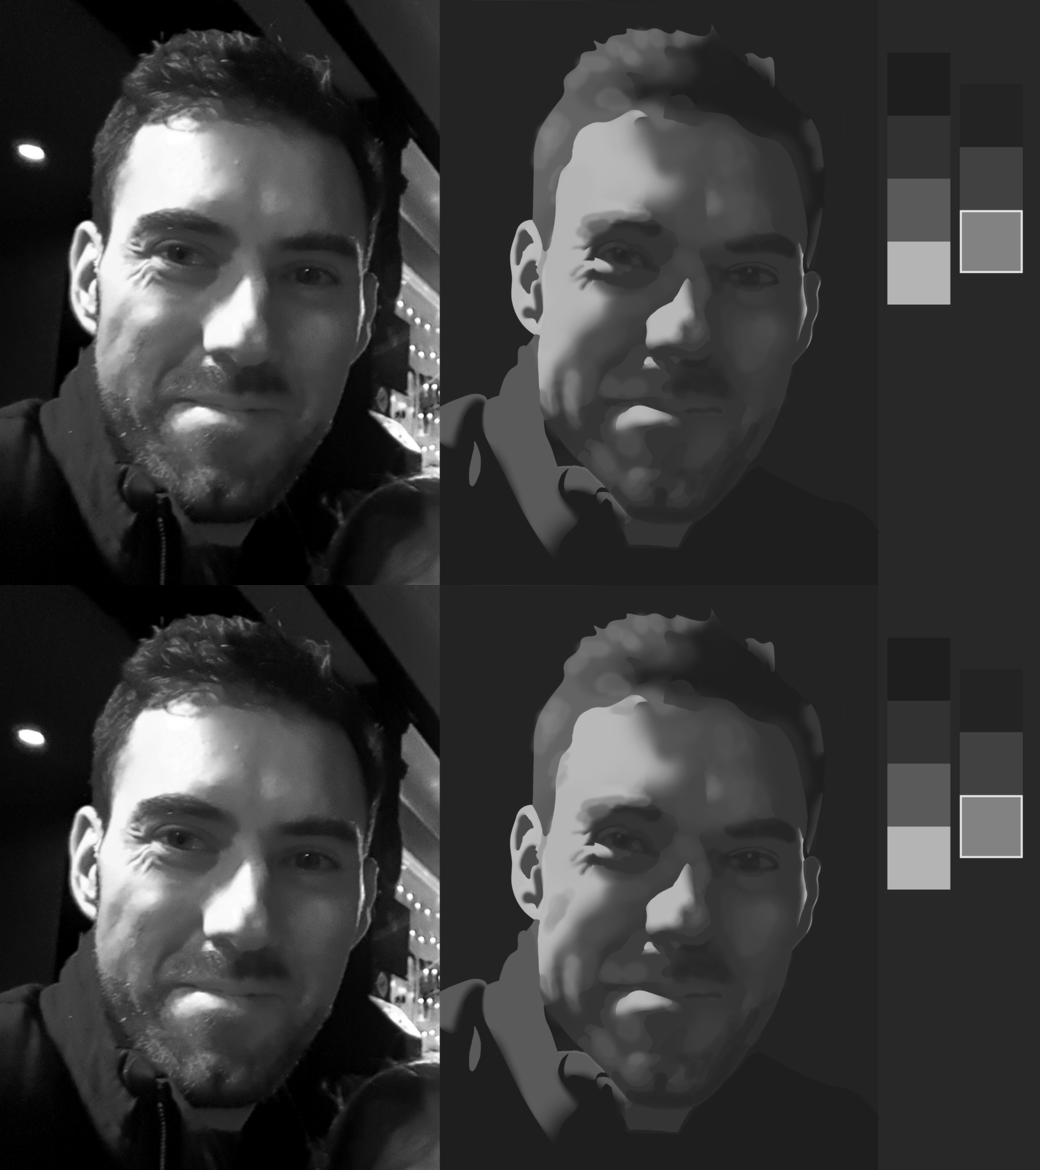
To capture shifts in value from extreme light, go a half step down in value.
…but I can go a half step down to capture some subtle value shifts in the cheek.
Grayscale Portrait Step 6: Check Your Values
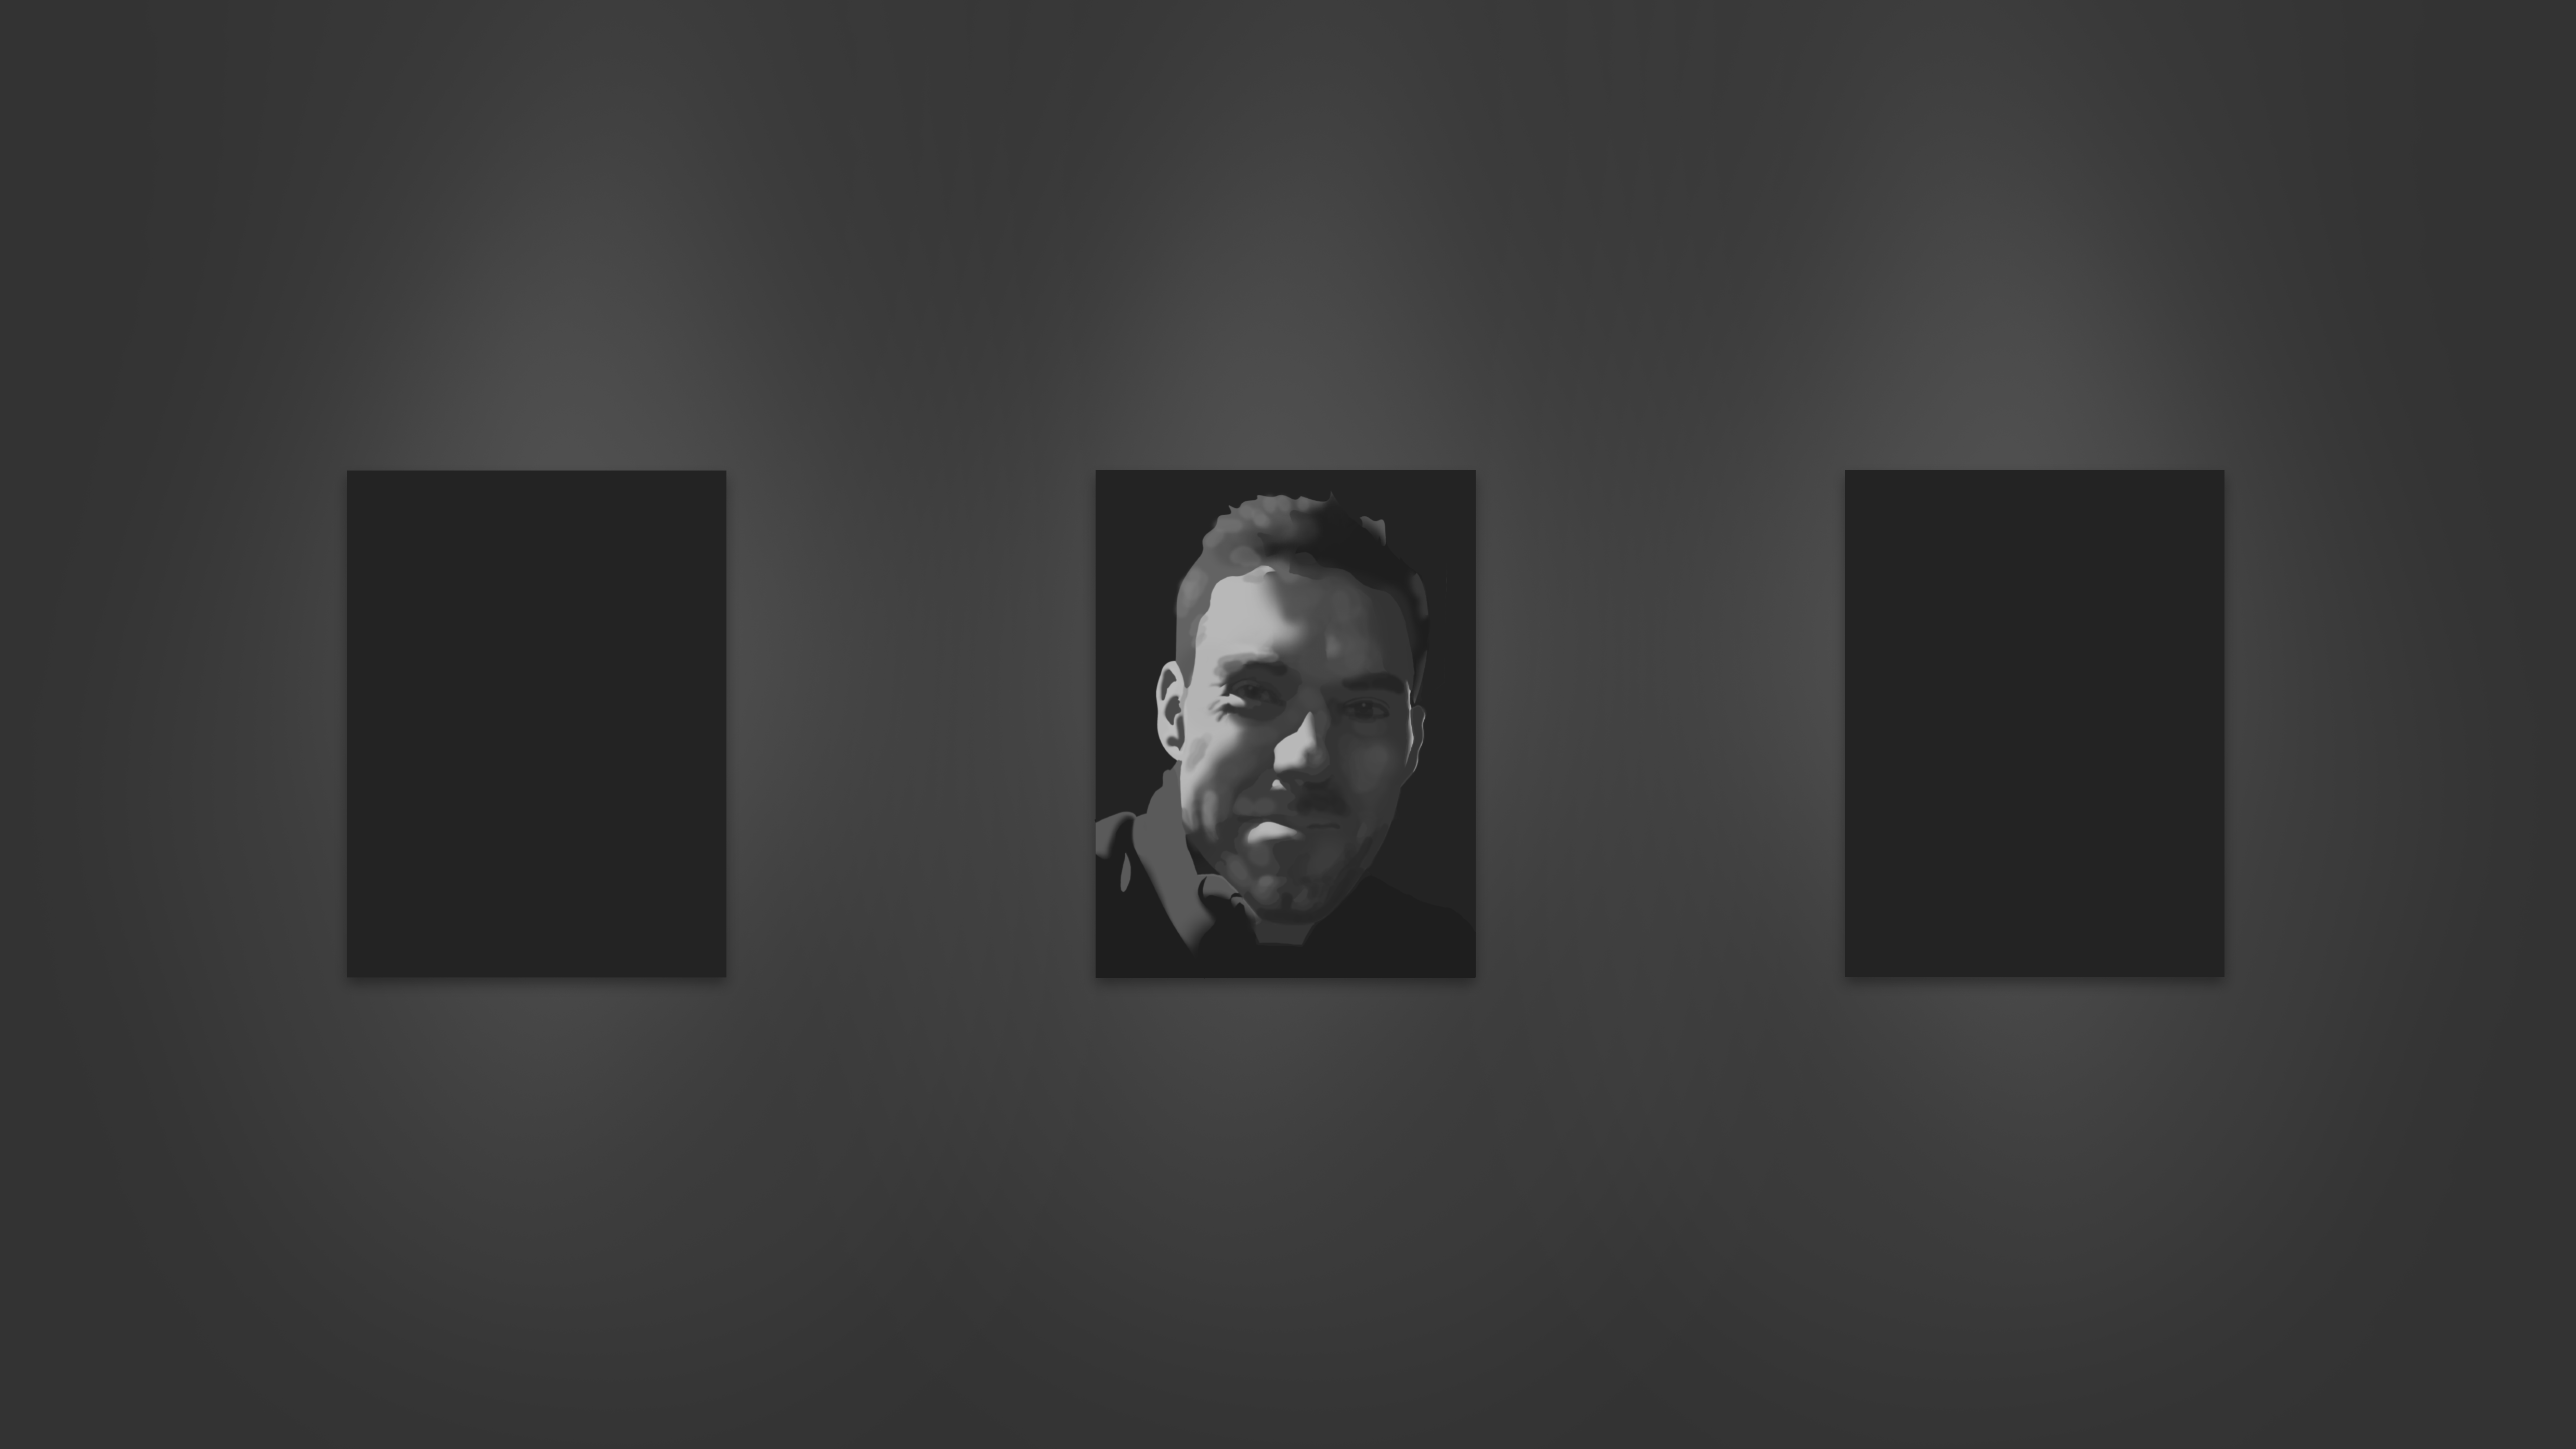
Even from a distance, the power of the correct use of a value scale can capture the original impression of light in a grayscale portrait.
Notice how careful I have been to stick with the process and stay within the limits of the 4-value scale. I refused to let any areas in my shadows have light values and refused to let any areas in my lights have shadow values.
When we go back to that gallery view, we can see how that original impression of light remains so strong. That's what we want. That's what we're aiming for.
Trying it Yourself
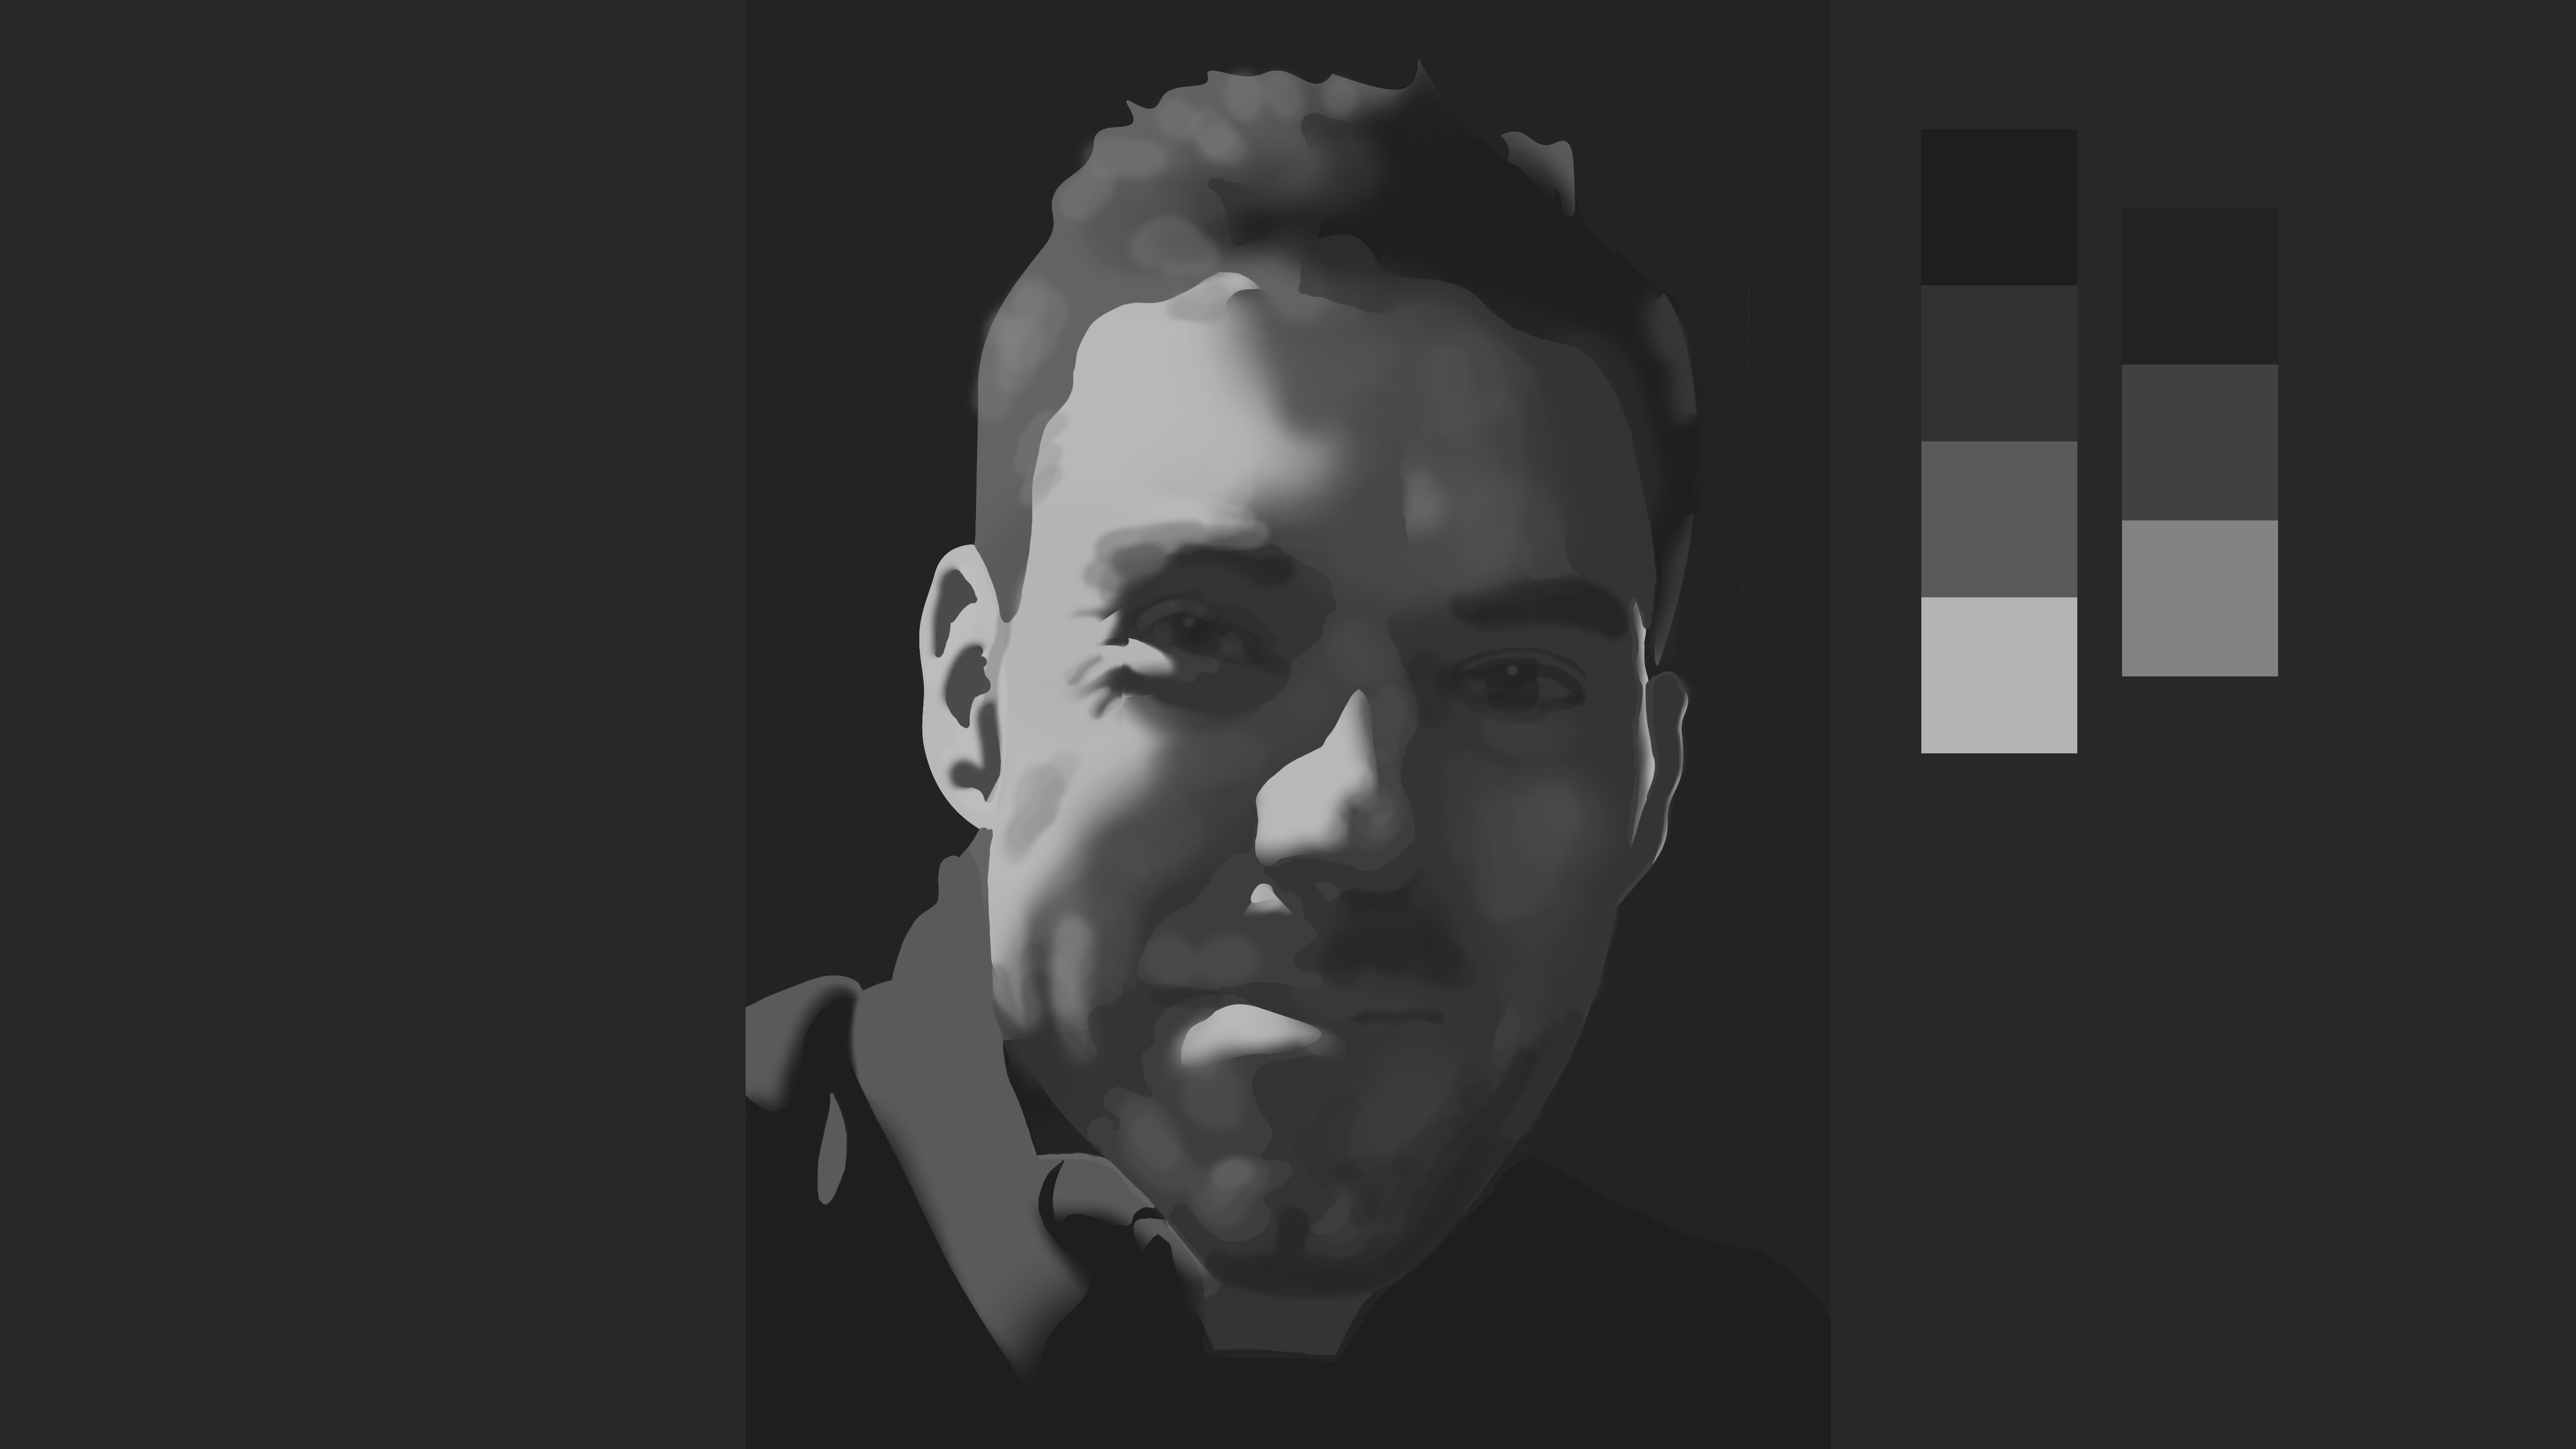
Evolve Artist’s simple method results in a grayscale portrait that captures the likeness of a person clearly.
Now there's a lot more that I could do with this portrait. For example, I haven't taken down any of my edges except for those form shadow gradients. But this should give you an idea of just how powerful this process is and just how simple it is.
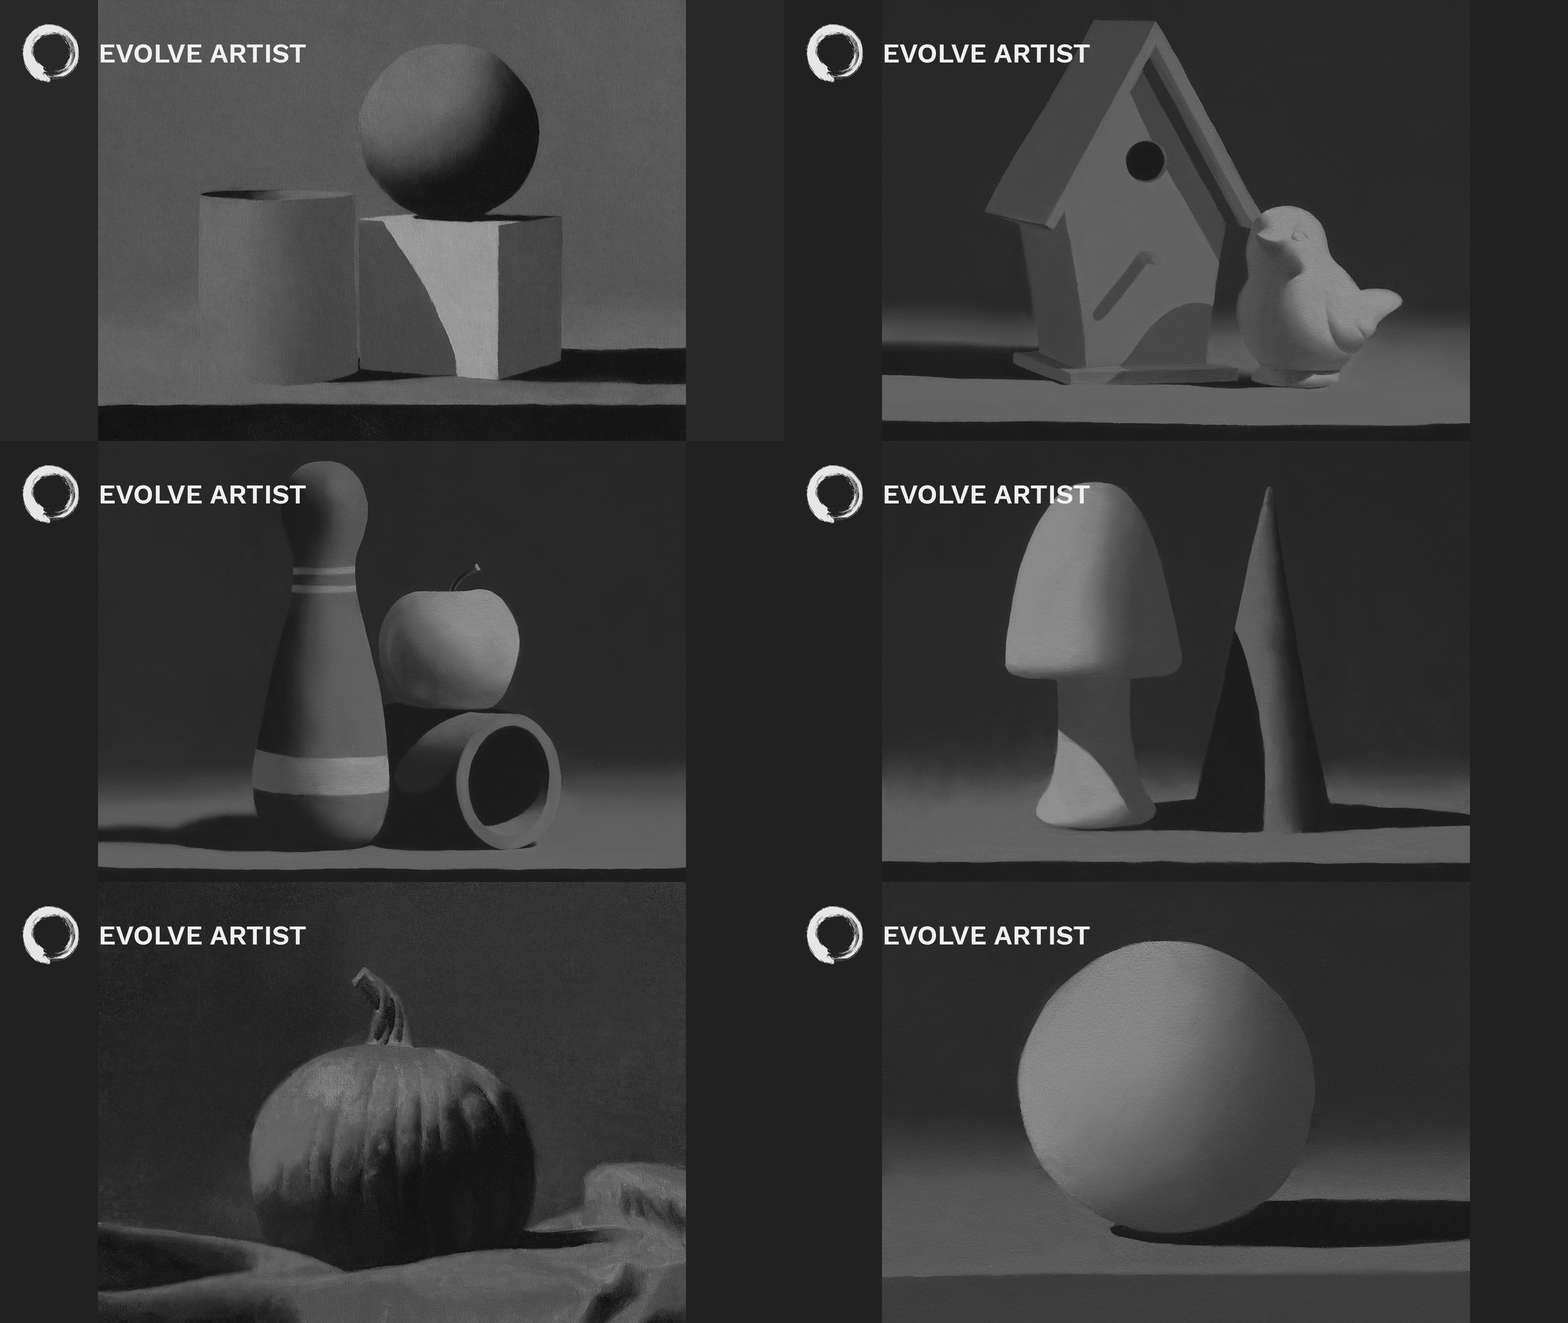
Here is a collection of students’ paintings using the simple method Evolve Artist uses to paint in grayscale.
It’s important to keep in mind that we don't throw our students into making portraits immediately. We start off with simple objects. If you want to try this yourself, then I strongly recommend that first you use a ball and a can with a strong direct light source.
Keep the objects simple first, and then increase the complexity from there. If you can't take a ball and a can and assign it four values with precise accuracy, then you won’t be able to take a portrait and simplify it down into only four values.
Painting Critique
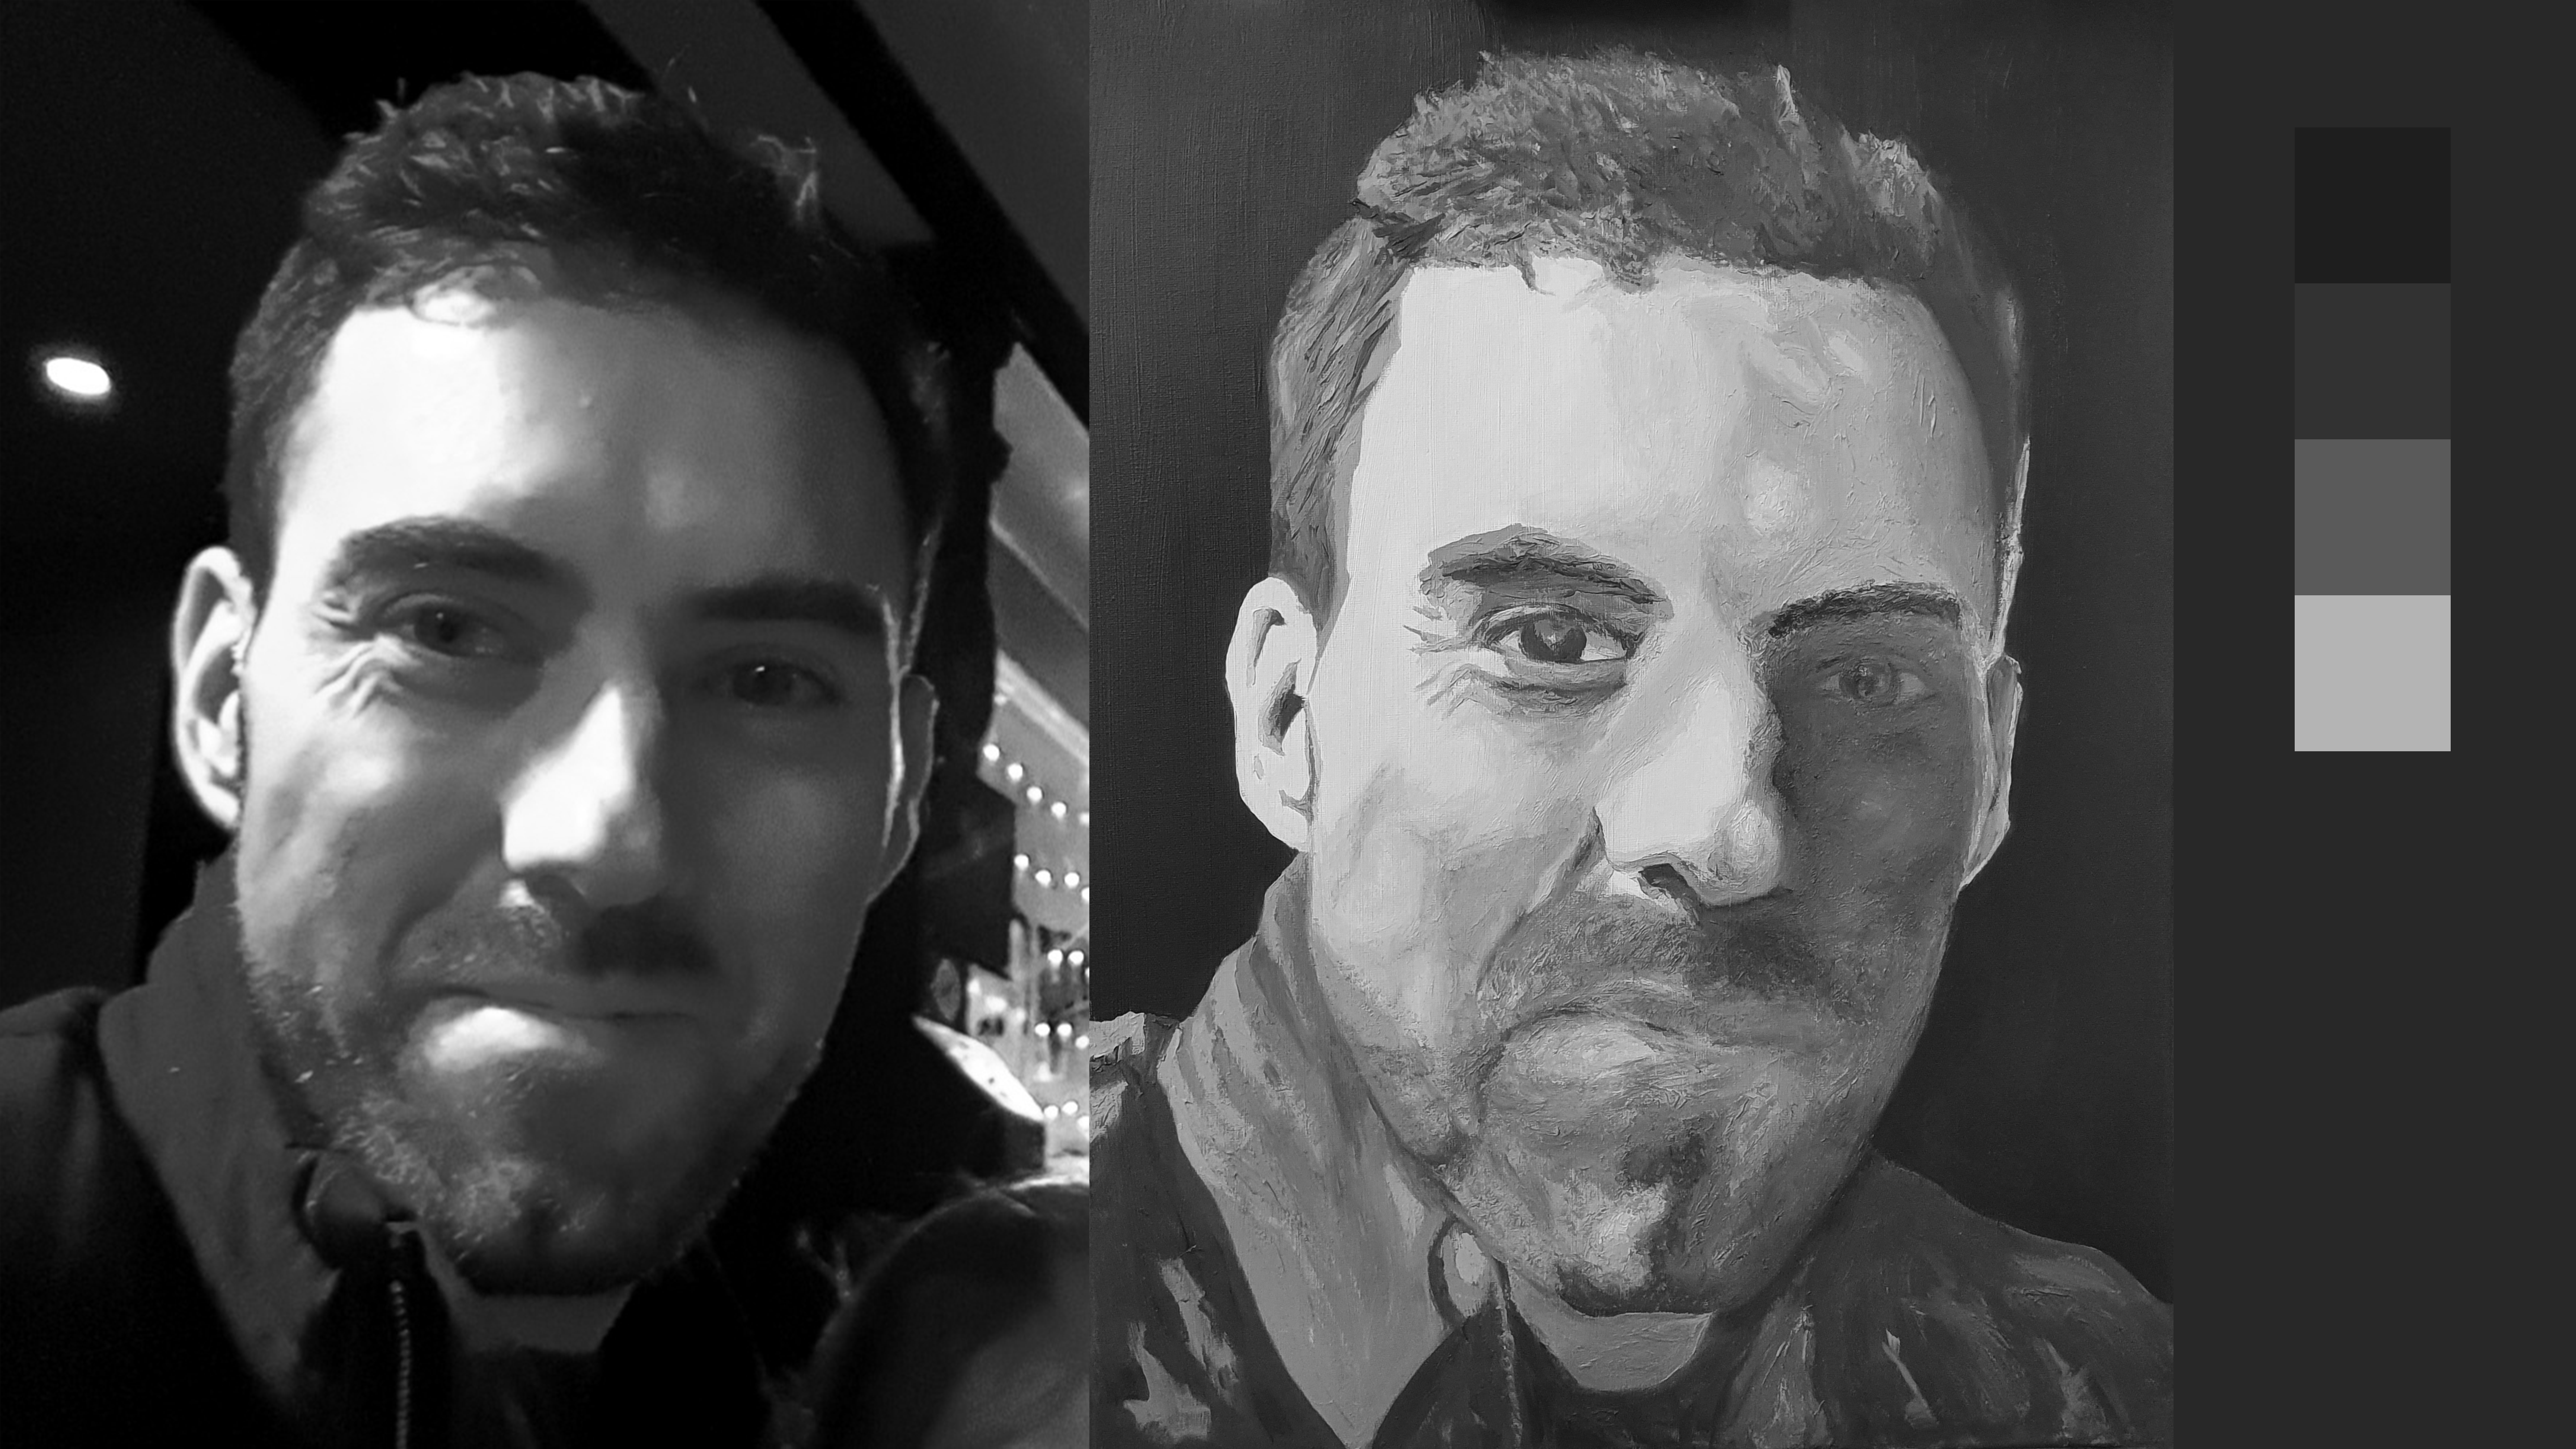
Special thanks to Andrew Donelan for sharing his portrait with us for this open art critique!
We want to say a special thanks to Andrew Donelan for sharing his portrait with us for this open art critique. I appreciate his attempt at this and that he’s been applying a lot of the knowledge that we're sharing here at Evolve Artist.
I also know that it is often easier to overcomplicate things rather than simplify them. Learning this takes time and practice. But truly, he did a great job with this, all things considered. If he had simply gotten the light and shadow assessment correct from the very beginning, then he would have taken this portrait to a whole different level.
At Evolve Artist, we send the transfer images to our students for each assignment so that they don't get tripped up trying to find the light and shadow for themselves (where Andrew got tripped up). We set you up with a few things at the beginning so that, eventually, students can find the light and shadow for themselves.
So great work, Andrew, especially considering that you didn't have the guided experience part of developing your skill. Hopefully, this critique has given you some of that guidance.
Having a Guide Show You the Way
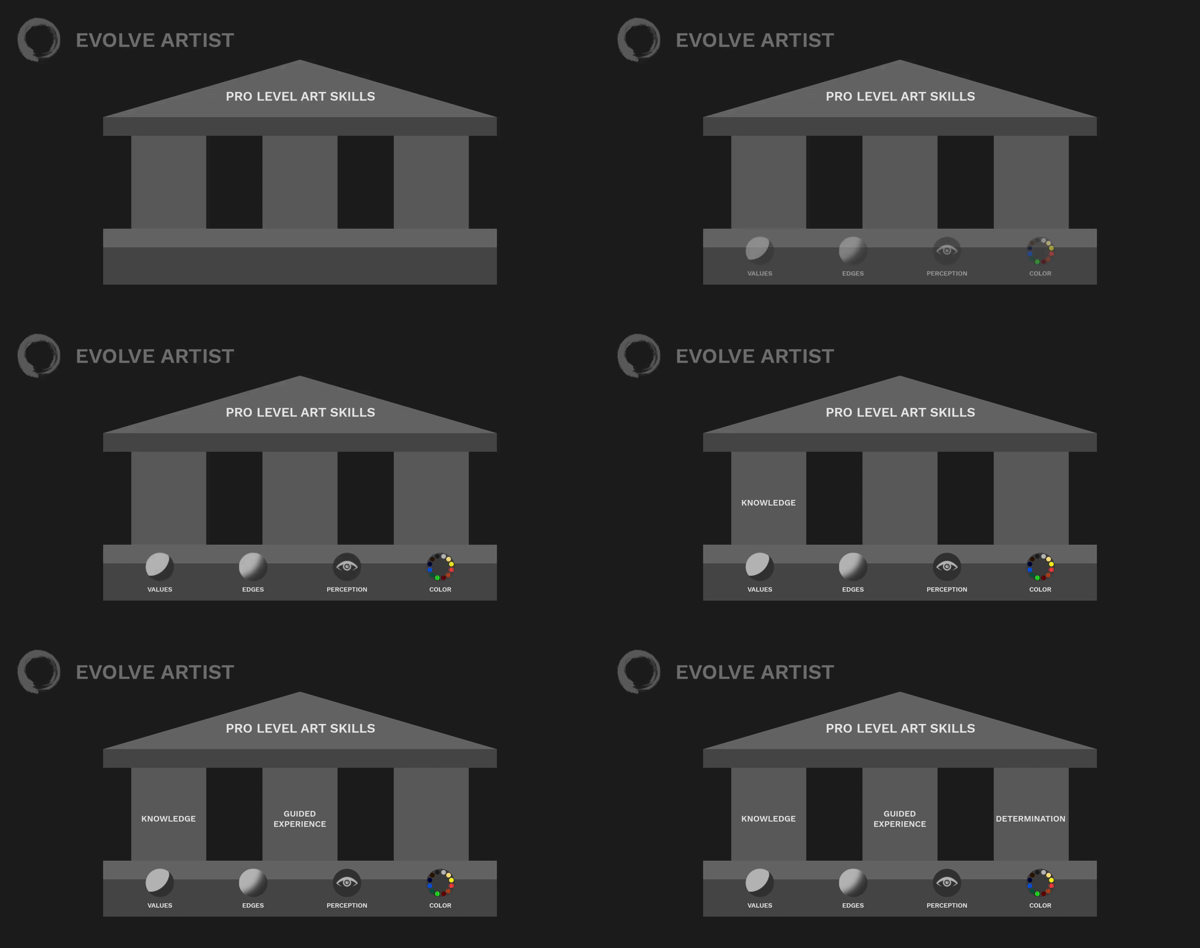
It takes knowledge, guided experience, and determination to reach professional-level art skills.
There are three pillars that you need to reach professional-level art skills. There's knowledge, guided experience, and determination. You can acquire knowledge on your own, and you have to bring your own determination to the easel when you work.
However, without turning that knowledge and determination into experience (and not just any experience, but experience that moves you forward on the right path), you will waste years of your life without the help of the wisdom from the people who've gone before you.
Click HERE to take the Three Things Course to learn more about the three pillars to reach professional-level art skills.
Even the Evolve founder and teacher, Kevin Murphy, who was mostly self-taught, didn't get his breakthrough in art until he had critical guidance and knowledge specific to his work from Dorian Vallejo.
Imagine what it would be like to develop these skills while having access to a full team of instructors, including Kevin Murphy, getting feedback on every single one of your assignments, and being supplied with all the materials that you need so that every step you take on your path is a big leap forward to making incredible art. That's what we do at Evolve Artist.
In the beginning, we keep it simple. We create our own reference images with a single clear light source and we send those to our students so that it's just so much easier and the results are just that much better.
Resources
If you want to read more about the Fundamentals of Art, click HERE to read about values, HERE to read about edges, HERE to read about perception, and HERE to read about painting with color.
Or, take it a step further by watching Evolve’s free mini course to get you started in Oil Painting for Beginners. If you’re ready to start your journey with Evolve Artist towards making pro-level art, join HERE.
I hope this was helpful to you and I wish you all happy, happy painting.
