Master Portraitist Kevin Murphy has dedicated much of his life to finding the quickest method to level up painting skills. Learn the fastest way to improve your portrait painting skills.
Learning Quickly With Small Steps
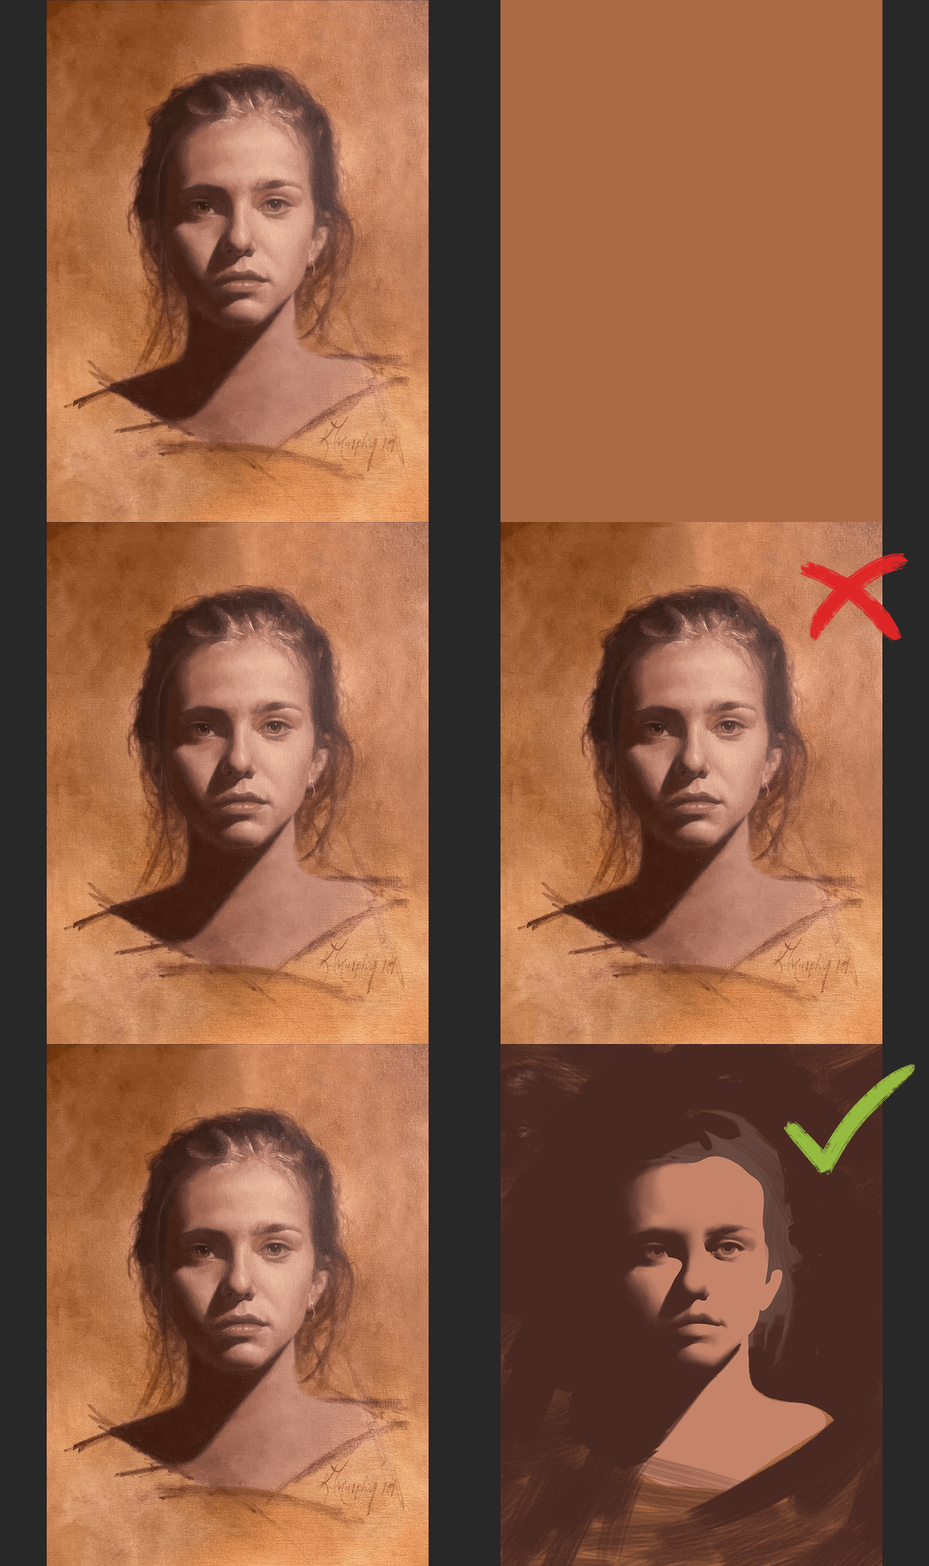
Don't try to make a finished portrait right from the get-go. Start with a step-by-step process.
Many artists think that to make a portrait, we have to be able to do a portrait right from the beginning. But I (Kevin Murphy, Evolve Artist founder and master portraitist) say, don't try to make finished art. Treat the beginning of the process as a series of exercises.
If you want to go out and run a marathon, you don't start by running 26 miles a day. They'll be picking you up off the road. Instead, you go out and run a couple of miles and do that for a few weeks until your body gets used to it. Then, you go from two miles up to five miles and do that for a few weeks until you move up to seven or ten if you're feeling good. There are things you don't just jump into.
Nobody in their right mind would jump from sitting around watching football games and eating potato chips and drinking beer every Sunday to running a 26-mile marathon. That's insane. Yet many will try to jump into painting a portrait completely unprepared, with no idea of how to tackle it. Then they’ll think, "I don't know why I failed. I'm not talented."
If you tried to do a triathlon like that, you'd be like, "Well, I haven't worked out in four years. I know why I only got a quarter of a mile down the road before I stopped." But you wouldn't beat yourself up over it. You would know that you weren’t prepared. That you didn't have enough practice or experience. The same goes with art. Nobody's born able to do this. These skills are earned and you earn them in small increments.
Start with the Structure
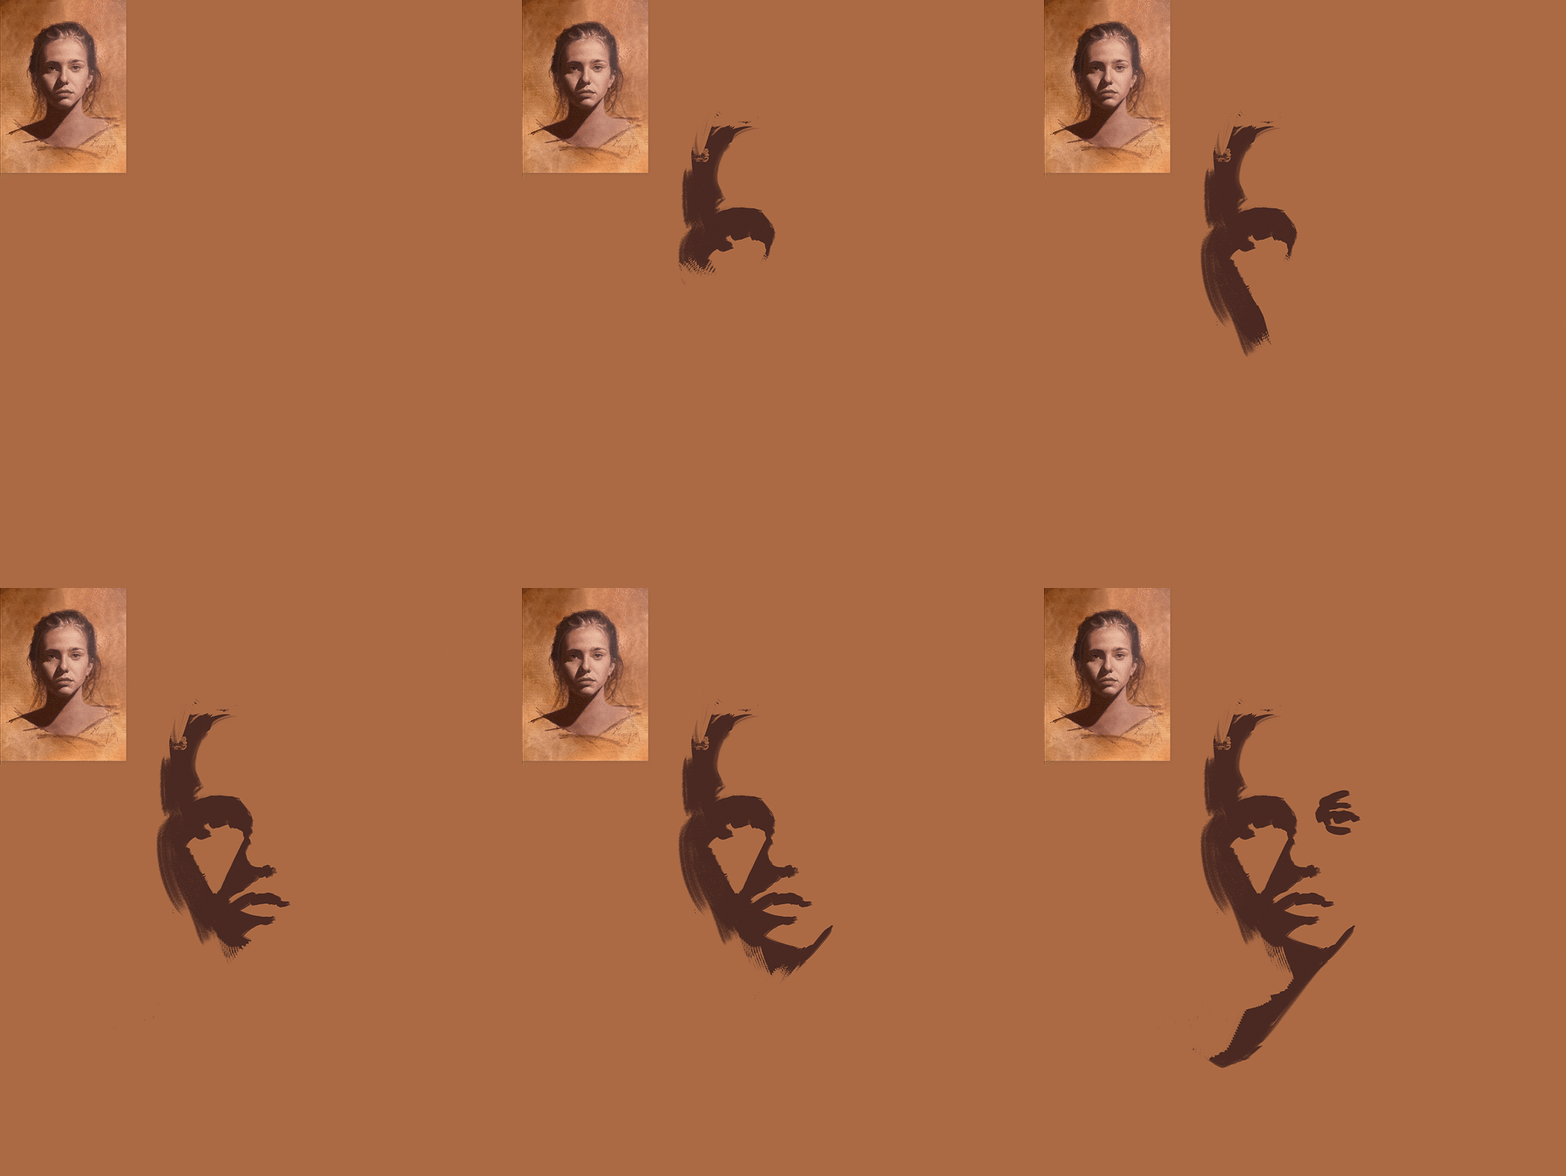
Start portraits by carefully painting the contour of the head using one shadow shade.
So, let's say we’re starting a portrait with the contour. Starting from the top of the head, down the nose and across the lips, you may have about 10 to 12 directional shifts. If you took ten minutes for each shift, that gives you a lot of time to figure out each mark for each shift. If you had 10 directional shifts, that would add up to 100 minutes or ten minutes more than an hour and a half.
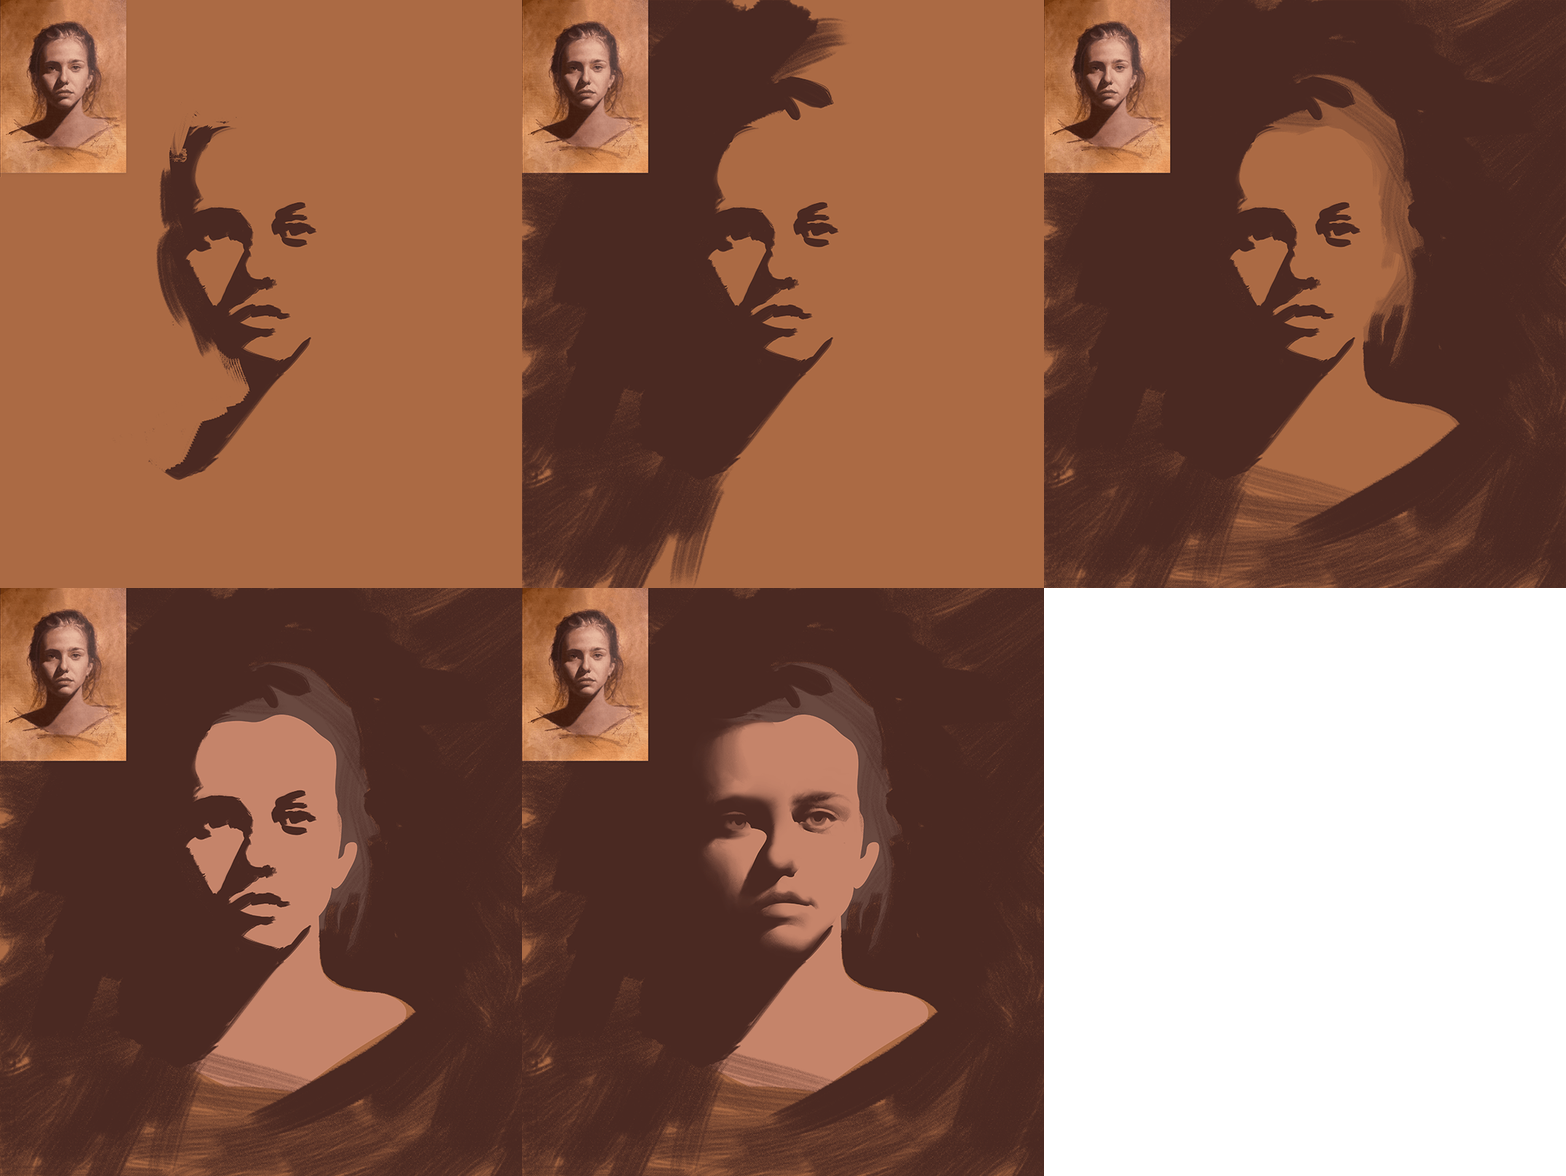
After you've got your shadows, block in the light and made gradients. The structure of the head will be in place.
Now, all you'd have to do is block in the light on the other side of the face, and you would have the structure of the head in place. Add another 15 to 20 minutes to make gradients and now you've got a three-dimensional head, no details necessary.
For a student, I would say stop there. Don't paint eyes, noses, or mouths. Stop there. Take the victory, and come back and do another one like that. You can change the light a little bit, then take your time and perfect that. Focusing on perfecting the structure is the quickest way to improve your portrait painting skills.
You'll find that after a while you can do it with blazing speed because it is simple. You learn what to look for. You learn to not see the details and to ignore them, even though they're screaming out at you.
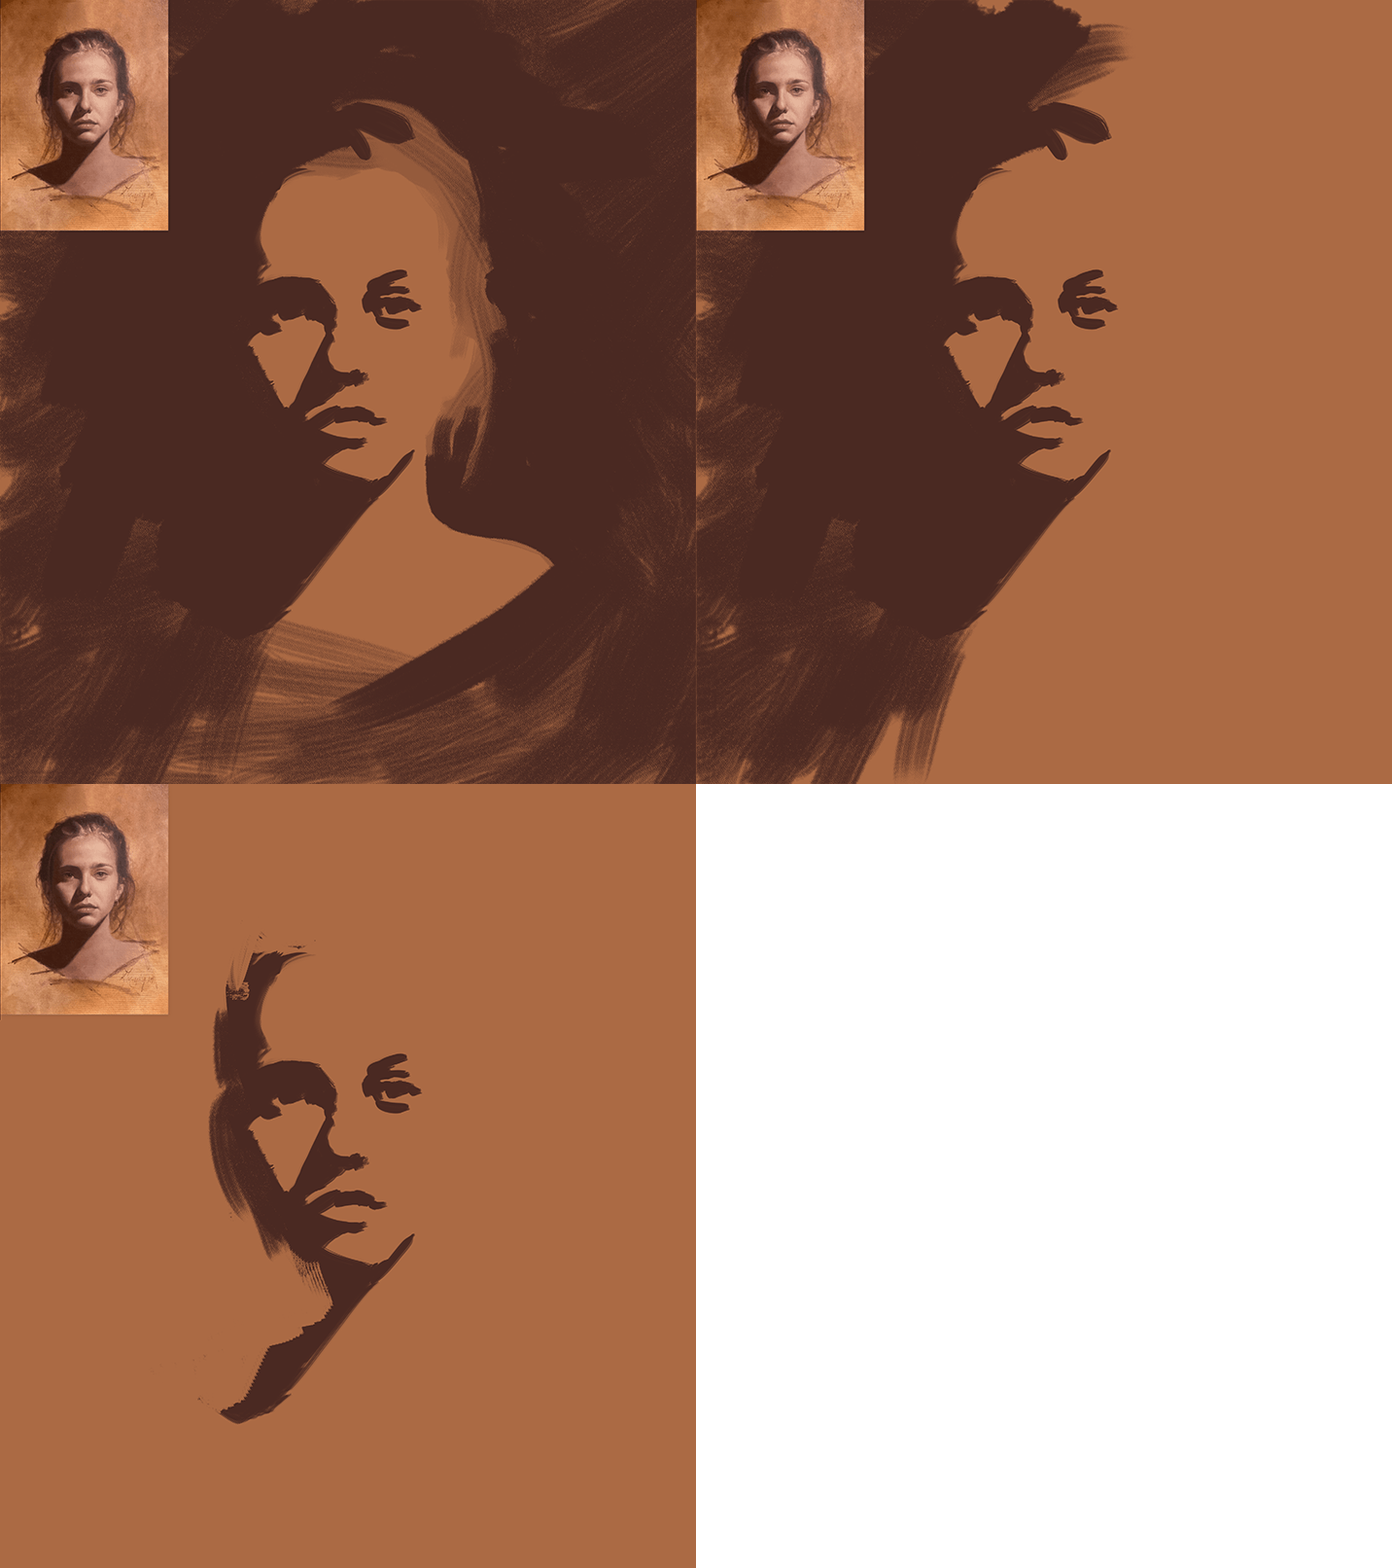
Start with a big brush and one shadow shade to keep it simple.
Start with big brushes and one shadow shade. Then add one light shade. Don't do the lights and the shadows at once. Start with just the shadows and figure out the shape. After that, don't worry about the shadowed side of the face. Establish the edge on the lit side and you can use the same shadow shade to establish your background. Once you do a dozen of those, you'll start to see how simple a portrait is. After that, rendering in the details isn’t that hard.
The Details Aren’t the Hard Part
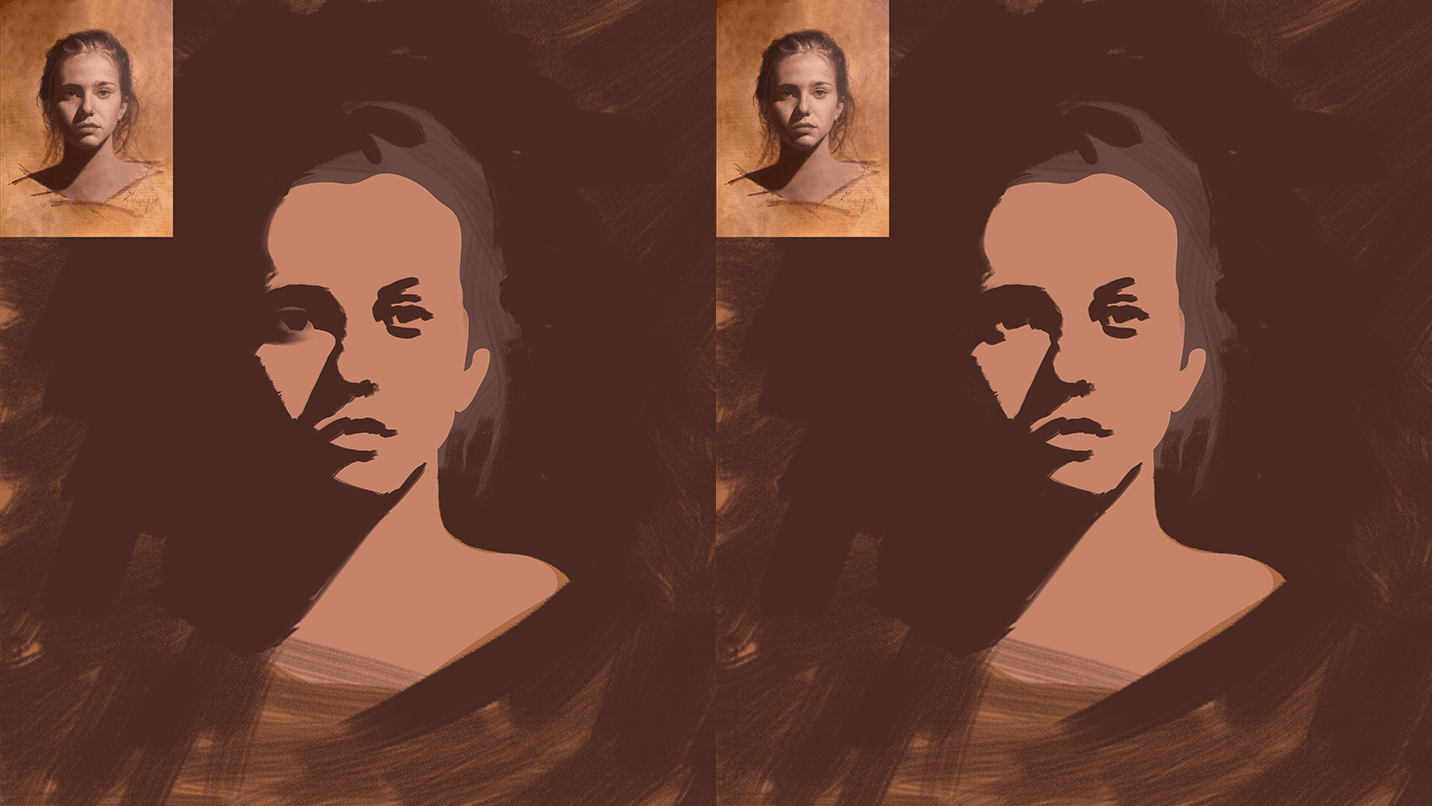
Once you've established the volume and form of the face, the details will come more easily.
People think the details are the hard part of mastering portrait painting skills. The truth is, the structure is the hard part. Getting the volume and form into the face is what’s the most challenging. (Click HERE to take Evolve's FREE class on "How to Create Depth and Volume in Your Art")
If I’m working on the eye, I’ll start where the shadow is. The eye fits in the shadow of the eye socket. I’ll see that the eye takes up a third of the height of the eye socket. That's not too hard to figure out if you take the time to look at it.
I see that it's half the width of the eye socket or that the eye is a percentage to the left or right. Maybe it's closer to the inside or it's closer to the outside or it's lower or higher in the height of the shadow.
Start by breaking down that shadow shape into the placement of the eye. Keep it simple. Don't try to render a perfect eye. Just try to get the shape. Add a little bit of white on the eye on each side, and that's it. That's enough.
In time, as you incrementally build up those base portrait painting skills, you’ll be able to do them without breaking a sweat. Once you can recognize the subject without having any details, throwing details in on top of it is easy.
Begin in Grayscale
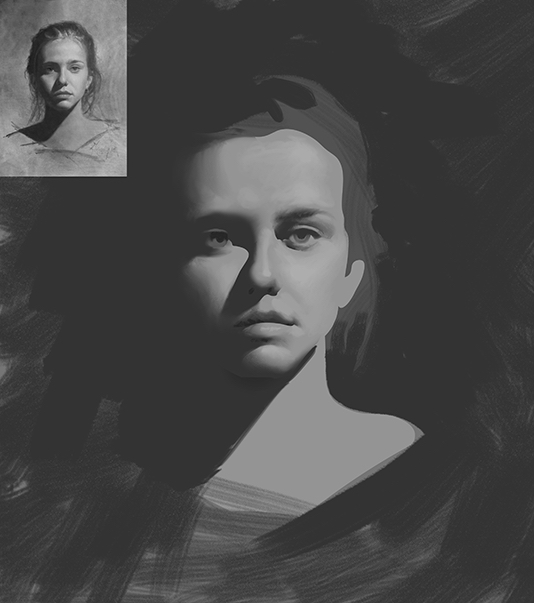
As you're learning, start in grayscale to keep things simple.
I recommend to students who are starting out to work in grayscale using one shadow shade and one light shade. It eliminates the nightmare of trying to match flesh tones.
Advance from Grayscale to Monochrome
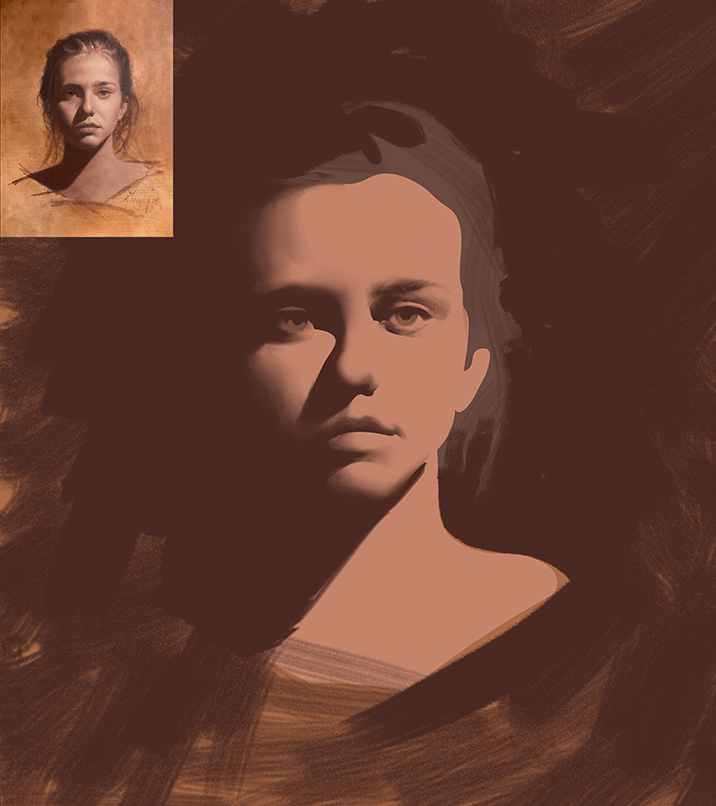
Once you've mastered grayscale, advance to monochrome to get practice with mixing colors while keeping the process simple.
Once you can fly through grayscale portraits, advance to monochrome by creating a single color for a light and a single color for a shadow. It's exactly the same, except instead of being gray, it's going to be a color. Even if the color is green, it doesn't really matter.
After you’ve mixed your two colours, follow the same steps as you would with grayscale. First block in the shape of the contour of the shadow. Then pull away from it and block in the light. Finally, turn the form with gradients.
Again, simplicity is the key if you want to improve your portrait painting skills quickly. Don't try to make a finished portrait. Develop the first stage and get good at it so that you've got confidence. Do this simple exercise like I just described. It’ll be a mess for the first couple of weeks but it’s going to get better and better and eventually you'll be able to get a recognizable head consistently.
Add Definition and Highlights
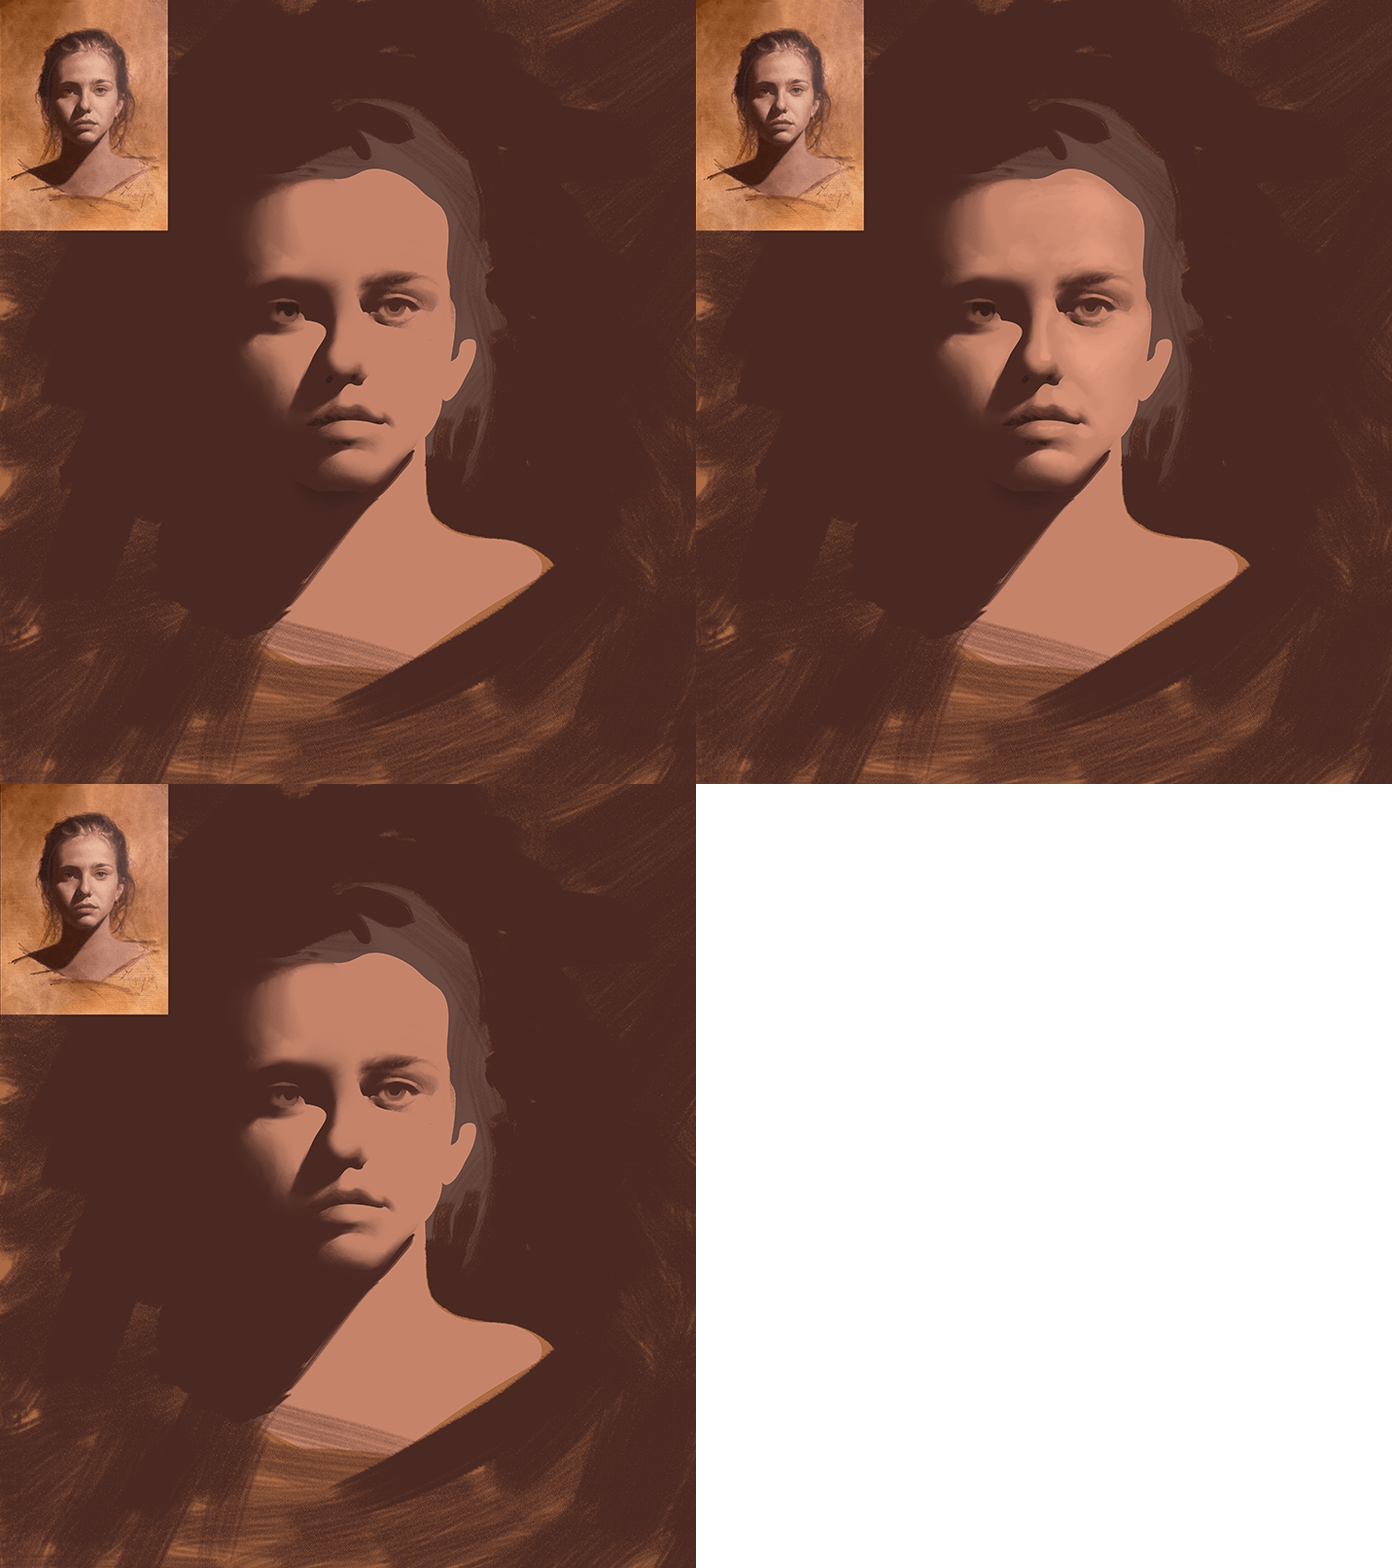
After you've got the structure of the head using shadows, lights, and gradients, you can add dimension in the shadows as well as highlights. This will bring three-dimensionality to your painting.
After you've got the shadows, the lights, and the gradients, you can add a little dimension in the shadows, such as a slightly darker notation for the eye or nostril, or you can define the mouth a little bit. Reminder: don't render details! Use big brushes to do this. Adding dimension to the shadows will improve the quality.
Then you can put a highlight on the light side of things. A highlight is going to dramatically change the three-dimensional nature of the painting. Using one value, add a highlight on the forehead, cheek, or nose. Stop there and repeat up to this step until you’ve nailed it down. Then you can move on to the next step.
Is it Better to Practice on the Same Face?
As you’re learning, you can use the same face over and over until you figure it out. You can even do it from a photograph. Photographs don’t move like a live sitter does. But don't trace it. Put it up on the wall two feet away.
This is helpful while you're practicing and figuring out the technique and building on your portrait painting skills. You don’t have to have a large photograph. You can even shoot a photo of yourself on your phone and use that. Just do it over and over until you figure it out.
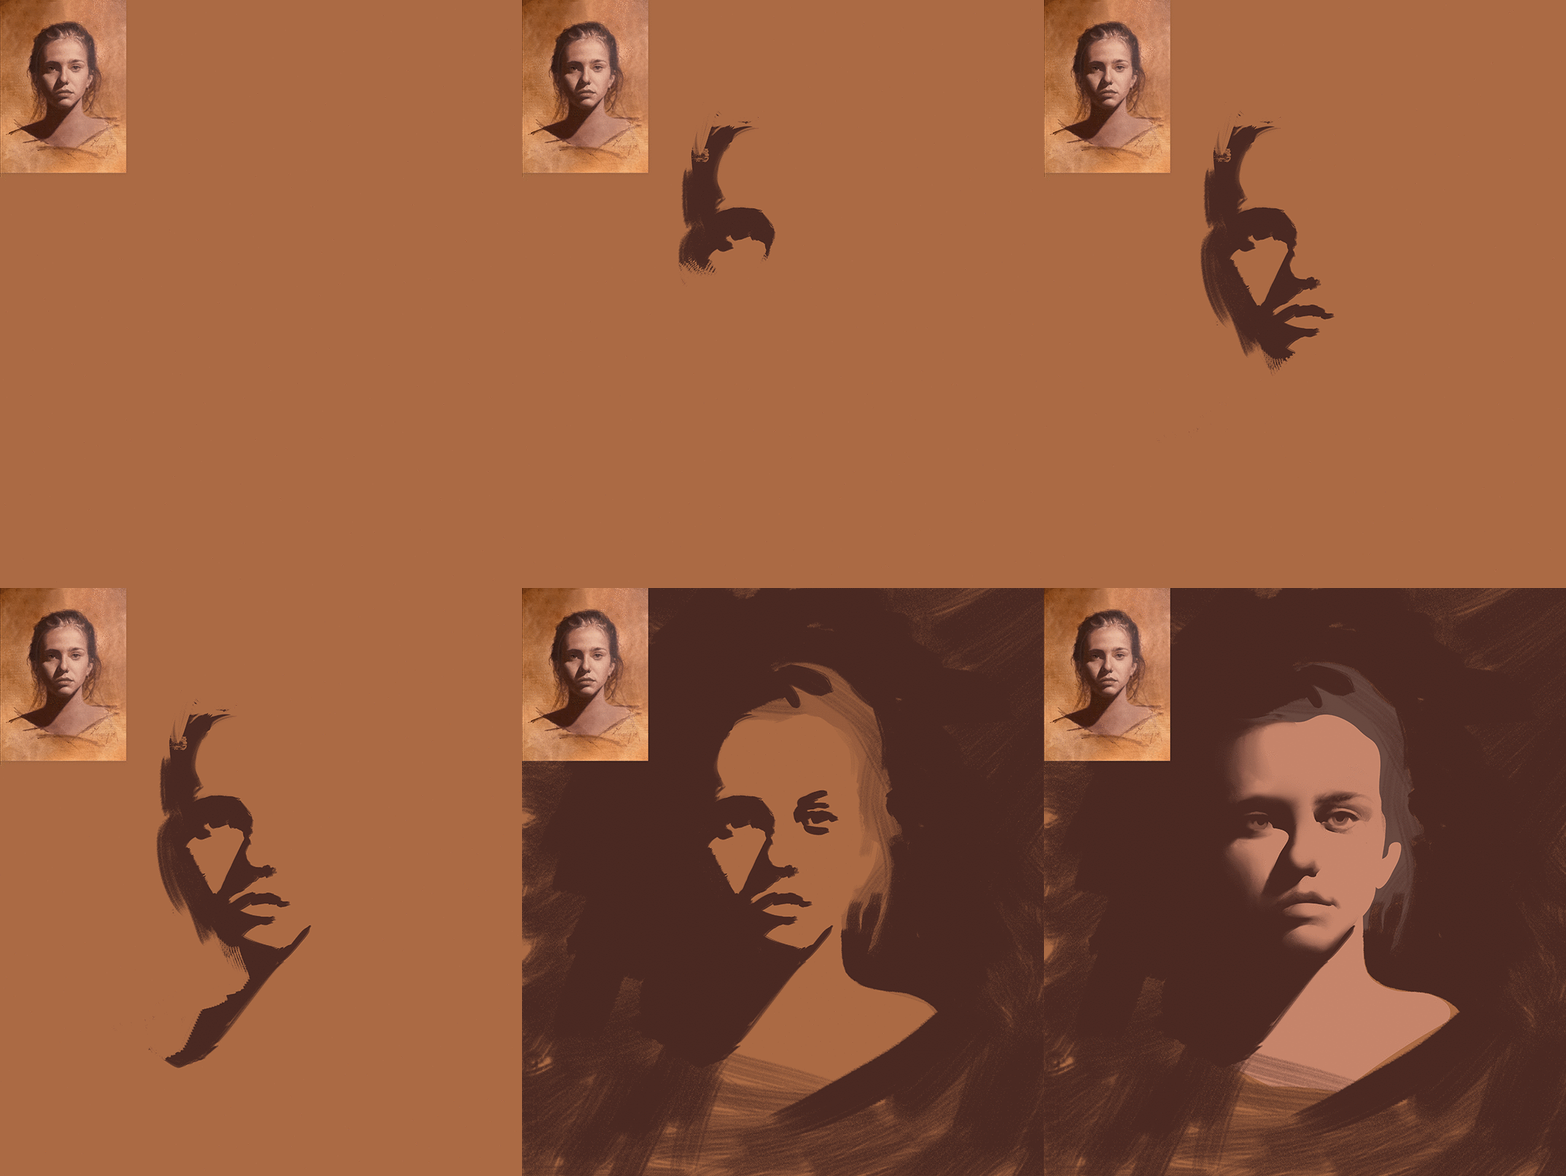
The quickest way to improve your portrait painting skills is to follow a step-by-step process and practice, practice, practice!
Once you've got one face down, then you can move to another. Again, practice the overall structure and don’t try to finish the portrait.
Practicing From Life vs. Photographs
I recommend starting from a photograph but be careful not to stick with the photographs too long. You want to bounce back and forth so you’re not caught off guard if you go from doing nothing but photographs for a long time and then trying to do it from life.
Painting from life from time to time will give you practice with viewing three-dimensional subject matter and having to translate it down to two dimensions for the painting. Because a photograph has already been translated to two dimensions, it will be easier to see the contours between the shadows and the lights.
Summary Steps to Improve Your Portrait Painting Skills
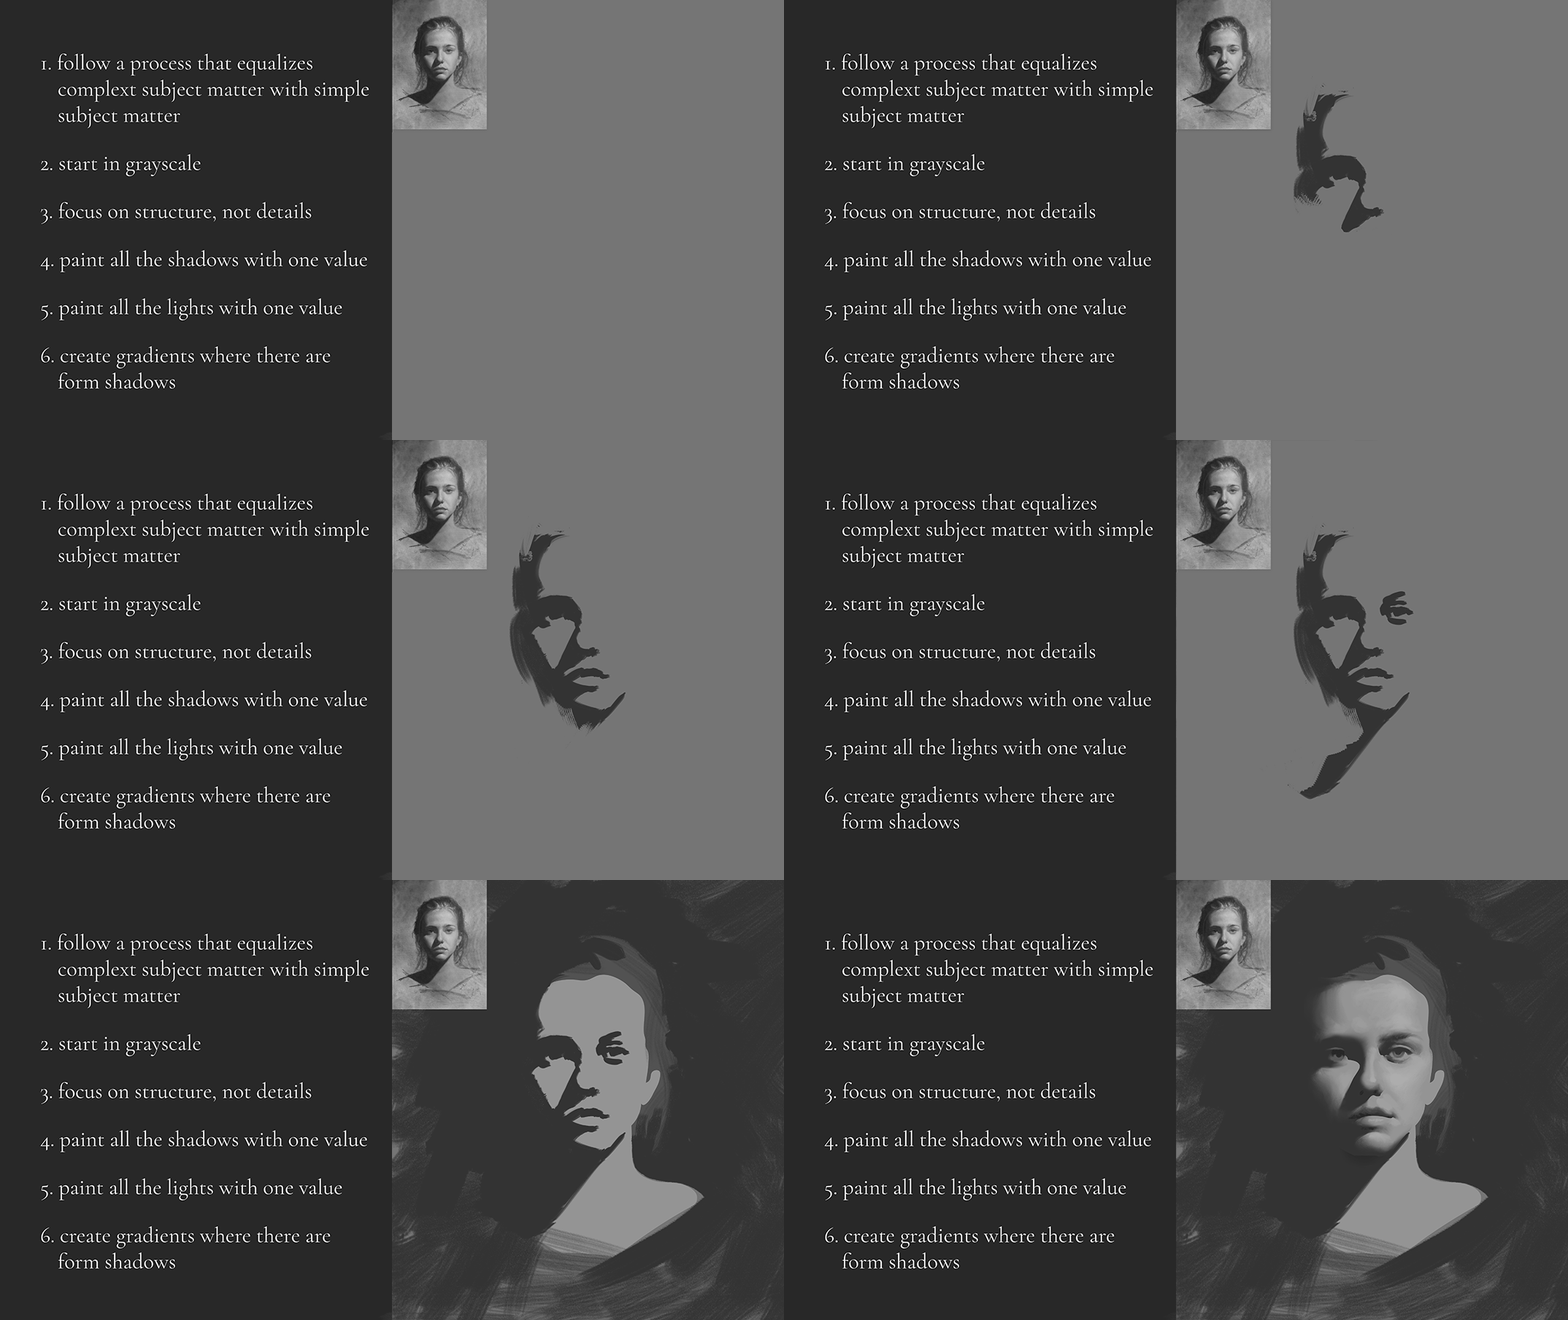
Follow these simple steps to quickly improve your portrait painting skills.
Learn How to Simplify What You See
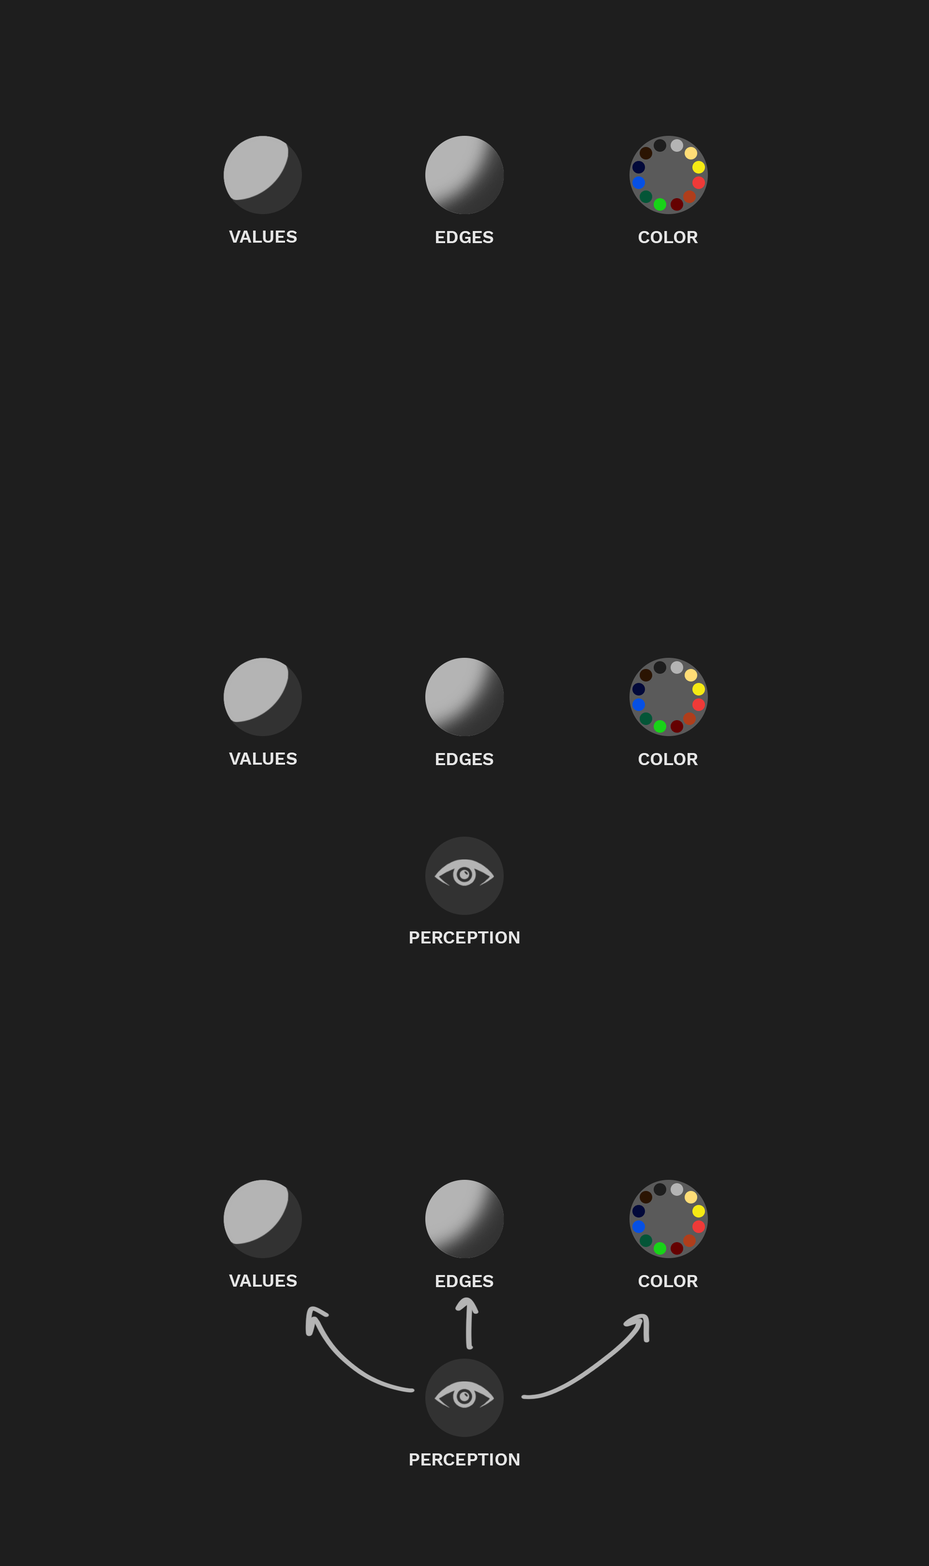
Perception is the key to improve your portrait painting skills. At Evolve Artist, we teach students how to filter the information you get from what you see.
Learning to observe is the key to improve your portrait painting skills quickly. You can't paint what you can't see. That requires an education on how to filter the information you get from what you see. That's what we do at Evolve Artist. (Read more about How to See Like an Artist).
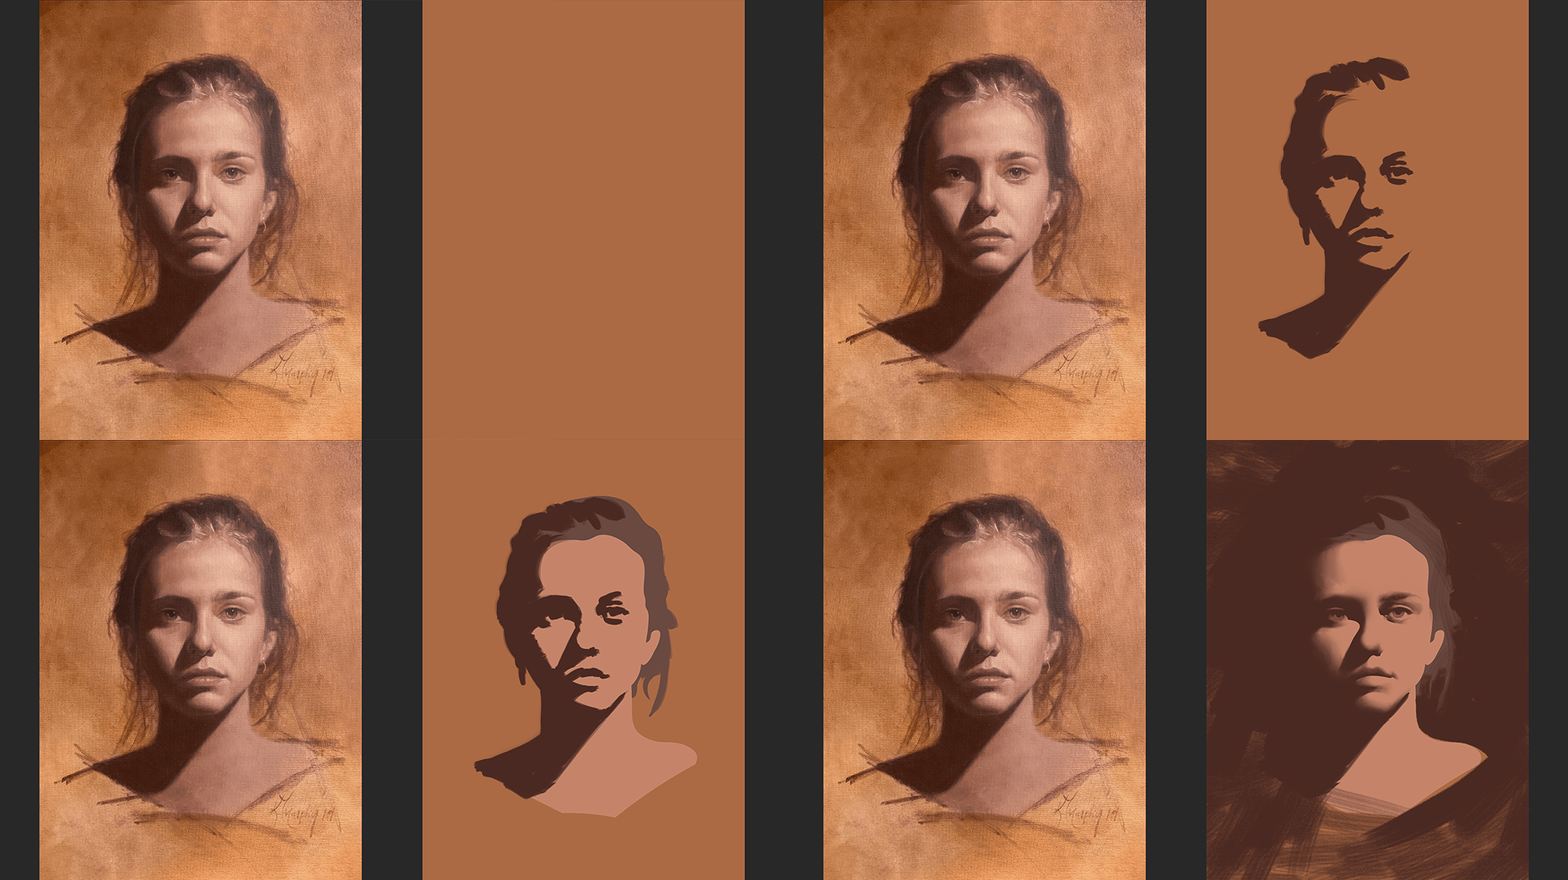
At Evolve Artist, we simply the steps into four fundamentals: Values, Edges, Color, and Perception.
At Evolve Artist, we teach you how to filter visual information to simplify it and to break down the complexity through a process so that each part of the process addresses different aspects of the complexity of the image. That way you're not tackling all of it at one time.
I always equate it with juggling. If you’re learning to juggle, you’re going to start with one ball. Three balls requires real skill. Even if you know what you're doing, there's a chance you're going to miss and drop something. A good process, a good program for painting will only let you “juggle” one ball at a time. Once you finish with that one, you can then pick up the next one.
It’s important to not squeeze all of the information into one stage, but, rather, to break it up into stages that build one on top of another so that you're not drowning in so much information. As you become more experienced, you can juggle more than one ball at a time. When you're first learning, simplicity is key--simplicity in how you think and how you filter all that visual information. That's why I say start in grayscale. If you can't do it in grayscale, you can't do it in color.
I firmly believe that all education in art should start in grayscale because it eliminates what I would assert is the most complex aspect of painting, which is color mixing. I've been at this for 30 years, and I'm still just scratching the surface of it.
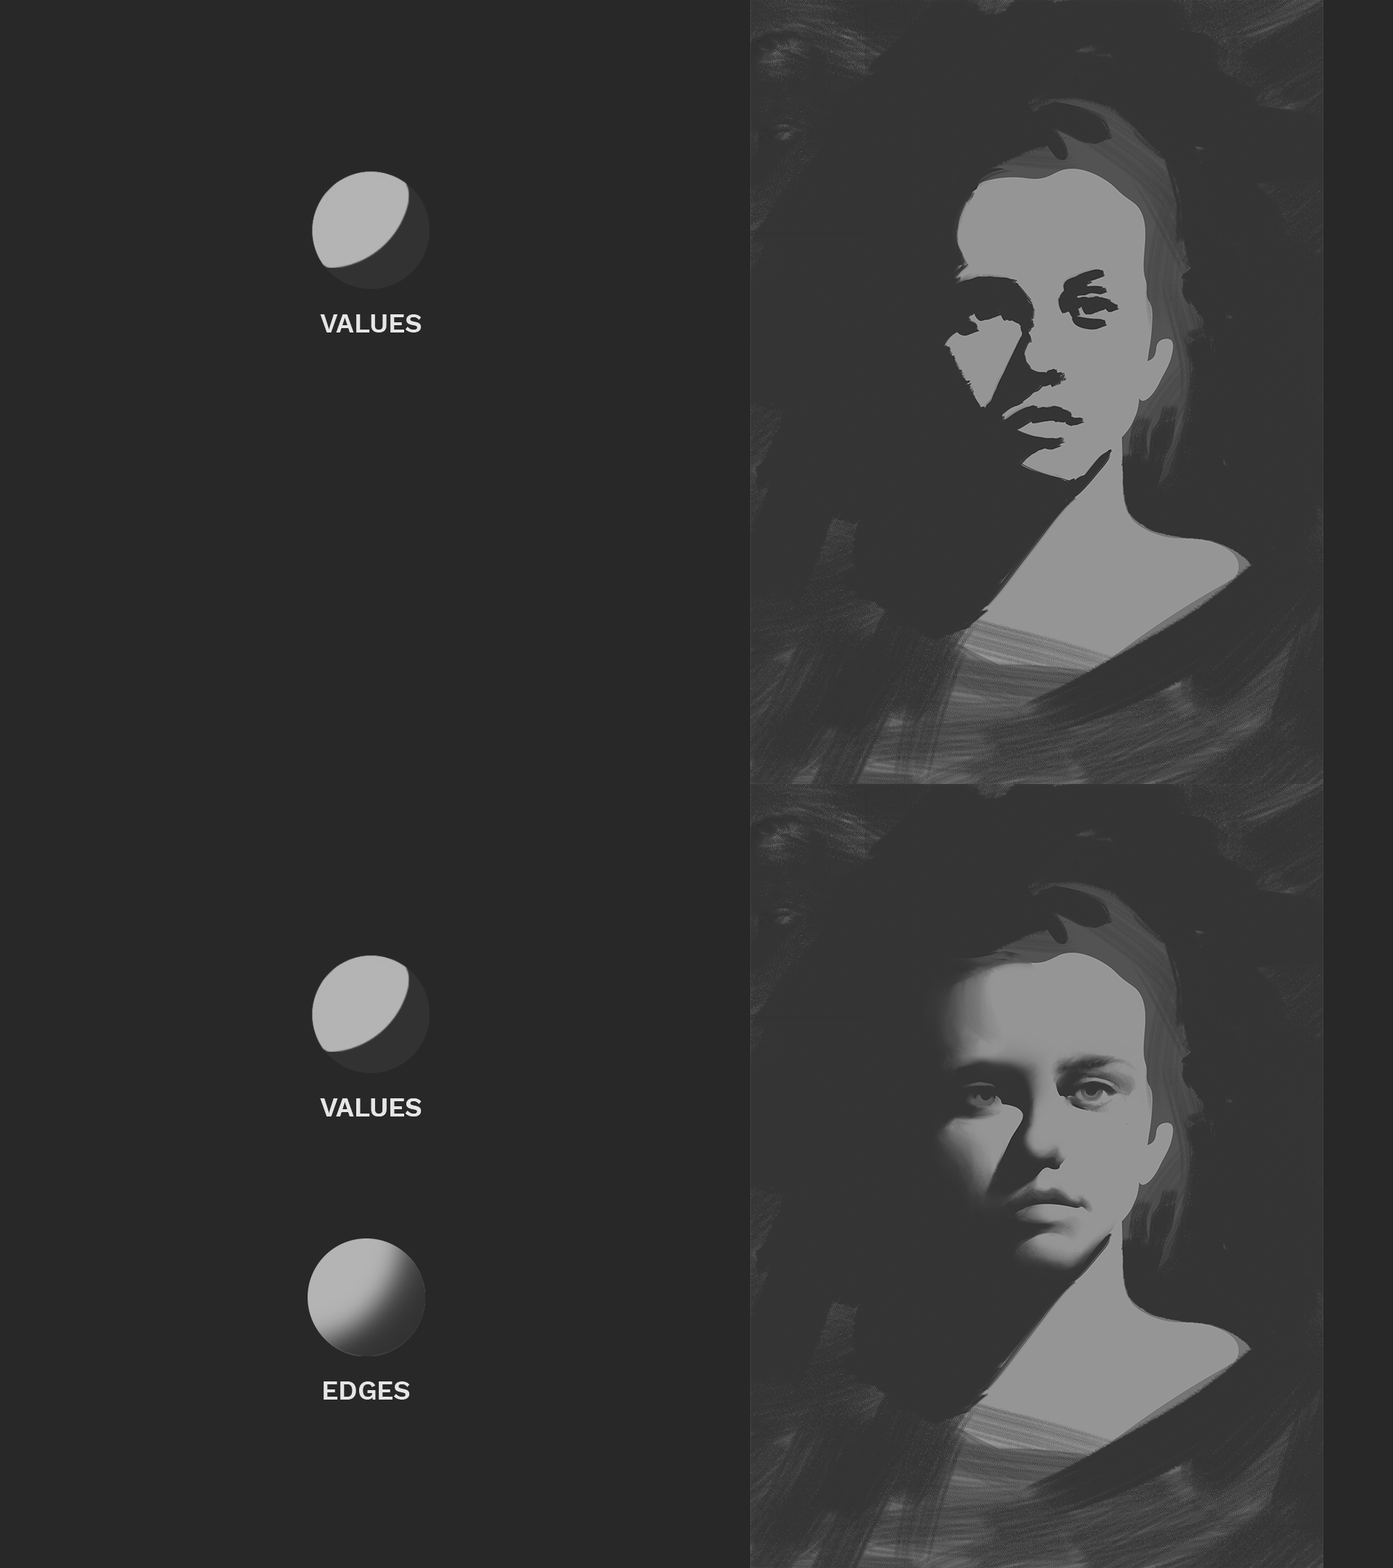
Starting in grayscale helps you to focus on the values and edges, two of the fundamentals of art.
Grayscale, however, is very straightforward. It allows you to concentrate on two very simple things: values, which you establish right at the beginning, and the edges that connect them. (Read more about VALUES and EDGES.)
Final Thoughts on How to Improve Your Portrait Painting Skills
There's your master's guide on the quickest way to improve your portrait painting skills. This is the fifth post from our Master's Guide to Painting Better Portraits series.
To learn more about what you need in order to improve your skills, check out our FREE course on the 3 Things you need to get to pro-level art skills.
Read the previous posts in the series:
Master's Guide #1: Where to Start a Portrait
Master's Guide #2: Simplicity in Portrait Painting
Master's Guide #3: How to Build Confidence in Portrait Painting
Master's Guide #4: How to Capture the Likeness of a Face
Master's Guide #6: How to Price Portrait Paintings
Master's Guide #7: How to Get Portrait Commissions
Master's Guide #8: Are Today's Portraitists Better Than the Old Masters?
If you found this post insightful and you want to get more content like this, then check us out on YouTube and follow us on Instagram. Subscribe to stay posted!
Happy painting!
