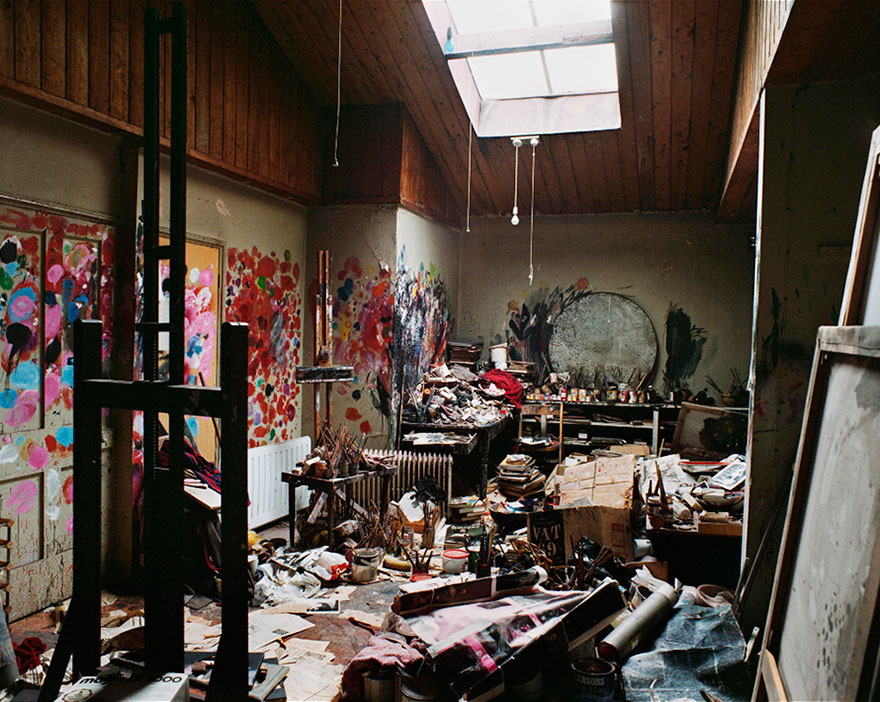
Francis Bacon's (1902-1992) famously chaotic studio shows there is no one-size-fits-all home art studio. This studio has been painstakingly recreated at the Hugh Lane Gallery in Dublin.
As a professional or aspiring artist, you’ll be spending a lot of time in one place - your art studio. If you’re like most artists, your studio is at home.
How your home art studio is set up depends on a lot of things, like the size of your room, the color of your walls, and your budget. Ideally, it’ll be a space you like to be in too.
The good news is that only a few things are truly non-negotiable. The key is understanding your space and doing what you can with what you’ve got - and we’re here to help.
Our students are learning to paint at home, each with their own studios set up in a way that works for them.
We’ve gathered the tips, tricks, and recommendations to create the ultimate guide on how to set up your home studio.
How much space do I really need?
The answer is - less than you think, depending on what you’re painting.
When Kevin Murphy, Evolve Founder, first started working as an artist, his first studio space was a broom closet.
A small space is OK, if you're working from a photograph, but you’ll need to be at least 3-4 feet away from a still-life box.
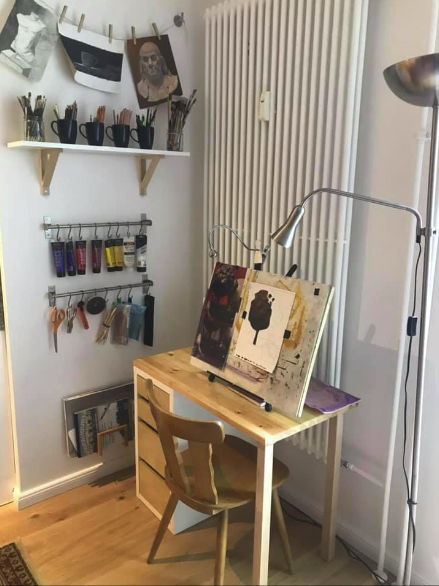
Sheila’s studio has carved out a small space for her home art studio.
Separate space vs shared space
A separate room for your studio might be a luxury. If you are working in a shared space where a door can’t be closed, you’ll need to consider safe storage solutions since you’ll want to clean up your paints, make sure any solvents are safely out of reach, and have a place for artwork to dry (see the Storing paintings and Standing desks and taborets section).
Lighting your home art studio
Lighting is a critical factor for your studio. Usually, the existing lighting in a room is not enough to light a painting.
You need bright and even light to paint under, but not so bright to create glare. This means natural daylight is not enough on its own because it changes throughout the day.
Exactly what you need has to be assessed based on your room and even the color of your walls, but the main goal is to have a lighting environment that is controlled.
Here are the 3 things you need to keep in mind.
1. Light sources
You need to consider two light sources. One for the object you’re painting, and one for the painting itself.
Generally, you want the light source for your painting to be behind and above you, the painter. However, you don’t want this light to interfere with the lighting of the objects you are painting.
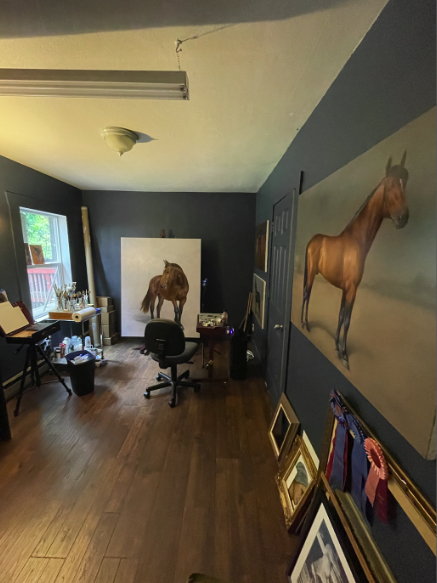
Piper Talladay, Evolve Head Instructor, uses an overhead light that hangs above and behind her to ensure her paintings are well-lit.
To help create a good lighting environment, you can install a hanging light overhead or a standing tripod light.
These don’t have to be expensive - for example, a fluorescent tube hanging housing similar to the one Evolve’s Head Instructor Piper uses costs around $30-40 at the hardware shop.
If you're in a smaller room, it’s important to separate your light sources.
You can hang a drape to protect your object from the light used to light your canvas or use a still-life box to create a perfect lighting environment.
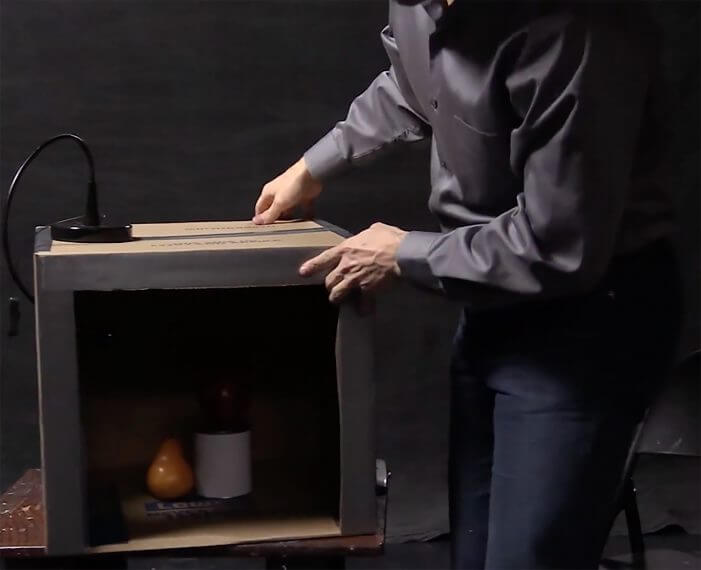
Building a simple still-life box is the best way to create a perfect lighting environment in your home art studio.
Tip
Choose a light source that can be switched off/on easily, otherwise it’s very bright for everyday use. This can be as simple as plugging and unplugging a light.
2. Lightbulbs
We recommend lightbulbs that are at least CRI 90+, and daylight that are approx. 5000 kelvin. Whether it’s LED or fluorescent, both can work depending on your budget.
For students in smaller spaces, we recommend the GE Refresh 60-Watt EQ A19 Daylight Dimmable LED Light Bulb.
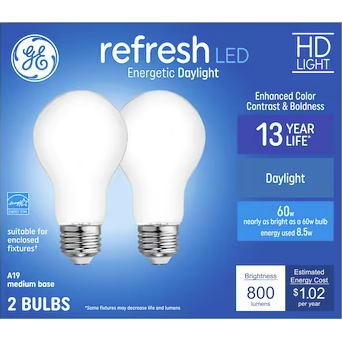
GE Refresh 60-Watt EQ A19 Daylight Dimmable LED Light Bulb is our recommendation for home art studios.
If you are in a larger space, fluorescent tubes might work better for you. Piper and Kevin both use the tubes linked here in their studios.
Something to keep in mind is that while the fluorescent tubes aren’t expensive, the shipping is (approx $80 for two). We find that they tend to last when only used for lighting while painting.
It’s important to consider the size of your space and adjust the brightness of your lighting to suit.
For example, the light housing that Piper has in her studio can hold two fluorescent tubes, and because her studio is a bit bigger, she uses both. However, if your space is smaller, consider using only one, otherwise, it would be too bright and this can result in glare.
3. Wall color
Wall color does have an impact on your lighting. But this doesn’t mean your studio walls have to be a boring color.
The key is for the wall color to be neutral (not too cool, and not too warm) so that when light bounces off of it, it doesn’t produce glare which impacts your view of your painting.![ArtAcademy-School-scaled As long as you choose a neutral shade, your wall color at your home studio doesn’t need to be light grey [The Art Academy, New Jersey].](https://evolveartist.com/blog/wp-content/uploads/2023/07/ArtAcademy-School-scaled-1.jpeg)
As long as you choose a neutral shade, the wall color at your home studio doesn’t need to be light grey (The Art Academy, New Jersey).
Dark colors can work well. The Art Academy Studio (the studio where the Evolve method was developed) is painted neutral navy blue in a satin finish (Night View available at Lowes). If you would like a darker color, but not a navy blue, you can ask the paint store to match the value of Night View or ask for a neutral dark color.
If you choose a light color - like a neutral grey, it can make the room brighter. You’ll need to adjust the lighting in your room to reduce the brightness. However, a lighter color can work well for a smaller room.
Choosing an easel for your home art studio
You spend a lot of time in front of your easel. You’ll want to choose one that fits your space and has the features you need to paint comfortably.
A standing easel (if you have the space and budget)
A standing easel is an excellent investment if you have the money and space. While traditional A-frame easels are perfectly fine, they will not support a really larger canvas, and painting smaller canvases could be hard on your back.
If you have the space for a standing easel, we recommend an H-frame easel. An H frame means the tray can go up and down, depending on the size of your canvas. Our picks are:
- The Weber Avanti 2 Steel Studio easel. This is the standing easel used at the Art Academy. It's made of metal so it is heavy and not as portable. But it is strong and extremely durable.
- The SD STUDIO DESIGNS Deluxe Easel - which is a more affordable alternative to the Weber Avanti 2.
- The Soho H Frame easel. This is an Evolve student favorite. It’s sturdy, with an extremely adjustable tray. Plus with a wood finish, it looks great.
Tip
Consider comfort when buying a standing easel. Is there a ledge to rest your elbow on when working on a large painting? Is it adjustable enough so you can work on both small and large paintings?
![Standing H-frame easels have an adjustable tray, making them a versatile and worthwhile investment [Soho H Frame easel]](https://www.jerrysartarama.com/media/catalog/product/cache/1ed84fc5c90a0b69e5179e47db6d0739/s/o/soho-h-frame-studio-easel-mahagony-main-1.jpg)
Standing H-frame easels have an adjustable tray, making them a versatile and worthwhile investment (The Soho H Frame easel)
Desk and portable easels (for a smaller space)
If you don’t have the room for a standing easel, or it’s not in budget, here are our easel picks:
- Portable desk easels like the Soho Aluminium Table Easel or the Martin Universal Design Angelina Table-Top Metal Easel are lightweight, easy to use, and durable. They can scootch back. So if you’re working with a heavier painting, you’ll need to anchor the easel with a heavy object, like a heavy book. You’re also limited to smaller paintings.
- Box easels like the Blick Studio Sketchbox Table Easel have the portability and size benefits of a desk easel, with the benefit of taking a bigger painting and some inbuilt storage. You’ll need to put it right on the edge of the table for a bigger painting.
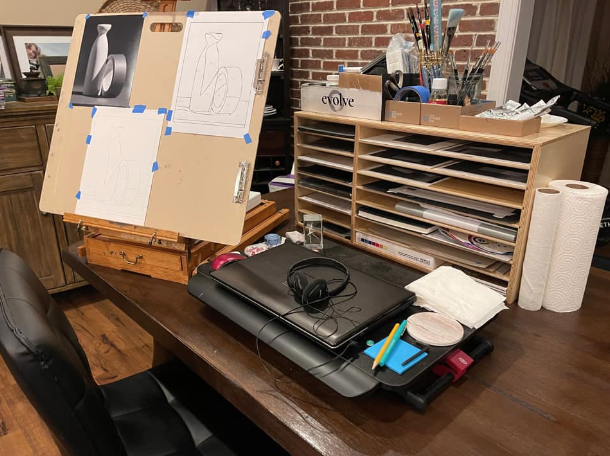
Evolve Student, Leslie uses a box easel in her home studio to save on space.
Wall easels (if you have the budget and wall space)
A wall easel is a great choice if you want to save on space, but have a bigger budget.
Some wall easel designs will allow you to work on multiple pieces at the same using customizable ledges. This means you won’t need to switch out canvases or get another easel.
If you have a small space, this is a good option too because it requires zero floor space. The downside is that it can be a bit harder to get closer to the painting.
Wall easels can also be pricey, ranging from a couple of hundreds of dollars to thousands depending on size.
The Rue is a popular option. There are tons of different plans online that you can choose from to suit your unique space. So if you have the skills or know someone who does (time to call in a favor!), you can build your own.
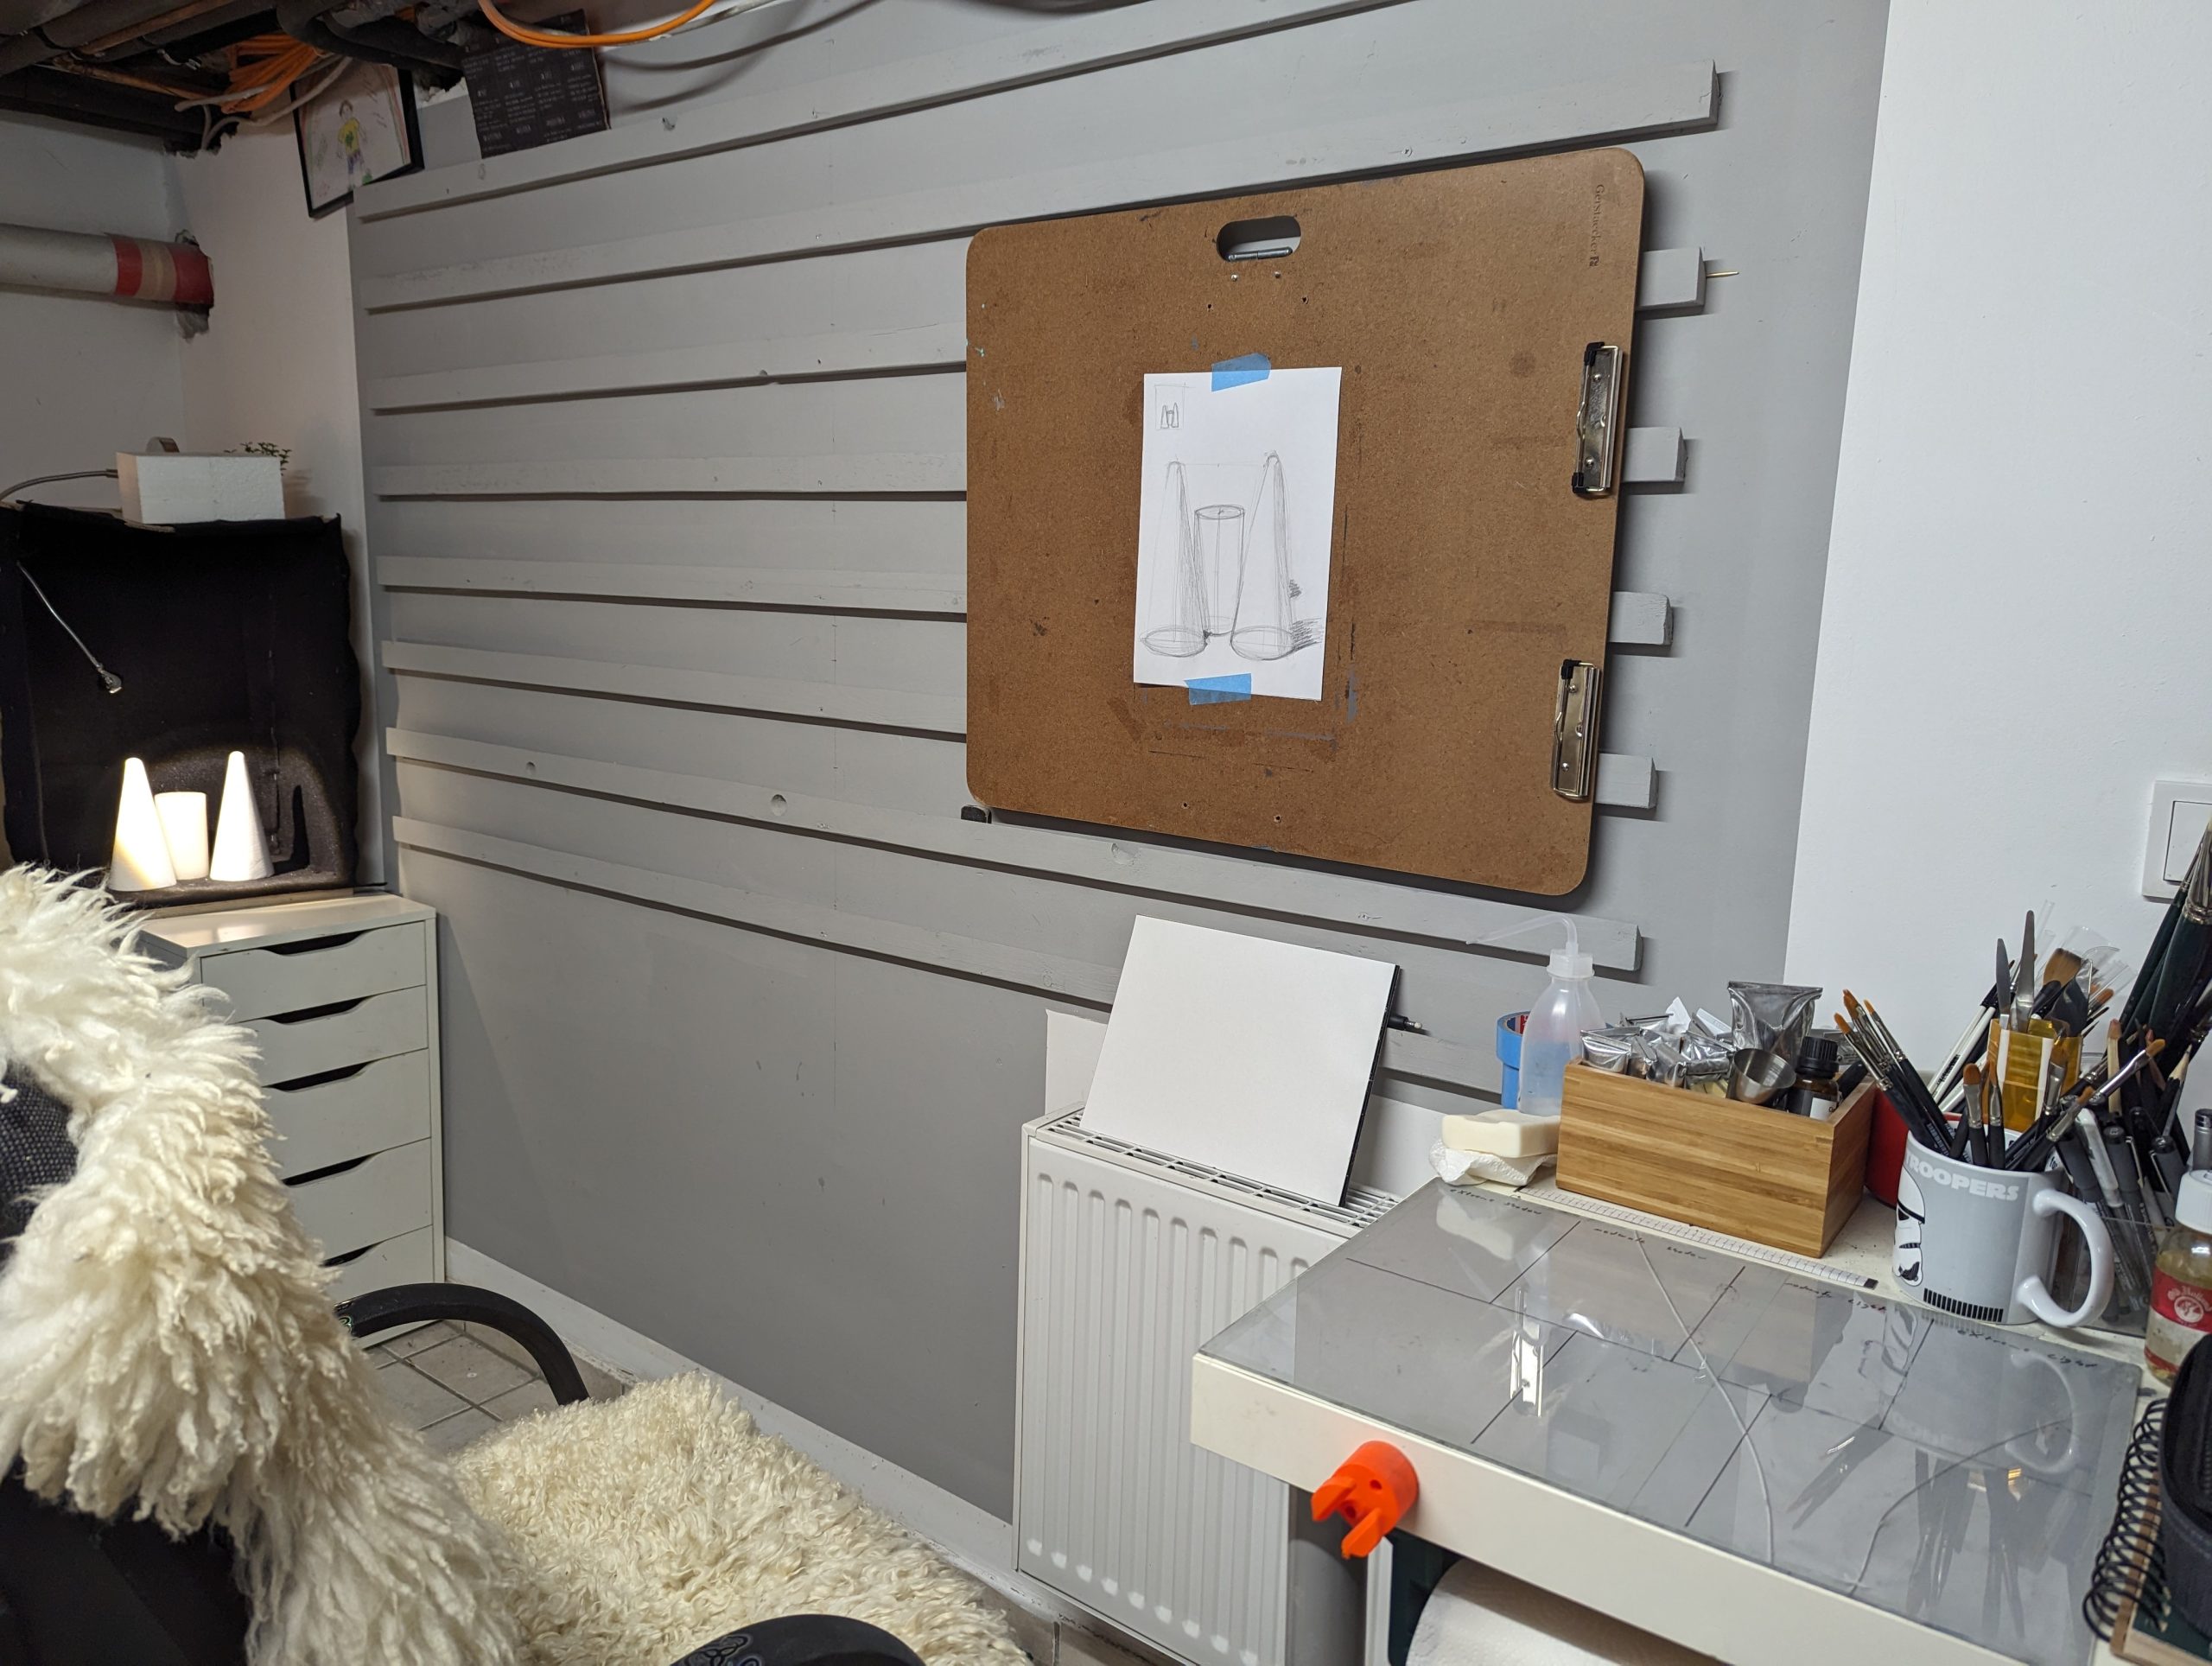
Evolve student Alexander made his own wall easel using plans he found online.
Storing paintings
If you’re putting hours of work into your paintings, you don’t want to be undone by storage that’s not fit for purpose.
Leaning your paintings on the floor against a wall is not ideal because if it’s still wet, dust or hair can get on your painting.
Having a plan/space for your pieces is an essential part of your studio.
If you have lots of space, some home art studios have storage closets with built-in racks. These are great for storing really large paintings. But the design can be scaled down for smaller paintings and smaller spaces.
For stretched canvas:
- If you have the space and it’s a commission/client work or a work-in-progress, you should ideally hang stretched canvas securely on a stud, or on an easel.
- You can lean stretched canvas on a slight angle on a rack, or against a wall off the ground. Ensure the canvas is leaning on the wooden or metal frame, not on the canvas itself.
- Never store face-to-face with another painting.
- For smaller pieces, you can use a dish rack to help store paintings (see picture below).
- Don't lean stretched canvas against the canvas side from the front or back. This will dent the canvas.
- Don't lay a canvas flat. Over time, it could dip and sag. While this isn’t likely if it’s been stretched properly, it’s better safe than sorry.
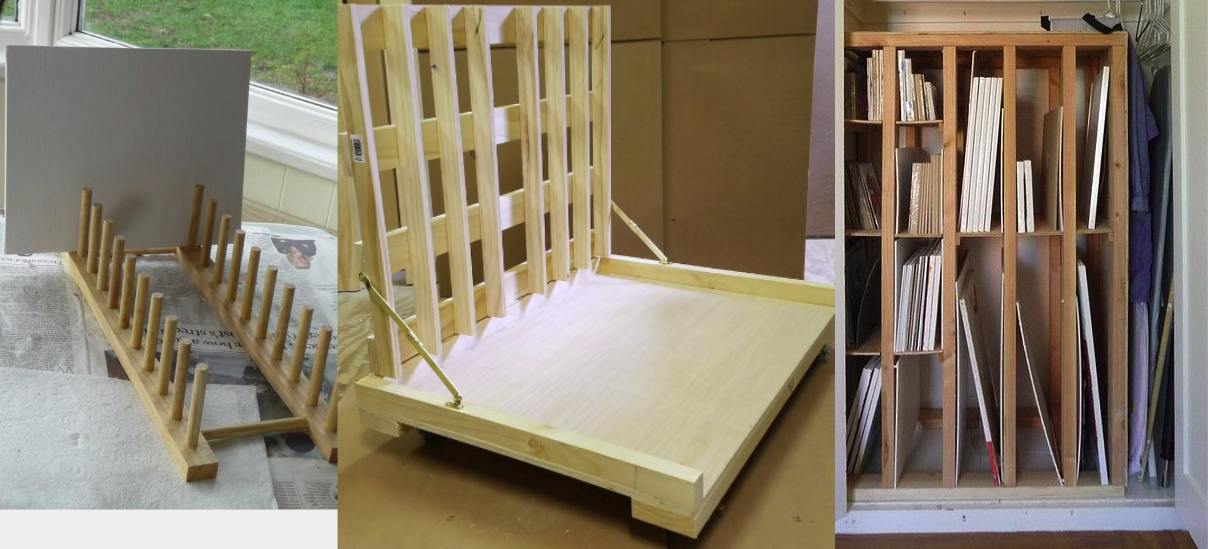
A range of storage solutions for paintings, ranging from large built-in racks to small repurposed dish racks.
For masonite panels or artist boards:
- Store these vertically stacked, leaning slightly back - we’ve seen small dish racks adapted for this.
- They must be dry. Do not stack them face to face.
- Place glassine paper between each panel/board. You can use wax/parchment paper in a pinch.
Loose linen:
- Can be stacked, face up with glassine or parchment paper in between.
- You can also use a binder or portfolio but store them flat if you can. If you are storing binders vertically be sure the pages aren’t sagging.
Is my painting dry?
Be sure a painting is dry before storing it - never assume.
- If the paint is thin - it’ll usually take a week to dry.
- Paintings will take longer to dry if there is more oil or if you’re using the impasto technique.
- Different colors, like white, will also take longer to dry.
- Because there are different variables, always check. Gently touch the painting. If it’s not sticky, it’s dry.
Standing desks and taborets
An adjustable desk that allows you to paint standing and sitting, and angle the palette towards is a real asset in a home art studio. Here are some options:
- A repurposed computer table is a great cost-efficient option. They come in a variety of sizes and qualities ranging in cost from $60 to over $100.
We recommend getting a table with an adjustable table top. The IKEA BJÖRKÅSEN is an affordable option without castors. A laptop table with castors like this one from Amazon is a good option if you have the space to move freely around your space. - A taboret is a beautiful investment. They can come in different sizes - larger like the Todd Reifers Signature Artist Workstation or smaller like Matisse French Painter's Taboret.
They are made specifically with features that work for artists - like space for storing paints and brushes, built-in palettes, and ledges that fold out. They do come at a premium. These are great for big paintings but are less maneuverable if you’re working on a smaller painting.
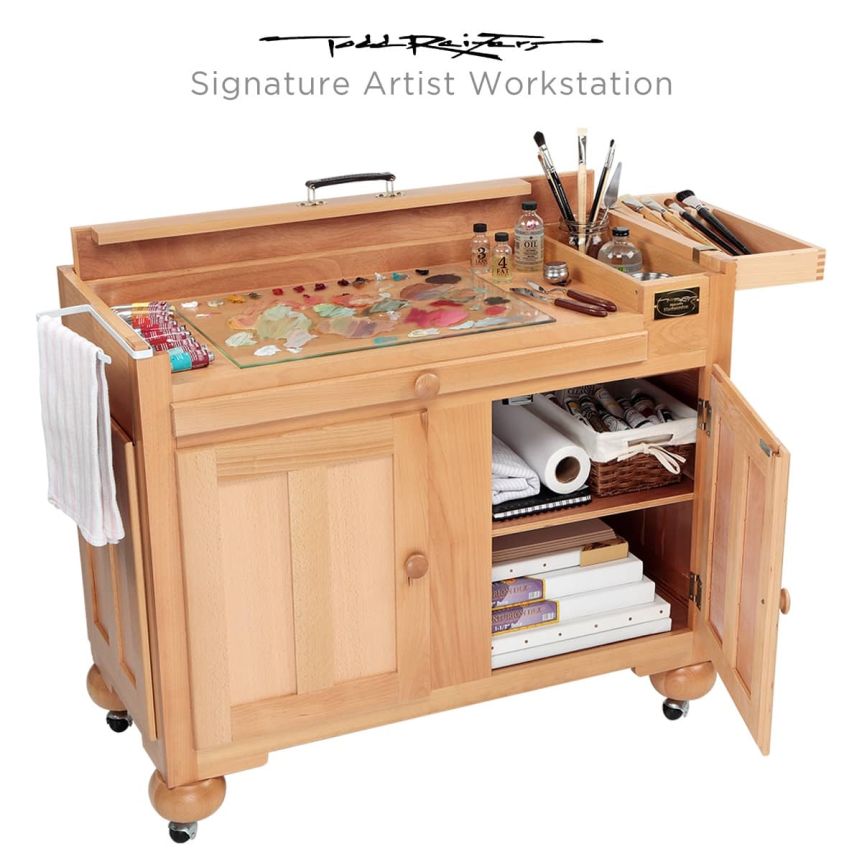
Taborets like the Todd Reifers Signature Artist Workstation are great storage solutions with many features that work for artists.
How to store paint tubes and brushes
An artist's paints and brushes are our everyday tools that we’ve often invested in.
Brushes
For brushes, we do not recommend storing them flat. Your brush bristles can get squished or compressed. This can impact the longevity of the bristles.
We highly recommend storing brushes facing up. There are a few ways you can do this:
- Old glass jars or tins. Brushes don’t require a complicated storage solution, so this is extremely cost-effective. Just aim for ones that are a bit heavier (like a larger tin or a glass jar) so the weight of your brushes doesn’t knock them over.
- Paint brush holders. If you like keeping your brushes separate, you can purchase a paint brush holder.
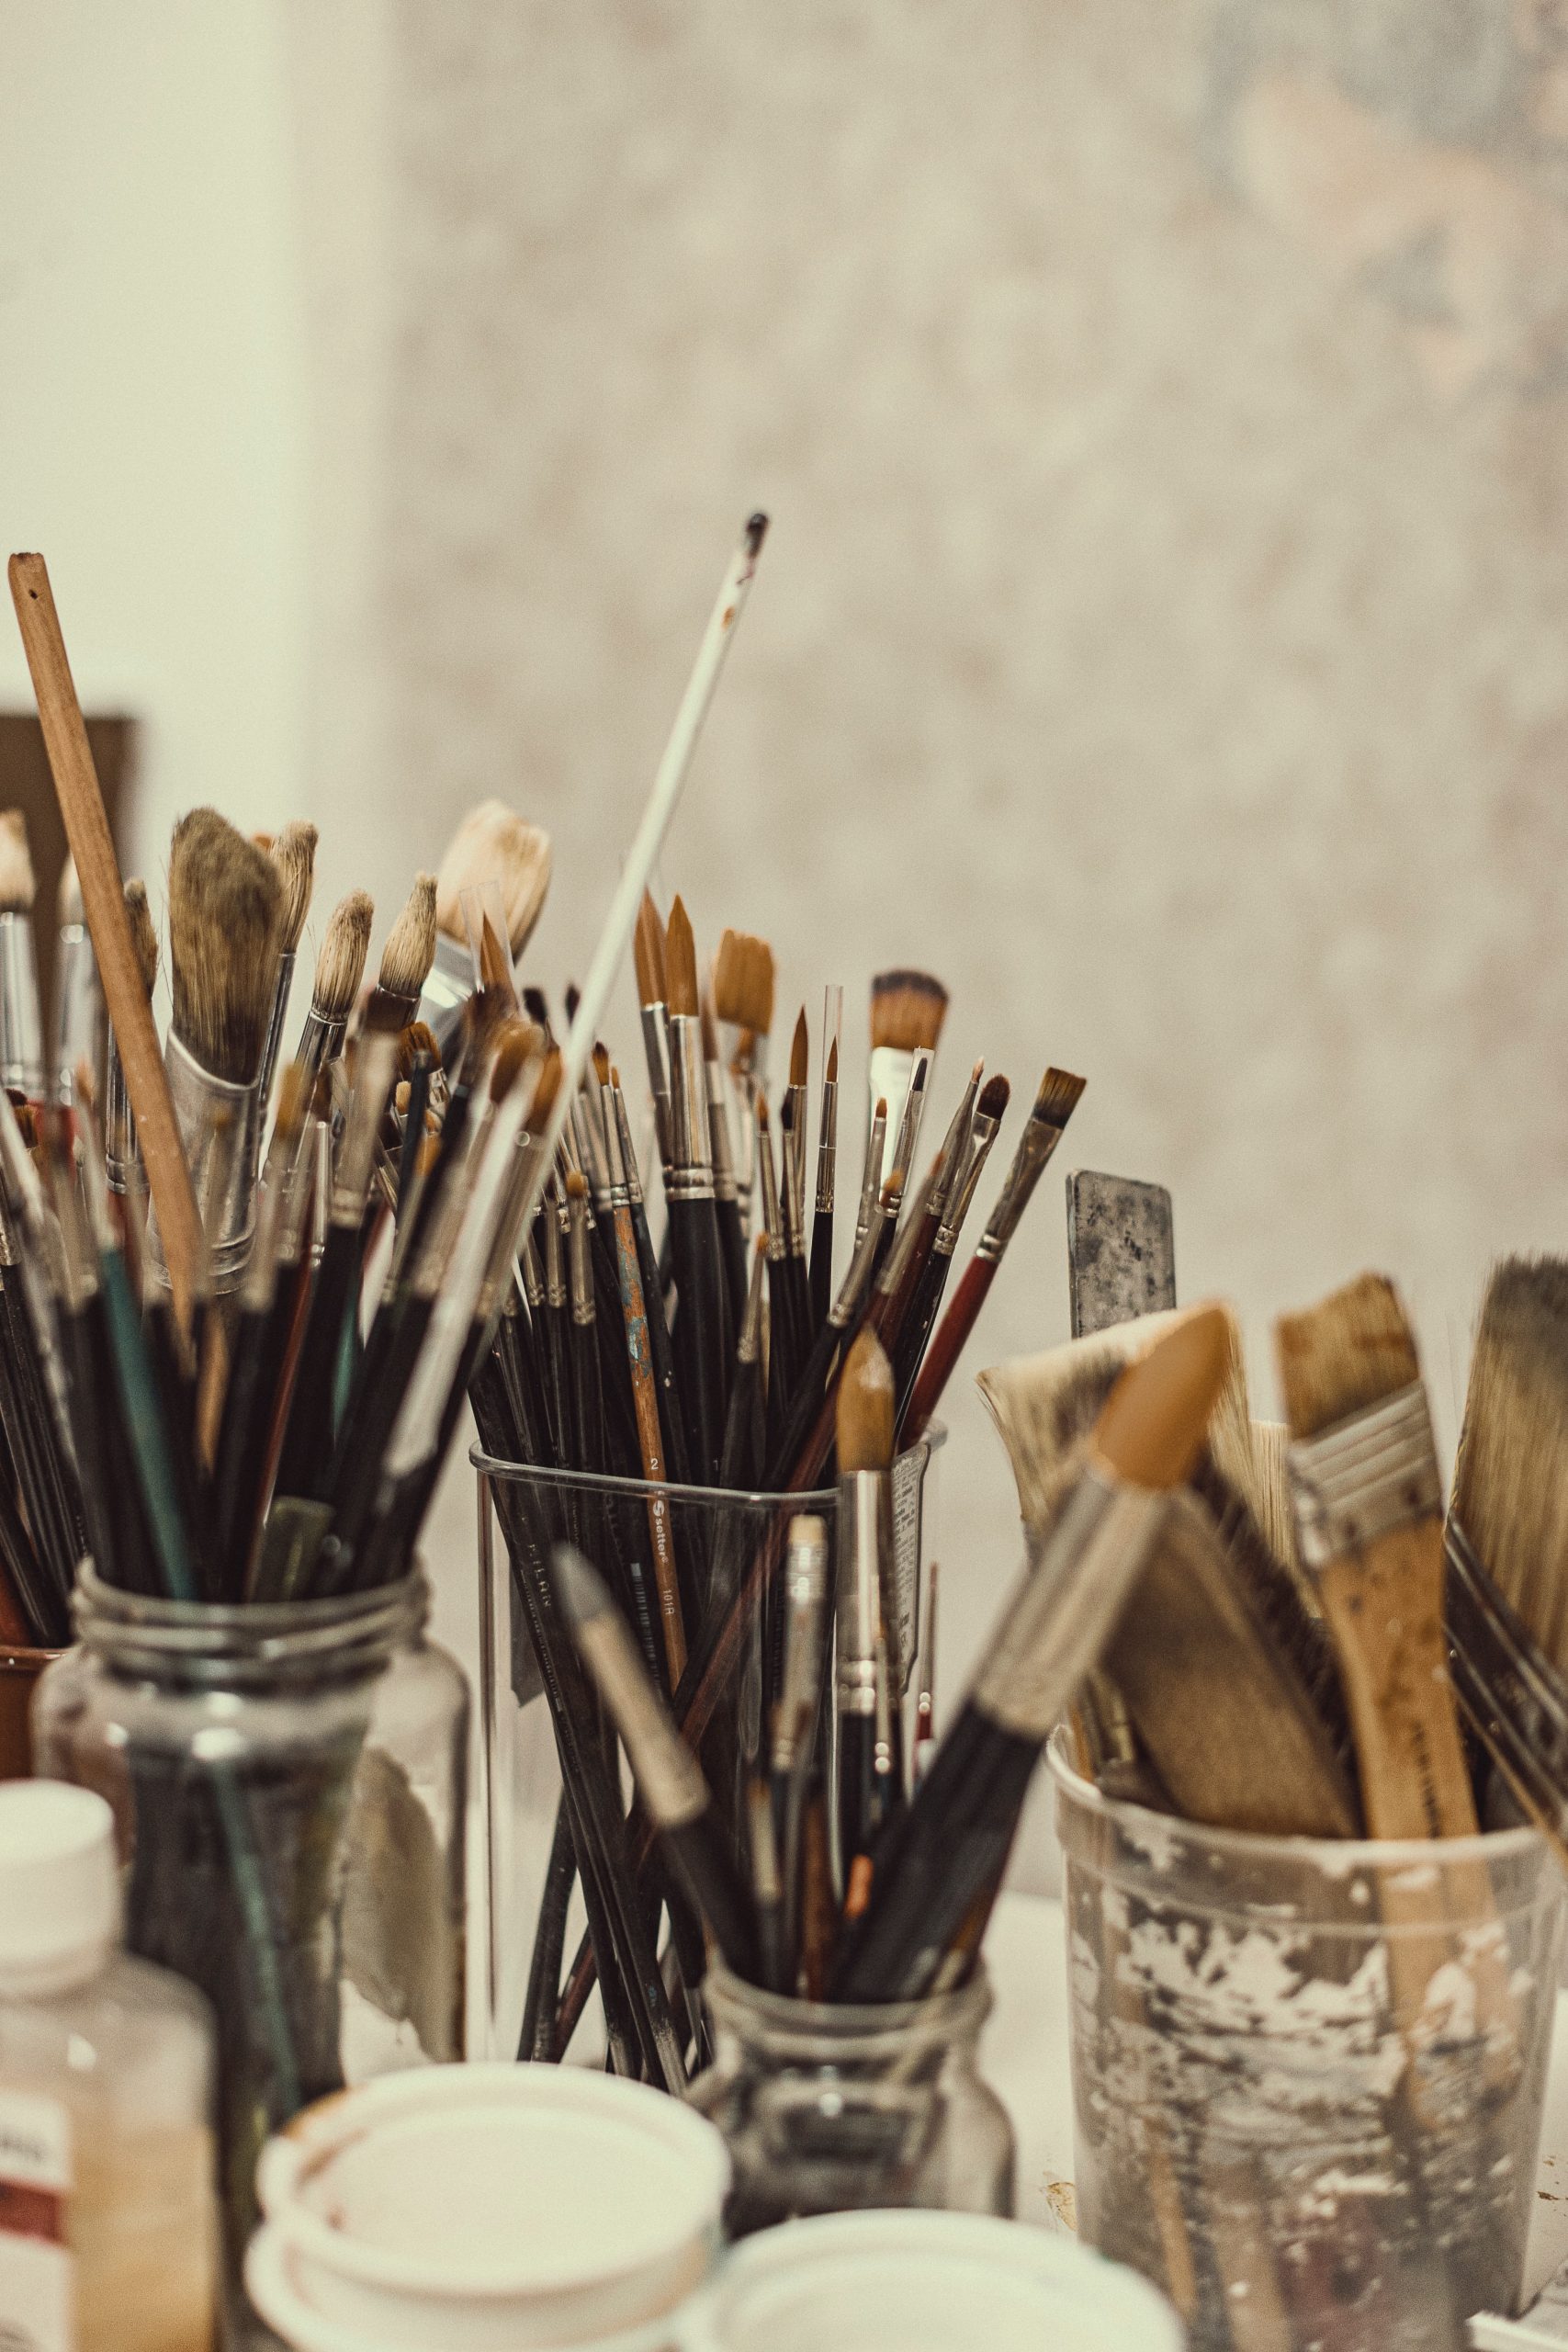
While you can buy paint brush holders, old jars and tins work just as well. Photo by Martin de Arriba on Unsplash
Paint
When it comes to paint, should you store them up or down, flat, angled? Capside up or down?
While the quality of your paint does matter (higher quality paints like Old Holland are not likely to separate), overall you need to be aware of how different storage styles might impact your paint.
- Storing flat is preferred by many artists because you don’t need to worry about squishing oil. You’ll need the drawer/floor space for this method.
- Capside up or down is convenient if you store your paints on a wall to save space. If you store the paint cap side up or down, the oil will rise to the top. So you need to SQUISH the paint tube to incorporate the oil back into the paint before you paint - especially if it’s a color you don’t use very often.
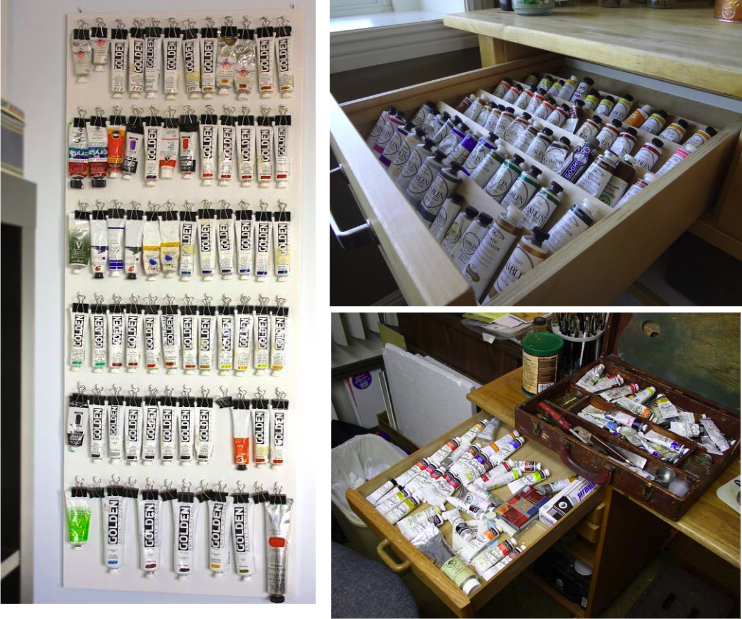
While a lot can be said on how to store paints, no method is make or break. Often it comes down to space. You just need to be aware of what the impact could be on your paint and mitigate it.
Storage
If you’ve invested in a taboret, you’ve already got a place to keep your brushes, paints, and other mediums/solvents.
Otherwise, a simple cart with shelves is just as effective. Something similar to the IKEA NISSAFORS utility cart is cheap and will do the trick.
Handling oils and mediums safely
Your safety is the priority. Everyone has a different level of personal comfort when it comes to the oils and solvents used when painting.
Below we’ve outlined a few things to be aware of, but at the end of the day, your safety is your responsibility. Our number one suggestion is Do. Your. Research. We highly recommend you ensure you’re comfortable with your home art studio setup.
- The majority of oil paints are completely non-toxic - Oil paint is made of natural oil and pigment, and the majority of pigments are safe and non-toxic. A few colors such as the white paint we provide in the Evolve program do contain lead and come with a warning label. However, the amount of lead in the white paint is pretty much on par with what you’d find in tap water. Unless you eat it (which we don’t recommend), the paint can’t cause harm. We talk more about why oil paints are perfectly safe to use in this blog post. Again, if you have any concerns do your research.
- Ensure your studio is well-ventilated when painting and handling solvents. Some people like to store their solvents in a separate room because of the strong odor and vapors.
- Consider an air purifier if you’re concerned about vapors. Some artists find that it helps, and some find it makes no difference, so this is a personal decision. You’ll need to ensure the model you get will have an impact on VOCs. Piper uses the Winix 5500-2 Air Purifier. It’s important to note that while an air purifier could help, a well-ventilated studio is a must.
- Keep a clean working environment. Keep your materials like linseed oil, alkyd, and solvents clean and safely stored. This helps to avoid accidents or spills.
Tip
You don’t need a solvent to clean your brushes. You can use Ivory soap (we have a step-by-step guide here).
Disposing of rags properly
To dispose of rags properly, all you need is a metal trash can with a lid. Once linseed oil/alkyd dries completely on a paper towel it is not combustible.
However, if you are dousing your painting in oil with a cloth/rag, you need to be more cautious.
If you throw a wet oily cloth into the trash, under certain conditions (like a really hot day) - it can combust. This is extremely rare, but precautions should always be taken.
Dispose of cloths and paper towels loosely in a metal trash can with a lid. They will dry in the trash can if loosely placed.
Never compress doused oily wet rags on top of more wet rags, they will not dry in these conditions.
![oil-painting-mediums-1 Mediums like linseed oil are used to impact the drying time of oil paint. They should be stored and disposed of properly in any home studio [Cups of linseed oil at the Hillsborough Art Academy].](https://evolveartist.com/blog/wp-content/uploads/2019/03/oil-painting-mediums-1.jpg)
Mediums like linseed oil are used to impact the drying time of oil paint. They should be stored and disposed of properly in any home studio [Cups of linseed oil at the Hillsborough Art Academy].
Other nice to haves:
- A gel mat to support your feet when you’re painting while standing. While standing is easier on your back, some people use shoes or have a gel mat to support their feet.
- A tripod stand is useful for holding an iPad if the reference you are painting from is digital. Otherwise, a photograph can be taped directly to a dry portion of your painting with blue painter's tape.
Tip
Remember that your studio will evolve with you as you grow as an artist. If you aren’t sure about something, see if you can test it out before investing big.
There’s no such thing as a perfect studio.
Bringing It All Together
Our students are learning at home in a variety of spaces, so there is no one-size-fits-all home art studio. While only a few things are non-negotiable (like an easel), a few well-placed tools and studio solutions can make your life easier.
If you’re painting at home and looking to upgrade your skills, maybe Evolve is for you. Evolve’s proven system helps beginners and advanced artists reach artistic mastery. Our curriculum breaks down art creation into easily digested parts, so you’re confident in your skills before each new technique is added. Our FREE Masterclass is a great introduction to what Evolve is all about.
Happy Painting!
